

Fundamentals of Computer
How To Start and Shut Down a Computer System.
Start a computer system.
- Press the computer’s Power button.
If the monitor is not turned on, press the Power button on the monitor. - When the computer has finished booting, it will show a dialogue box that will ask for a username and password.
- Enter your username and password, then click “→ ” (the submit button) or press the Enter key on keyboard.
Shut down a computer system.
- Click the Start icon (at the bottom left corner).
- Click the Power icon on the main menu.
- Click Shut down.
OR
- Right-click the Start icon.
- Click or hover over Shut down.
- Click Shut down.
OR
- Click the Start icon.
- Click the User profile icon.
- Click Sign out.
OR
- Right-click the Start icon.
- Click or hover over Shut down.
Start a Program
Start a program or application such as Word, PowerPoint, Paint, etc.
Method 1
- Click the Start icon.
- Click the name of the program that you wish to start (e.g. Word, PowerPoint, etc.).
Method 2
- Type the program name in the Search box.
- Click the name of the program that you wish to start.
Method 3
- Double-click a program shortcut icon on the desktop. (If the program icon is on the desktop.)
Method 4
- Click an open program on the taskbar (the bottom edge of the screen).
Close a Program
Close (exit) a program (close an active open window)
Method 1
- Click the Close icon (x) in the upper-right corner of the window.
Method 2
- Click the File, and then click Close.
Method 3
On your keyboard, press Alt + F4 at the same time.
Starting with computer basics is a great way to build foundational knowledge. Here’s an overview to get you going:
What is a Computer?
A computer is an electronic device that processes, stores, and retrieves data. It can perform a wide range of tasks based on the instructions provided.
Key Components:
- Hardware (Physical Parts):
- Input Devices: Keyboard, mouse, microphone, scanner, etc.
- Output Devices: Monitor, printer, speakers, etc.
- Central Processing Unit (CPU): The “brain” of the computer that processes instructions.
- Storage: Hard drives (HDD), solid-state drives (SSD), or external storage.
- Memory (RAM): Temporary storage for running programs and processes.
- Motherboard: Connects all the components together.
- Software (Programs/Applications):
- Operating System (OS): The interface between the user and hardware (e.g., Windows, macOS, Linux).
- Applications: Programs like Excel, Word, games, browsers, etc.
Basic Concepts:
- Data: Information that the computer processes.
- Binary System: Computers understand only 0s and 1s (binary code).
- File Management: Learning to organize and manage files and folders.
- Networking: Understanding how computers connect and communicate via the internet.
How to Learn:
- Explore the Interface: Familiarize yourself with an operating system like Windows or macOS.
- Practice with Applications: Start with word processors, spreadsheets, and web browsers.
- Learn Shortcuts: Keyboard shortcuts can boost your efficiency.
- Ask Questions: Being curious is the fastest way to learn.
Operating software and application software are two fundamental types of computer software, each serving distinct purposes.
Type of Software
Operating Software (Operating System, OS):
- Definition: It is the system software that manages hardware resources and provides a platform for other software to run.
- Purpose: Acts as an intermediary between the hardware and the user or application programs.
- Examples:
- Microsoft Windows
- macOS
- Linux
- Android
- iOS
- Key Functions:
- Manages files and directories.
- Allocates system resources like CPU, memory, and storage.
- Ensures communication between hardware components.
- Provides a user interface (e.g., graphical or command-line).
Application Software:
- Definition: It is software designed to perform specific tasks for the user.
- Purpose: Helps users accomplish personal or professional tasks using the computer.
- Examples:
- Microsoft Word (Word processing)
- Excel (Spreadsheets)
- Google Chrome (Web browsing)
- Adobe Photoshop (Image editing)
- Zoom (Video conferencing)
- Key Features:
- Runs on top of an operating system.
- Designed for direct interaction with users.
- Tailored to specific use cases or industries.
How Both Software Work Together:
- The operating software provides the environment for the application software to function. For example, you need an OS like Windows to run an app like Excel.
Input devices
Input devices are hardware components that allow users to provide data and control signals to a computer. Here’s a list of common input devices used with a PC:
- Keyboard: For text input and commands.
- Mouse: For pointing, clicking, and navigating the graphical user interface.
- Touchpad: Common in laptops, used as an alternative to a mouse.
- Touchscreen: Allows direct interaction by touching the screen.
- Joystick/Game Controller: Primarily used for gaming.
- Scanner: Converts physical documents or images into digital formats.
- Microphone: Captures audio input for communication or recording.
- Webcam: Captures video input for calls or video recordings.
- Stylus: Used for precise input on touchscreens or graphic tablets.
- Trackball: A pointing device, an alternative to a mouse.
- Graphics Tablet: For digital drawing and design.
- Barcode Scanner: Reads barcodes for inventory or point-of-sale systems.
- VR Controllers: Specialized input devices for virtual reality environments.
Common Input Devices:
- Keyboard:
- Used for typing text, entering commands, and controlling software.
- Variants: Standard keyboard, mechanical keyboard, and virtual/on-screen keyboards.
- Mouse:
- A pointing device for selecting, clicking, and navigating on the screen.
- Variants: Optical mouse, wireless mouse, and trackballs.
- Touchscreen:
- Allows direct interaction with the screen using touch gestures like taps, swipes, and pinches.
- Commonly used in smartphones, tablets, and some laptops/monitors.
- Microphone:
- Captures audio input for communication, voice commands, or recording.
- Used in applications like video calls, voice assistants, and podcasts.
- Scanner:
- Converts physical documents, photos, or images into a digital format.
- Variants: Flatbed scanners, handheld scanners, and barcode scanners.
- Webcam:
- Captures video for streaming, video conferencing, or recording.
- Game Controllers:
- Includes joysticks, gamepads, and steering wheels designed for gaming.
- Graphics Tablet:
- Used for digital drawing and design with a stylus. Great for artists and designers.
- Trackpad:
- A built-in alternative to a mouse, often found in laptops.
- Barcode Scanner:
- Used to read barcodes for inventory management, billing, or identification.
- Stylus:
- A pen-like device used for precision input, especially on touchscreen devices.
Specialized Input Devices:
- VR Controllers: Enable interaction in virtual reality environments.
- Biometric Devices: Capture fingerprints, iris scans, or facial recognition for authentication.
- Motion Sensors: Detect body movements, commonly used in gaming or fitness systems.
These devices are essential for interacting with computers in various ways, from typing and clicking to voice commands and creative design.
Output devices
Output devices are hardware components that display, project, or convey the results of a computer’s processes to the user. Here are some common examples:
- Monitor: Displays visuals, including text, images, videos, and graphical output.
- Printer: Produces physical copies of digital documents and images on paper.
- Speaker: Outputs sound, such as music, voice, or system alerts.
- Headphones/Earbuds: Personal audio output devices.
- Projector: Projects visuals onto a larger screen or surface.
- Plotter: Used for printing large-scale graphics or architectural blueprints.
- LED Indicators: Used for simple visual signals or notifications.
- VR Headset (Display): Outputs immersive virtual reality visuals.
These devices work in tandem with input devices to make interactions with computers more meaningful and accessible.
Let’s explore output devices—these are the tools that help a computer communicate the results of its processes to the user. Here’s a breakdown:
Common Output Devices:
- Monitor:
- Displays text, images, videos, and the graphical user interface.
- Types: CRT (old technology), LCD, LED, and modern OLED screens.
- Printer:
- Produces physical copies of documents and images on paper.
- Types: Inkjet, laser, and 3D printers.
- Speakers:
- Outputs sound, such as music, notifications, or voice from videos and calls.
- Headphones/Earbuds:
- Personal audio devices for hearing sound privately.
- Projector:
- Projects visuals onto a larger surface like a screen or wall for presentations or entertainment.
- Plotter:
- Creates large-scale drawings, designs, or blueprints, often used in engineering and architecture.
- LED Indicators:
- Simple devices that give visual feedback through lights (e.g., power or status indicators).
- Haptic Devices:
- Provide tactile feedback, such as vibrations (used in gaming controllers or phones).
- VR Headset (Display):
- Outputs immersive 3D visuals for virtual reality experiences.
Specialized Output Devices:
- Braille Displays: For visually impaired users to read text via tactile Braille characters.
- Augmented Reality (AR) Devices: Combines real-world visuals with computer-generated overlays.
Output devices are essential for making the data processed by a computer tangible or understandable to the user.
Exercise
Let’s explore how to start working with a mouse! A mouse is a versatile input device for navigating and interacting with your computer’s graphical interface. Here’s a step-by-step guide:
Basic Functions of a Mouse:
- Pointing:
- Move the mouse across your desk or surface to see the on-screen cursor move accordingly.
- Clicking:
- Left-Click: Selects items, opens files, or interacts with buttons/icons.
- Right-Click: Opens context menus with additional options.
- Double-Click: Quickly double-tap the left mouse button to open files or folders.
- Scrolling:
- Use the scroll wheel (if available) to move up or down in a document or webpage.
- Dragging and Dropping:
- Click and hold the left mouse button on an item, move it to a new location, and release the button.
Mouse Settings and Customization:
- Open Mouse Settings:
- On Windows, go to Settings > Devices > Mouse.
- You can adjust the pointer speed, change button functions, and more.
- Pointer Options:
- Customize your pointer size, shape, and visibility for better accessibility.
- Tweak Double-Click Speed:
- Adjust how fast you need to double-click for it to register.
Shortcuts and Advanced Features:
- Middle-Click (Scroll Wheel):
- In browsers, middle-click links to open them in a new tab.
- Used in some applications for unique functions (e.g., closing tabs in a browser).
- Mouse Gestures (if supported):
- Some mice allow gestures for actions like minimizing windows or switching tabs.
- Gaming or Multi-Button Mice:
- Many gaming mice come with programmable buttons for custom actions in games or productivity tasks.
Practice Makes Perfect:
- Familiarize yourself with how the mouse feels and responds.
- Try navigating your operating system, browsing the internet, or organizing files.
Keyboard
Let’s get started with the keyboard—your ultimate input device for typing, shortcuts, and navigation!
Basic Keyboard Layout:
- Alphanumeric Keys:
- Include letters (A-Z), numbers (0-9), and punctuation marks.
- These are the keys used for typing text.
- Function Keys (F1–F12):
- Located at the top of the keyboard.
- Perform specific tasks (e.g., F1 for help, F5 to refresh, etc.).
- Modifier Keys:
- Shift: For capital letters or accessing symbols on keys.
- Ctrl (Control) and Alt: Used in combination with other keys for shortcuts.
- Fn (Function): Typically found on laptops, used to access secondary functions of keys.
- Navigation Keys:
- Arrow Keys: Navigate within text or spreadsheets.
- Home/End: Jump to the beginning or end of a line.
- Page Up/Page Down: Scroll up or down in documents.
- Special Keys:
- Spacebar: Adds a space between words.
- Enter: Used to execute commands or move to a new line.
- Backspace: Deletes characters to the left of the cursor.
- Delete: Deletes characters to the right of the cursor.
- Numeric Keypad:
- Found on the right side of larger keyboards, for quick number input.
Basic Typing Skills:
- Proper Posture:
- Sit straight, with your wrists slightly raised above the keyboard.
- Keep your fingers on the home row keys (A–L), with your thumbs on the spacebar.
- Practice Touch Typing:
- Learn to type without looking at the keys for faster typing speed and accuracy.
- Start with easy typing exercises or software like TypingMaster or online tools.
Keyboard Shortcuts to Boost Productivity:
Here are some handy shortcuts to make your work faster:
- Ctrl + C: Copy
- Ctrl + V: Paste
- Ctrl + X: Cut
- Ctrl + Z: Undo
- Ctrl + S: Save
- Ctrl + P: Print
- Alt + Tab: Switch between open applications
- Windows Key + D: Show desktop
Advanced Features:
- Customizing Keys:
- On Windows, go to Settings > Devices > Keyboard to customize behavior.
- Keyboard Languages:
- Switch between different input languages (e.g., English, Hindi) using Alt + Shift or the language bar.
- Specialized Keyboards:
- Explore ergonomic keyboards, gaming keyboards, or multimedia keyboards tailored to specific needs.
Here’s an overview of the functions of the different keys on a standard keyboard:
1. Alphanumeric Keys
- Letters (A–Z): For typing text.
- Numbers (0–9): For numerical input.
2. Modifier Keys
- Shift:
- Hold to type uppercase letters or access symbols (e.g.,
@,#) on number keys.
- Hold to type uppercase letters or access symbols (e.g.,
- Ctrl (Control):
- Used for shortcuts (e.g., Ctrl + C for copy, Ctrl + V for paste).
- Alt:
- Works with other keys for shortcuts (e.g., Alt + Tab to switch apps).
- Fn (Function key on laptops):
- Accesses secondary functions of other keys (e.g., brightness, volume).
3. Function Keys (F1–F12)
Each function key performs a specific task:
- F1: Opens help menu in many programs.
- F5: Refreshes the active window.
- F11: Toggles full-screen mode in some browsers.
4. Navigation Keys
- Arrow Keys:
- Navigate through text or menus.
- Home/End:
- Moves cursor to the start or end of a line.
- Page Up/Page Down:
- Scrolls up or down one screen.
5. Editing Keys
- Backspace:
- Deletes characters to the left of the cursor.
- Delete:
- Removes characters to the right of the cursor.
- Insert:
- Toggles between insert and overwrite text modes.
6. Special Keys
- Enter: Executes commands or creates a new line in text.
- Spacebar: Adds a space between text.
- Esc (Escape): Cancels the current operation or closes menus.
7. Numeric Keypad
- Used for quick numeric input and basic arithmetic operations (*, /, +, -).
8. Miscellaneous Keys
- Caps Lock: Toggles uppercase typing on/off.
- Tab: Indents text or navigates through form fields.
- Windows Key:
- Opens the Start menu (Windows OS).
- Print Screen (PrtSc):
- Captures a screenshot.
What are the different types of computers?

When most people hear the word computer, they think of a personal computer such as a desktop or laptop. However, computers come in many shapes and sizes, and they perform many different functions in our daily lives. When you withdraw cash from an ATM, scan groceries at the store, or use a calculator, you’re using a type of computer.
Computers come in various types, including personal computers (desktops and laptops), servers, workstations, mainframes, supercomputers, tablets, and even wearable devices, each designed for specific purposes and capabilities.
Here’s a breakdown of some common types of computers:
Based on Size and Purpose:
- Personal Computers (PCs):
- Desktops: Traditional computers with separate components like a tower, monitor, keyboard, and mouse, often used for general tasks at home or in offices.
- Laptops: Portable computers with a built-in keyboard, screen, and trackpad, designed for use on the go.
- Tablets: Handheld computers with a touch-sensitive screen, often used for media consumption, browsing, and light tasks.
- Servers:Powerful computers dedicated to providing services to other computers on a network, such as hosting websites or managing databases.
- Workstations:High-performance computers designed for demanding tasks like graphic design, video editing, and scientific simulations, often with powerful processors and graphics cards.
- Mainframe Computers:Large, powerful computers designed to handle large amounts of data and multiple users simultaneously, often used by large organizations.
- Supercomputers:The most powerful computers, designed for complex calculations and simulations, used in fields like weather forecasting and scientific research.
- Mini PCs:Compact computers with the features and capabilities of a standard computer, often used in educational settings or as media players.
- Microcomputers:Small computers that incorporate a microprocessor, CPU, memory, storage, and input/output units.
Based on Data Representation:
Hybrid Computers: Combine both analog and digital processing capabilities.
Analog Computers: Use continuous physical phenomena to model problems, such as electrical or mechanical quantities.
Digital Computers: Process information using binary code (0s and 1s). Servers
Other types of computers
Many of today’s electronics are basically specialized computers, though we don’t always think of them that way. Here are a few common examples.
- Smartphones: Many cell phones can do a lot of things computers can do, including browsing the Internet and playing games. They are often called smartphones.
- Wearable: Wearable technology is a general term for a group of devices—including fitness trackers and smart watches—that are designed to be worn throughout the day. These devices are often called wearable for short.
- Game consoles: A game console is a specialized type of computer that is used for playing video games on your TV.
- TVs: Many TVs now include applications—or apps—that let you access various types of online content. For example, you can stream video from the Internet directly onto your TV.
PCs and Macs
Personal computers come in two main styles: PC and Mac. Both are fully functional, but they have a different look and feel, and many people prefer one or the other.
PCs
This type of computer began with the original IBM PC that was introduced in 1981. Other companies began creating similar computers, which were called IBM PC Compatible (often shortened to PC). Today, this is the most common type of personal computer, and it typically includes the Microsoft Windows operating system.
MACs
The Macintosh computer was introduced in 1984, and it was the first widely sold personal computer with a graphical user interface, or GUI (pronounced gooey). All Macs are made by one company (Apple), and they almost always use the Mac OS X operating system.
Basic Parts of a Computer
The basic parts of a desktop computer are the computer case, monitor, keyboard, mouse, and power cord. Each part plays an important role whenever you use a computer.
Computer case
The computer case is the metal and plastic box that contains the main components of the computer, including the motherboard, central processing unit (CPU), and power supply. The front of the case usually has an On/Off button and one or more optical drives.
Computer cases come in different shapes and sizes. A desktop case lies flat on a desk, and the monitor usually sits on top of it. A tower case is tall and sits next to the monitor or on the floor. All-in-one computers come with the internal components built into the monitor, which eliminates the need for a separate case.
Buttons and Ports on a Computer
Take a look at the front and back of your computer case and count the number of buttons, ports, and slots you see. Now look at your monitor and count any you find there. You probably counted at least 10, and maybe a lot more.
Each computer is different, so the buttons, ports, and sockets will vary from computer to computer. However, there are certain ones you can expect to find on most desktop computers. Learning how these ports are used will help whenever you need to connect something to your computer, like a new printer, keyboard, or mouse.
Front of a computer case
Click the buttons in the interactive below to become familiar with the front of a computer.

Back of a computer case
The back of a computer case has connection ports that are made to fit specific devices. The placement will vary from computer to computer, and many companies have their own special connectors for specific devices. Some of the ports may be color coded to help you determine which port is used with a particular device.
Click the buttons in the interactive below to become familiar with the back of a computer.
Other types of ports
There are many other types of ports, such as FireWire, Thunderbolt, and HDMI. If your computer has ports you don’t recognize, you should consult your manual for more information.
Now you try it! Practice connecting the cables with the interactive game below.
Peripherals you can use with your computer
The most basic computer setup usually includes the computer case, monitor, keyboard, and mouse, but you can plug many different types of devices into the extra ports on your computer. These devices are called peripherals. Let’s take a look at some of the most common ones.
- Printers: A printer is used to print documents, photos, and anything else that appears on your screen. There are many types of printers, including inkjet, laser, and photo printers. There are even all-in-one printers, which can also scan and copy documents.
- Scanners: A scanner allows you to copy a physical image or document and save it to your computer as a digital (computer-readable) image. Many scanners are included as part of an all-in-one printer, although you can also buy a separate flatbed or handheld scanner.
- Speakers/headphones: Speakers and headphones are output devices, which means they send information from the computer to the user—in this case, they allow you to hear sound and music. Depending on the model, they may connect to the audio port or the USB port. Some monitors also have built-in speakers.
- Microphones: A microphone is a type of input device, or a device that receives information from a user. You can connect a microphone to record sound or talk with someone else over the Internet. Many laptop computers come with built-in microphones.
- Web cameras: A web camera—or webcam—is a type of input device that can record videos and take pictures. It can also transmit video over the Internet in real time, which allows for video chat or video conferencing with someone else. Many webcams also include a microphone for this reason.
- Game controllers and joysticks: A game controller is used to control computer games. There are many other types of controllers you can use, including joysticks, although you can also use your mouse and keyboard to control most games.
- Digital cameras: A digital camera lets you capture pictures and videos in a digital format. By connecting the camera to your computer’s USB port, you can transfer the images from the camera to the computer.
- Mobile phones, MP3 players, tablet computers, and other devices: Whenever you buy an electronic device, such as a mobile phone or MP3 player, check to see if it comes with a USB cable. If it does, this means you can most likely connect it to your computer.
Inside a Computer
A computer cabinet, also known as a CPU case or tower, houses various components critical for the functioning of a computer. Here’s an overview of what’s typically inside:
- Motherboard: This is the main circuit board that connects all the components. It has slots for the CPU, RAM, storage, and expansion cards.
- Central Processing Unit (CPU): Often referred to as the brain of the computer, the CPU executes instructions and processes data.
- Memory (RAM): Random Access Memory temporarily stores data and instructions that the CPU needs while performing tasks.
- Storage Drives:
- HDD (Hard Disk Drive) or SSD (Solid-State Drive) stores the operating system, software, and user files.
- Power Supply Unit (PSU): Converts electricity from an outlet into usable power for the internal components.
- Cooling Systems: Fans and/or liquid cooling systems help prevent overheating. The CPU and GPU typically have dedicated cooling solutions.
- Graphics Processing Unit (GPU): This handles rendering images, videos, and animations. It can be integrated into the motherboard or a dedicated card.
- Expansion Cards: These include sound cards, network cards, or other cards for additional functionality.
- Cables: Internal cables connect the power supply, storage devices, and other components to the motherboard.
- Case Fans: These provide ventilation to keep the internal components cool.
- Optical Drive (Optional): In some setups, you might find a DVD or Blu-ray drive.
- Ports and Connections: External ports like USB, HDMI, and audio jacks are integrated into the cabinet to connect peripherals.
Motherboard
CPU/processor

RAM (random access memory)

Hard drive

SSD

Power supply unit

Video card

Sound card

Bluetooth card (or adapter)


What is a laptop computer?
A laptop is a personal computer that can be easily moved and used in a variety of locations. Most laptops are designed to have all of the functionality of a desktop computer, which means they can generally run the same software and open the same types of files. However, laptops also tend to be more expensive than comparable desktop computers.
How is a laptop different from a desktop?
Because laptops are designed for portability, there are some important differences between them and desktop computers. A laptop has an all-in-one design, with a built-in monitor, keyboard, touchpad (which replaces the mouse), and speakers. This means it is fully functional, even when no peripherals are connected. A laptop is also quicker to set up, and there are fewer cables to get in the way.
You’ll also have to the option to connect a regular mouse, larger monitor, and other peripherals. This basically turns your laptop into a desktop computer, with one main difference: You can easily disconnect the peripherals and take the laptop with you wherever you go.
Here are the main differences you can expect with a laptop.
- Touchpad: A touchpad—also called a track pad—is a touch-sensitive pad that lets you control the pointer by making a drawing motion with your finger.
- Battery: Every laptop has a battery, which allows you to use the laptop when it’s not plugged in. Whenever you plug in the laptop, the battery recharges. Another benefit of having a battery is that it can provide backup power to the laptop if the power goes out.
- AC adapter: A laptop usually has a specialized power cable called an AC adapter, which is designed to be used with that specific type of laptop.
- Ports: Most laptops have the same types of ports found on desktop computers (such as USB), although they usually have fewer ports to save space. However, some ports may be different, and you may need an adapter in order to use them.
- Price: Generally speaking, laptops tend to be more expensive than a desktop computer with the same internal components. While you may find that some basic laptops cost less than desktop computers, these are usually much less powerful machines.
Mobile Devices
What is a mobile device?
A mobile device is a general term for any type of handheld computer. These devices are designed to be extremely portable, and they can often fit in your hand. Some mobile devices—like tablets, e-readers, and smartphones—are powerful enough to do many of the same things you can do with a desktop or laptop computer.
Tablet computers
Like laptops, tablet computers are designed to be portable. However, they provide a different computing experience. The most obvious difference is that tablet computers don’t have keyboards or touchpads. Instead, the entire screen is touch-sensitive, allowing you to type on a virtual keyboard and use your finger as a mouse pointer.
Tablet computers can’t necessarily do everything traditional computers can do. For many people, a traditional computer like a desktop or laptop is still needed in order to use some programs. However, the convenience of a tablet computer means it may be ideal as a second computer.
E-readers
E-book readers—also called e-readers—are similar to tablet computers, except they are mainly designed for reading e-books (digital, downloadable books). Notable examples include the Amazon Kindle, Barnes & Noble Nook, and Kobo. Most e-readers use an e-ink display, which is easier to read than a traditional computer display. You can even read in bright sunlight, just like if you were reading a regular book.
You don’t need an e-reader to read e-books. They can also be read on tablets, smartphones, laptops, and desktops.
Smartphones
A smartphone is a more powerful version of a traditional cell phone. In addition to the same basic features—phone calls, voicemail, text messaging—smartphones can connect to the Internet over Wi-Fi or a cellular network (which requires purchasing a monthly data plan). This means you can use a smartphone for the same things you would normally do on a computer, such as checking your email, browsing the Web, or shopping online.
Most smartphones use a touch-sensitive screen, meaning there isn’t a physical keyboard on the device. Instead, you’ll type on a virtual keyboard and use your fingers to interact with the display. Other standard features include a high-quality digital camera and the ability to play digital music and video files. For many people, a smartphone can actually replace electronics like an old laptop, digital music player, and digital camera in the same device.
Understanding Operating Systems
An operating system (OS) is the essential software that manages a computer’s hardware and software resources. It acts as a bridge between the user and the computer hardware, ensuring that tasks are carried out efficiently. Think of it as the “brain” that helps everything in the computer work together harmoniously.
Key Functions of an Operating System:
- Resource Management: Coordinates hardware components such as the CPU, memory, storage devices, and peripherals.
- Task Scheduling: Allocates resources to different applications and ensures multitasking.
- User Interface: Provides a platform for users to interact with the computer (e.g., graphical interfaces like Windows or macOS, or command-line interfaces like Linux Terminal).
- File System Management: Organizes and manages data storage in files and directories.
- Security & Access Control: Protects data, applications, and resources from unauthorized access.
Examples of popular operating systems include Windows, macOS, Linux, and Android. Each is tailored to specific types of devices, from PCs to smartphones.
perating systems can be classified into various types based on their functionality, purpose, and the devices they serve. Here’s an overview:
1. Batch Operating System:
- Executes batches of jobs without user interaction during processing.
- Common in early computers used for large-scale data processing tasks.
2. Time-Sharing Operating System:
- Allows multiple users to access a single computer simultaneously.
- Allocates CPU time to tasks efficiently to ensure all users experience minimal delays.
3. Distributed Operating System:
- Manages a group of independent computers that work together as a single system.
- Resources are distributed across multiple machines.
4. Network Operating System:
- Designed to manage data communication between devices in a network.
- Examples include Windows Server and UNIX.
5. Real-Time Operating System (RTOS):
- Processes data and tasks within strict time constraints.
- Commonly used in embedded systems like medical devices or automated machines.
6. Mobile Operating System:
- Tailored for smartphones and tablets.
- Examples include Android and iOS.
7. Graphical User Interface (GUI) OS:
- Provides a visual interface with icons, windows, and menus.
- Examples include Windows and macOS.
8. Command-Line Interface (CLI) OS:
- Operated through text-based commands.
- Examples include Linux Terminal and DOS.
Types of operating systems
Personal Computers
- Windows (Microsoft)
- macOS (Apple)
- Linux (Multiple distributions like Ubuntu, Fedora, and Debian)
Mobile Devices
- Android (Google)
- iOS (Apple)
Servers
- Windows Server (Microsoft)
- Unix (Various distributions)
- Red Hat Enterprise Linux (RHEL)
- CentOS
Real-Time and Embedded Systems
- RTOS (Real-Time Operating Systems like VxWorks or FreeRTOS)
- QNX
Other Noteworthy Systems
- Chrome OS (Google – for Chromebooks)
- FreeBSD (Open-source Unix-based OS)
- Solaris (Oracle)
Operating systems for mobile devices generally aren’t as fully featured as those made for desktop and laptop computers, and they aren’t able to run all of the same software. However, you can still do a lot of things with them, like watch movies, browse the Web, manage your calendar, and play games.
Understanding Applications
Application software refers to programs designed to perform specific tasks for users. These can range from productivity tools to entertainment applications. Here’s a breakdown of some common categories and examples:
1. Productivity Software:
- Word Processors: Microsoft Word, Google Docs
- Spreadsheets: Microsoft Excel, Google Sheets
- Presentation Software: Microsoft PowerPoint, Keynote
2. Multimedia Software:
- Photo/Video Editing: Adobe Photoshop, Final Cut Pro
- Media Players: VLC Media Player, Windows Media Player
- Music Production: FL Studio, GarageBand
3. Web Browsers:
- Google Chrome, Mozilla Firefox, Microsoft Edge
4. Communication Software:
- Email Clients: Microsoft Outlook, Thunderbird
- Messaging Apps: WhatsApp, Zoom, Microsoft Teams
5. Utility Software:
- File Compression: WinRAR, 7-Zip
- Antivirus: Norton, Avast
- Backup Tools: Acronis True Image
6. Enterprise Software:
- Customer Relationship Management (CRM): Salesforce, HubSpot
- Enterprise Resource Planning (ERP): SAP, Oracle
7. Educational Software:
- Duolingo (language learning), MATLAB (engineering and science tools)
8. Entertainment and Gaming:
- Games: Fortnite, Minecraft
- Streaming: Netflix, Spotify
- Media players: If you want to listen to MP3s or watch movies you’ve downloaded, you’ll need to use a media player. Windows Media Player and iTunes are popular media players.
- Games: There are many types of games you can play on your computer. They range from card games like Solitaire to action games like Halo. Many action games require a lot of computing power, so they may not work unless you have a newer computer.
Mobile apps
Desktop and laptop computers aren’t the only devices that can run applications. You can also download apps for mobile devices like smartphones and tablets. Here are a few examples of mobile apps.
- Gmail: You can use the Gmail app to easily view and send emails from your mobile device. It’s available for Android and iOS devices.
- Instagram: You can use Instagram to quickly share photos with your friends and family. It’s available for Android and iOS.
- Duolingo: With a combination of quizzes, games, and other activities, this app can help you learn new languages. It’s available for Android and iOS.
Installing new applications
Every computer and mobile device will come with some applications already built in, such as a web browser and media player. However, you can also purchase and install new apps to add more functionality. You can review our lessons on Installing Software on Your Windows PC, Installing Software on Your Mac, and Free Software to learn more.
Connecting to the Internet
How do I connect to the Internet?
Once you’ve set up your computer, you may want to purchase home Internet access so you can send and receive email, browse the Web, stream videos, and more. You may even want to set up a home wireless network, commonly known as Wi-Fi, so you can connect multiple devices to the Internet at the same time.
Types of Internet service
The type of Internet service you choose will largely depend on which Internet service providers (ISPs) serve your area, along with the types of service they offer. Here are some common types of Internet service.
- Dial-up: This is generally the slowest type of Internet connection, and you should probably avoid it unless it is the only service available in your area. Dial-up Internet uses your phone line, so unless you have multiple phone lines you will not be able to use your landline and the Internet at the same time.
- DSL: DSL service uses a broadband connection, which makes it much faster than dial-up. DSL connects to the Internet via a phone line but does not require you to have a landline at home. And unlike dial-up, you’ll be able to use the Internet and your phone line at the same time.
- Cable: Cable service connects to the Internet via cable TV, although you do not necessarily need to have cable TV in order to get it. It uses a broadband connection and can be faster than both dial-up and DSL service; however, it is only available where cable TV is available.
- Satellite: A satellite connection uses broadband but does not require cable or phone lines; it connects to the Internet through satellites orbiting the Earth. As a result, it can be used almost anywhere in the world, but the connection may be affected by weather patterns. Satellite connections are also usually slower than DSL or cable.
- 3G and 4G: 3G and 4G service is most commonly used with mobile phones, and it connects wirelessly through your ISP’s network. However, these types of connections aren’t always as fast as DSL or cable. They will also limit the amount of data you can use each month, which isn’t the case with most broadband plans.
Choosing an Internet service provider
Now that you know about the different types of Internet service, you can do some research to find out what ISPs are available in your area. If you’re having trouble getting started, we recommend talking to friends, family members, and neighbors about the ISPs they use. This will usually give you a good idea of the types of Internet service available in your area.
Most ISPs offer several tiers of service with different Internet speeds, usually measured in Mbps (short for megabits per second). If you mainly want to use the Internet for email and social networking, a slower connection (around 2 to 5 Mbps) might be all you need. However, if you want to download music or stream videos, you’ll want a faster connection (at least 5 Mbps or higher).
You’ll also want to consider the cost of the service, including installation charges and monthly fees. Generally speaking, the faster the connection, the more expensive it will be per month.
Although dial-up has traditionally been the least expensive option, many ISPs have raised dial-up prices to be the same as broadband. This is intended to encourage people to switch to broadband. We do not recommend dial-up Internet unless it’s your only option.
Hardware needed
Modem
Once you have your computer, you really don’t need much additional hardware to connect to the Internet. The primary piece of hardware you need is a modem. The type of Internet access you choose will determine the type of modem you need. Dial-up access uses a telephone modem, DSL service uses a DSL modem, cable access uses a cable modem, and satellite service uses a satellite adapter. Your ISP may give you a modem—often for a fee—when you sign a contract, which helps ensure that you have the right type of modem. However, if you would prefer to shop for a better or less expensive modem, you can choose to buy one separately.
Router
A router is a hardware device that allows you to connect several computers and other devices to a single Internet connection, which is known as a home network. Many routers are wireless, which allows you to create a home wireless network, commonly known as a Wi-Fi network.
You don’t necessarily need to buy a router to connect to the Internet. It’s possible to connect your computer directly to your modem using an Ethernet cable. Also, many modems include a built-in router, so you have the option of creating a Wi-Fi network without buying extra hardware.
Setting up your Internet connection
Once you’ve chosen an ISP, most providers will send a technician to your house to turn on the connection. If not, you should be able to use the instructions provided by your ISP—or included with the modem—to set up your Internet connection.
After you have everything set up, you can open your web browser and begin using the Internet. If you have any problems with your Internet connection, you can call your ISP’s technical support number.
Home networking
If you have multiple computers at home and want to use all of them to access the Internet, you may want to create a home network, also known as a Wi-Fi network. In a home network, all of your devices connect to your router, which is connected to the modem. This means everyone in your family can use the Internet at the same time.
Your ISP technician may be able to set up a home Wi-Fi network when installing your Internet service. If not, you can review our lesson on How to Set Up a Wi-Fi Network to learn more.
If you want to connect a computer that does not have built-in Wi-Fi connectivity, you can purchase a Wi-Fi adapter that plugs into your computer’s USB port.
Getting Started with the Internet
Getting started with the Internet
The Internet is a global network of billions of computers and other electronic devices. With the Internet, it’s possible to access almost any information, communicate with anyone else in the world, and much more. You can do all of this on your computer.
Connecting to the Internet
A device has to be connected to the Internet before you can access it. If you plan to use the Internet at home, you’ll usually need to purchase an Internet connection from an Internet service provider, which will likely be a phone company, Cable Company, or the government. Other devices usually connect through Wi-Fi or cellular Internet connections. Sometimes libraries, cafes, and schools offer free Wi-Fi for their patrons, customers, and students.
If you’re not sure how to connect your device, check out our lesson on how to connect to the Internet, or ask someone for help.
Browsing the web
Most information on the Internet is on websites. Once you are connected to the Internet, you can access websites using a kind of application called a web browser.
A website is a collection of related text, images, and other resources. Websites can resemble other forms of media—like newspaper articles or television programs—or they can be interactive in a way that’s unique to computers. The purpose of a website can be almost anything: a news platform, an advertisement, an online library, a forum for sharing images, or an educational site like us!
A web browser allows you to connect to and view websites. The web browser itself is not the Internet, but it displays pages on the Internet. Each website has a unique address. By typing this address into your web browser, you can connect to that website and your web browser will display it.
Navigating websites
Websites often have links to other sites, also called hyperlinks. These are often parts of the text on the website. They are usually colored blue, and sometimes they are underlined or bold. If you click the text, your browser will load a different page. Web authors use hyperlinks to connect relevant pages. This web of links is one of the most unique features of the Internet, lending to the old name World Wide Web.
Each website has a unique address, called a URL. You’ll notice that when you click a link, the URL changes as your browser loads a new page. If you type a URL in the address bar in your browser, your browser will load the page associated with that URL. It’s like a street address, telling your browser where to go on the Internet.
When you’re looking for specific information on the Internet, a search engine can help. A search engine is a specialized website that’s designed to help you find other websites. If you type keywords or a phrase into a search engine, it will display a list of websites relevant to your search terms.
Other things you can do on the Internet
One of the best features of the Internet is the ability to communicate almost instantly with anyone in the world. Email is one of the oldest and most universal ways to communicate and share information on the Internet, and billions of people use it. Social media allows people to connect in a variety of ways and build communities online.
There are many other things you can do on the Internet too. There are thousands of ways to keep up with news or shop for anything online. You can pay your bills, manage your bank accounts, meet new people, watch TV, or learn new skills. You can learn or do almost anything online.
Understanding the Cloud
What is the cloud?
You may have heard people using terms like the cloud, cloud computing, or cloud storage. But what exactly is the cloud?
Simply put, the cloud is the Internet—more specifically, it’s all of the things you can access remotely over the Internet. When something is in the cloud, it means it’s stored on Internet servers instead of your computer’s hard drive.
Why use the cloud?
Some of the main reasons to use the cloud are convenience and reliability. For example, if you’ve ever used a web-based email service, such as Gmail or Yahoo! Mail, you’ve already used the cloud. All of the emails in a web-based service are stored on servers rather than on your computer’s hard drive. This means you can access your email from any computer with an Internet connection. It also means you’ll be able to recover your emails if something happens to your computer.
Let’s look at some of the most common reasons to use the cloud.
- File storage: You can store all types of information in the cloud, including files and email. This means you can access these things from any computer or mobile device with an Internet connection, not just your home computer. Dropbox and Google Drive are some of the most popular cloud-based storage services.
- File sharing: The cloud makes it easy to share files with several people at the same time. For example, you could upload several photos to a cloud-based photo service like Flickr or iCloud Photos, then quickly share them with friends and family.
- Backing up data: You can also use the cloud to protect your files. There are apps such as Carbonite that automatically back up your data to the cloud. This way, if your computer ever is lost, stolen, or damaged, you’ll still be able to recover these files from the cloud.
What is a web app?
Previously, we talked about how desktop applications allow you to perform tasks on your computer. But there are also web applications—or web apps—that run in the cloud and do not need to be installed on your computer. Many of the most popular sites on the Internet are actually web apps. You may have even used a web app without realizing it! Let’s take a look at some popular web apps.
- Facebook: Facebook lets you create an online profile and interact with your friends. Profiles and conversations can be updated at any time, so Facebook uses web app technologies to keep the information up to date.
- Pixlr: Pixlr is an image editing application that runs in your web browser. Much like Adobe Photoshop, it includes many advanced features, like color correction and sharpening tools.
- Google Docs: Google Docs is an office suite that runs in your browser. Much like Microsoft Office, you can use it to create documents, spreadsheets, presentations, and more. And because the files are stored in the cloud, it’s easy to share them with others.
Troubleshooting
Do you know what to do if your screen goes blank? What if you can’t seem to close an application, or can’t hear any sound from your speakers? Whenever you have a problem with your computer, don’t panic! There are many basic troubleshooting techniques you can use to fix issues like this. In this lesson, we’ll show you some simple things to try when troubleshooting, as well as how to solve common problems you may encounter.
General tips to keep in mind
There are many different things that could cause a problem with your computer. No matter what’s causing the issue, troubleshooting will always be a process of trial and error—in some cases, you may need to use several different approaches before you can find a solution; other problems may be easy to fix. We recommend starting by using the following tips.
- Write down your steps: Once you start troubleshooting, you may want to write down each step you take. This way, you’ll be able to remember exactly what you’ve done and can avoid repeating the same mistakes. If you end up asking other people for help, it will be much easier if they know exactly what you’ve tried already.
- Take notes about error messages: If your computer gives you an error message, be sure to write down as much information as possible. You may be able to use this information later to find out if other people are having the same error.
- Always check the cables: If you’re having trouble with a specific piece of computer hardware, such as your monitor or keyboard, an easy first step is to check all related cables to make sure they’re properly connected.
- Restart the computer: When all else fails, restarting the computer is a good thing to try. This can solve a lot of basic issues you may experience with your computer.
Using the process of elimination
If you’re having an issue with your computer, you may be able to find out what’s wrong using the process of elimination. This means you’ll make a list of things that could be causing the problem and then test them out one by one to eliminate them. Once you’ve identified the source of your computer issue, it will be easier to find a solution.
Scenario:
Let’s say you’re trying to print out invitations for a birthday party, but the printer won’t print. You have some ideas about what could be causing this, so you go through them one by one to see if you can eliminate any possible causes.
First, you check the printer to see that it’s turned on and plugged in to the surge protector. It is, so that’s not the issue. Next, you check to make sure the printer’s ink cartridge still has ink and that there is paper loaded in the paper tray. Things look good in both cases, so you know the issue has nothing to do with ink or paper.
Now you want to make sure the printer and computer are communicating correctly. If you recently downloaded an update to your operating system, it might interfere with the printer. But you know there haven’t been any recent updates and the printer was working yesterday, so you’ll have to look elsewhere.
You check the printer’s USB cord and find that it’s not plugged in. You must have unplugged it accidentally when you plugged something else into the computer earlier. Once you plug in the USB cord, the printer starts working again. It looks like this printer issue is solved!
This is just one example of an issue you might encounter while using a computer. In the rest of this lesson, we’ll talk about other common computer problems and some ways to solve them.
Simple solutions to common problems
Most of the time, problems can be fixed using simple troubleshooting techniques, like closing and reopening the program. It’s important to try these simple solutions before resorting to more extreme measures. If the problem still isn’t fixed, you can try other troubleshooting techniques.
Problem: Power button will not start computer
- Solution 1: If your computer does not start, begin by checking the power cord to confirm that it is plugged securely into the back of the computer case and the power outlet.
- Solution 2: If it is plugged into an outlet, make sure it is a working outlet. To check your outlet, you can plug in another electrical device, such as a lamp.
- Solution 3: If the computer is plugged in to a surge protector, verify that it is turned on. You may have to reset the surge protector by turning it off and then back on. You can also plug a lamp or other device into the surge protector to verify that it’s working correctly.
- Solution 4: If you are using a laptop, the battery may not be charged. Plug the AC adapter into the wall, then try to turn on the laptop. If it still doesn’t start up, you may need to wait a few minutes and try again.
Problem: An application is running slowly
- Solution 1: Close and reopen the application.
- Solution 2: Update the application. To do this, click the Help menu and look for an option to check for Updates. If you don’t find this option, another idea is to run an online search for application updates.
Problem: An application is frozen
Sometimes an application may become stuck, or frozen. When this happens, you won’t be able to close the window or click any buttons within the application.
- Solution 1: Force quit the application. On a PC, you can press (and hold) Ctrl+Alt+Delete (the Control, Alt, and Delete keys) on your keyboard to open the Task Manager. On a Mac, press and hold Command+Option+Esc. You can then select the unresponsive application and click End task (or Force Quit on a Mac) to close it.

- Solution 2: Restart the computer. If you are unable to force quit an application, restarting your computer will close all open apps.
Problem: All programs on the computer run slowly
- Solution 1: Run a virus scanner. You may have malware running in the background that is slowing things down.
- Solution 2: Your computer may be running out of hard drive space. Try deleting any files or programs you don’t need.
- Solution 3: If you’re using a PC, you can run Disk Defragmenter. To learn more about Disk Defragmenter, check out our lesson on Protecting Your Computer.
Problem: The computer is frozen
Sometimes your computer may become completely unresponsive, or frozen. When this happens, you won’t be able to click anywhere on the screen, open or close applications, or access shut-down options.
- Solution 1 (Windows only): Restart Windows Explorer. To do this, press and hold Ctrl+Alt+Delete on your keyboard to open the Task Manager. Next, locate and select Windows Explorer from the Processes tab and click Restart. You may need to click More Details at the bottom of the window to see the Processes tab.
- Solution 2 (Mac only): Restart Finder. To do this, press and hold Command+Option+Esc on your keyboard to open the Force Quit Applications dialog box. Next, locate and select Finder, then click Relaunch.
- Solution 3: Press and hold the Power button. The Power button is usually located on the front or side of the computer, typically indicated by the power symbol. Press and hold the Power button for 5 to 10 seconds to force the computer to shut down.
- Solution 4: If the computer still won’t shut down, you can unplug the power cable from the electrical outlet. If you’re using a laptop, you may be able to remove the battery to force the computer to turn off. Note: This solution should be your last resort after trying the other suggestions above.
Problem: The mouse or keyboard has stopped working
- Solution 1: If you’re using a wired mouse or keyboard, make sure it’s correctly plugged into the computer.
- Solution 2: If you’re using a wireless mouse or keyboard, make sure it’s turned on and that its batteries are charged.
Problem: The sound isn’t working
- Solution 1: Check the volume level. Click the audio button in the top-right or bottom-right corner of the screen to make sure the sound is turned on and that the volume is up.
- Solution 2: Check the audio player controls. Many audio and video players will have their own separate audio controls. Make sure the sound is turned on and that the volume is turned up in the player.
- Solution 3: Check the cables. Make sure external speakers are plugged in, turned on, and connected to the correct audio port or a USB port. If your computer has color-coded ports, the audio output port will usually be green.
- Solution 4: Connect headphones to the computer to find out if you can hear sound through the headphones.
Problem: The screen is blank
- Solution 1: The computer may be in Sleep mode. Click the mouse or press any key on the keyboard to wake it.
- Solution 2: Make sure the monitor is plugged in and turned on.
- Solution 3: Make sure the computer is plugged in and turned on.
- Solution 4: If you’re using a desktop, make sure the monitor cable is properly connected to the computer tower and the monitor.
Solving more difficult problems
If you still haven’t found a solution to your problem, you may need to ask someone else for help. As an easy starting point, we’d recommend searching the Web. It’s possible that other users have had similar problems, and solutions to these problems are often posted online. Also, if you have a friend or family member who knows a lot about computers, they may be able to help you.
Keep in mind that most computer problems have simple solutions, although it may take some time to find them. For difficult problems, a more drastic solution may be required, like reformatting your hard drive or reinstalling your operating system. If you think you might need a solution like this, we recommend consulting a professional first. If you’re not a computer expert, it’s possible that attempting these solutions could make the situation worse.
Everyone needs to look for help sometimes. Luckily, when you want help with a computer program, it’s usually easy to find. Most programs have a help feature somewhere, and learning how to use it can make a big difference. You may not find everything you need, but your computer’s built-in help is a great place to start.
Different programs integrate help features in different ways. Some are like interactive manuals included with the program that you can open with a menu, while others are just links to the developer’s support website. But they’re always designed with the same thing in mind: to help you learn the features of the program and to solve problems yourself.
How to access built-in help
Most programs have one of two ways to access built-in help. For example, Adobe Photoshop Elements has a Help menu with a variety of options. Many of these options open Adobe’s support page in your web browser, while others access features within the program itself.
Other programs have a help button. For example, Microsoft Office 2016 has the Help tab with a Help button to open a search.
Features of a help file
Help files can be organized in a variety of ways, including as a table of contents, FAQ, or searchable database.
When you open the help panel in Office 2016, you’ll see a search box. Much like a search engine, you type keywords in the search bar, and it will display topics relevant to the keywords you entered.
The table of contents for Mozilla’s support page is a broad list of categories. Clicking any of these hyperlinks will lead to a list of narrower topics and specific help articles. There’s also a search bar to help you.
Although built-in help can be useful, it may not always have the information you want. If you can’t find what you’re looking for or don’t understand what you’ve found, you can usually ask someone you know, do a Google search, or contact support staff. It can take a little extra time and effort, but learning how to find solutions on your own is a valuable skill—and you’ll get better at it with practice.
Bringing your files with you
When you’re working on a document or other computer file, you can always save it to your computer’s hard drive. Sometimes, you may want to bring your file with you and open it on a different computer. In this lesson, we’ll talk about two ways to save your files so you can access them from almost anywhere.
- Flash drive: Flash drives are small, removable hard drives that plug into the USB ports on your computer. They are relatively inexpensive (usually less than $20) and can be purchased at any store with an electronics section.
- Cloud storage: Cloud storage means you save your files on servers on the Internet using an account with a cloud service. With cloud storage, you can access your files from any computer with Internet access without having to keep track of a physical device.
Flash drives and the cloud can also be used to back up your files. To learn more, check out our lesson on Backing Up Your Files.
Using a flash drive
Flash drives make it easy to carry your important files and documents with you in a portable form. You should always back up the files on your flash drive elsewhere just in case it gets lost or breaks.
To connect a flash drive:
- Insert the flash drive into a USB port on your computer. You should find a USB port on the front, back, or side of your computer (the location may vary depending on whether you have a desktop or laptop).
- If you’re using Windows, a dialog box may appear. If it does, select Open folder to view files. On a Mac, a flash drive icon will usually appear on the desktop.
- If a dialog box does not appear, open Windows Explorer—or Finder if you’re using a Mac—and select the flash drive on the left side of the window. Note that the name of the flash drive may vary.
To work with a flash drive:
Once you’ve connected a flash drive, you can work with it just like any other folder on your computer, including moving and deleting files.
- If you want to copy a file from your computer to the flash drive, click and drag the file from your computer to this window.
- The file will be duplicated, and this new version will be saved to the flash drive. The original version of the file will still be saved to your computer.
- If you want to copy a file from your flash drive to your computer, click and drag the file from this window to your computer.
- If you want to remove a file from your flash drive, click and drag the file to the Recycle Bin on a PC or the Trash can on a Mac. A dialog box may appear. If it does, click yes to confirm that you want to permanently delete the file.
If a dialog box does not appear, you may need to empty the Trash can to permanently delete the file.
To safely remove a flash drive:
When you’re done using a flash drive, don’t remove it from the USB port just yet. You’ll need to make sure to disconnect it properly to avoid damaging files on the drive.
- Right-click the flash drive and select Disconnect (or Eject).
- You can now safely remove the flash drive from the USB port.
If you’re using a Mac, you can also click the Eject button next to the flash drive in Finder to eject it.
Saving files to the cloud
There are many services that allow you to create a free account and save documents, images, and other files to the cloud. Some of the most popular are Google Drive, OneDrive, and Dropbox. The free storage space that comes with these accounts (usually around 15GB) should be plenty if you’re using your account for regular personal, work, or school purposes. If you own a business and want to keep all of your documents in the cloud, you may want to pay your cloud service for more storage.
Unlike physical media, the cloud can’t break or get lost, so you don’t necessarily need to back up the files you keep on it. Files in the cloud are also easier to share so you can collaborate with friends and coworkers. However, when you save something online, there’s always a risk that unauthorized users will try to gain access to your personal information. To protect your files, create a strong password and pay attention to the privacy settings and policies of the cloud service you’re using.
To learn more about services that allow you to store your files in the cloud, check out our tutorials on Google Drive and OneDrive and Office Online.
Exercise Fundamentals of Computer
What is the WEB BROWSING?
- How to SAVE A FILE OR PICTURE from web browser?
- How to CREATE a FOLDER?
- How to save a File?
- What is HARDWARE of PC?
- What is SOFTWARE?
- What is an OS or OPERATING SOFTWARE?
- What is an APPLICATION SOFTWARE?
- What are the INPUT DEVICES?
- What are the OUTPUT DEVICES?
- How an INPUT Device works? Or What are the MAIN WORK of an INPUT Device?
- How an OUTPUT Device works? Or What are the WORKS of an OUTPUT Device?
NOTEPAD
- How to open NOTEPAD in WINDOWS 11?
- How to save a NOTEPAD FILE in a FOLDER?
- How to open an existing file in NOTEPAD and update it?
- How to use “FIND” command in Notepad?
- How to save an updated file in NOTEPAD?
- How to start a new line or a paragraph in NOTEPAD?
- How to save an existing NOTEPAD file with different name in a folder?
Windows 11 overview – Windows-11:-The-basics working
In this article
Windows 11 is a client operating system and includes features that organizations should know about. Windows 11 is built on the same foundation as Windows 10. If you use Windows 10, then Windows 11 is a natural transition. It’s an update to what you know, and what you’re familiar with.
Windows 11 offers innovations focused on enhancing end-user productivity, and is designed to support today’s hybrid work environment.
Your investments in updates and device management are carried forward. For example, many of the same apps and tools can be used in Windows 11. Many of the same security settings and policies can be applied to Windows 11 devices, including PCs. You can use Windows Autopilot with a zero-touch deployment to enrol your Windows devices in Microsoft Intune. You can also use newer features, such as Azure Virtual Desktop and Windows 365 on your Windows 11 devices.
This article lists what’s new, and some of the features & improvements. For more information on what’s new for OEMs, see What’s new in manufacturing, customization, and design.
Security and scanning
The security and privacy features in Windows 11 are similar to Windows 10. Security for your devices starts with the hardware, and includes OS security, application security, and user & identity security. There are features available in the Windows OS to help in these areas. This section describes some of these features. For a more comprehensive view, including zero trust, see Windows security.
- The Windows Security app is built into the OS. This app is an easy-to-use interface, and combines commonly used security features. For example, your get access to virus & threat protection, firewall & network protection, account protection, and more.
- Security baselines includes security settings that already configured, and ready to be deployed to your devices. If you don’t know where to start, or it’s too time consuming to go through all the settings, then you should look at Security Baselines.
- Microsoft Defender Antivirus is built into Windows, and helps protect devices using next-generation security. When used with Microsoft Defender for Endpoint, your organization gets strong endpoint protection, and advanced endpoint protection & response. If you use Intune to manage devices, then you can create policies based on threat levels in Microsoft Defender for Endpoint.
- The application security features help prevent unwanted or malicious code from running, isolate untrusted websites & untrusted Office files, protect against phishing or malware websites, and more.
- Windows Hello for Business helps protect users and identities. It replaces passwords, and uses a PIN or biometric that stays locally on the device. Device manufacturers are including more secure hardware features, such as IR cameras and TPM chips. These features are used with Windows Hello for Business to help protect user identities on your organization devices.
As an admin, going password less help secures user identities. The Windows OS, Microsoft Entra ID, and Intune work together to remove passwords, create more secure policies, and help enforce compliance.
For more information on the security features you can configure, manage, and enforce using Intune, see Protect data and devices with Microsoft Intune.
Easier access to new services, and services you already use
- Windows 365 is a desktop operating system that’s also a cloud service. From another internet-connected device, including Android and macOS devices, you can run Windows 365, just like a virtual machine.
- Microsoft 365 Apps can be installed on Windows 11 clients using the device management tools you’re already familiar with:
- What is Intune?
- Add Microsoft 365 apps to Windows 10 devices with Microsoft Intune
- What is Microsoft Configuration Manager?
- Deploy Microsoft 365 Apps with Microsoft Configuration Manager
- Power Automate for desktop allows your users to create flows in a low-code app to help them with everyday tasks. For example, users can create flows that save a message to OneNote, notify a team when there’s a new Forms response, get notified when a file is added to SharePoint, and more.
Customize the desktop experience
- Snap Layouts, Snap Groups: When you open an app, hover your mouse over the minimize or maximize option. When you do, you can select a different layout for the app:
This feature allows users to customize the sizes of apps on their desktop. And, when you add other apps to the layout, the snapped layout stays in place.
When you add your apps in a Snap Layout, that layout is saved in a Snap Group. In the taskbar, when you hover over an app in an existing snap layout, it shows all the apps in that layout. This feature is the Snap Group. You can select the group, and the apps are opened in the same layout. As you add more Snap Groups, you can switch between them just by selecting the Snap Group.
Users can manage some snap features using the Settings app > System > Multitasking. For more information on the end-user experience, see Snap your windows.
You can also add Snap Layouts to apps your organization creates. For more information, see Support snap layouts for desktop apps on Windows 11.
Starting in Windows 11, version 22H2, you can also activate snap layouts by dragging a window to the top of the screen. The feature is available for both mouse and touch.
For more information on the end-user experience, see Snap your windows.
- Start menu: The Start menu includes some apps that are pinned by default. You can customize the Start menu layout by pinning (and unpinning) the apps you want. For example, you can pin commonly used apps in your organization, such as Outlook, Microsoft Teams, apps your organization creates, and more.
Using policy, you can deploy your customized Start menu layout to devices in your organization. For more information, see Customize the Start menu layout on Windows 11.
Users can manage some Start menu features using the Settings app > Personalization. For more information on the end-user experience, see See what’s on the Start menu.
- Taskbar: You can also pin (and unpin) apps on the Taskbar. For example, you can pin commonly used apps in your organization, such as Outlook, Microsoft Teams, apps your organization creates, and more.
Using policy, you can deploy your customized Taskbar to devices in your organization. For more information, see Customize the Taskbar on Windows 11.
Users can manage some Taskbar features using the Settings app > Personalization. For more information on the end-user experience, see:
- Customize the taskbar notification area
- Pin apps and folders to the desktop or taskbar
- Widgets: Widgets are available on the Taskbar. It includes a personalized feed that could be weather, calendar, stock prices, news, and more:
You can enable or disable this feature using the following policy:
- Group Policy: Computer Configuration\Administrative Templates\Windows Components\widgets
- MDM: ./Device/Vendor/MSFT/Policy/Config/NewsAndInterests/AllowNewsAndInterests
For information on the end-user experience, see Stay up to date with widgets.
- Virtual desktops: On the Taskbar, you can select the Desktops icon to create a new desktop:
Use the desktop to open different apps depending on what you’re doing. For example, you can create a Travel desktop that includes web sites and apps that are focused on travel.
Using policy, you can deploy a customized Taskbar to devices in your organization. For more information, see Customize the Taskbar on Windows 11.
Users can manage some desktop features using Settings app > System > Multitasking. For more information on the end-user experience, see Multiple desktops in Windows.
Use your same apps, and new apps, improved
- Starting with Windows 11, users in the Windows Insider program can download and install Android™️ apps from the Microsoft Store. This feature is called the Windows Subsystem for Android, and allows users to use Android apps on their Windows devices, similar to other apps installed from the Microsoft Store.
Users open the Microsoft Store, install the Amazon Appstore app, and sign in with their Amazon account. When they sign in, they can search, download, and install Android apps.
- Your Windows 10 apps also work on Windows 11. App Assure is also available if there are some issues.
You can continue to use MSIX packages for your UWP, Win32, WPF, and Win Form desktop application files. Continue to use Windows Package Manager to install Windows apps. You can create Azure virtual desktops that run Windows 11. Use Azure Virtual desktop with MSIX app attach to virtualize desktops and apps. For more information on these features.
In the Settings app > Apps, users can manage some of the app settings. For example, they can get apps anywhere, but let the user know if there’s a comparable app in the Microsoft Store. They can also choose which apps start when they sign in.
Using an MDM provider, like Intune, you can create policies that also manage some app settings. For a list of settings, see App Store in Intune.
- If you manage devices using Intune, then you might be familiar with the Company Portal app. Starting with Windows 11, the Company Portal is your private app repository for your organization apps. For more information, see Private app repository in Windows 11.
For public and retail apps, continue using the Microsoft Store.
- Windows Terminal app: This app is included with the OS. On previous Windows versions, it’s a separate download in the Microsoft Store. For more information, see What is Windows Terminal?
This app combines Windows PowerShell, a command prompt, and Azure Cloud Shell all within the same terminal window. You don’t need to open separate apps to use these command-line applications. It has tabs. When you open a new tab, you can choose your command-line application:
If users or groups in your organization do a lot with Windows PowerShell or the command prompt, then use policy to add the Windows Terminal app to the Start menu layout or the Taskbar.
Users can also search for the Terminal app, right-select the app, and pin the app to the Start menu and taskbar.
- The Microsoft Store has a new look, and includes more public and retail apps. For more information on the end-user experience, see:
- Get updates for apps and games in Microsoft Store
- How to open Microsoft Store on Windows
- The Microsoft Edge browser is included with the OS. Internet Explorer (IE) isn’t available in Windows 11. In Microsoft Edge, you can use IE Mode if a website needs Internet Explorer. Open Microsoft Edge, and enter edge://settings/defaultBrowser in the URL.
To save system resources, Microsoft Edge uses sleeping tabs. Users can configure these settings, and more, in edge://settings/system.
Using Group Policy or an MDM provider, such as Intune, you can configure some Microsoft Edge settings. For more information, see Microsoft Edge – Policies and Configure Microsoft Edge policy settings.
Deployment and servicing
- Install Windows 11: The same methods you use to install Windows 10 can also be used to install Windows 11. For example, you can deploy Windows to your devices using Windows Autopilot, Configuration Manager, and other methods. Windows 11 is delivered as an upgrade to eligible devices running Windows 10.
For more information on getting started, see Windows client deployment resources and documentation and Plan for Windows 11.
For more information on the end-user experience, see Ways to install Windows 11.
- Windows Autopilot: If you’re purchasing new devices, you can use Windows Autopilot to set up and preconfigure the devices. When users get the device, they sign in with their organization account (user@contoso.com). In the background, Autopilot gets them ready for use, and deploys any apps or policies you set. You can also use Windows Autopilot to reset, repurpose, and recover devices. Autopilot offers zero touch deployment for admins.
If you have a global or remote workforce, then Autopilot might be the right option to install the OS, and get it ready for use. For more information, see Overview of Windows Autopilot.
- Microsoft Intune is a mobile application management (MAM) and mobile device management (MDM) provider. It helps manage devices, and manage apps on devices in your organization. You configure policies, and then deploy these policies to users and groups. You can create and deploy policies that install apps, configure device features, enforce PIN requirements, block compromised devices, and more.
If you use Group Policy to manage your Windows 10 devices, then you can also use Group Policy to manage Windows 11 devices. In Intune, there are administrative templates and the settings catalogue that include many of the same policies. Group Policy analytics analyse your on-premises group policy objects.
- Windows Updates and Delivery optimization helps manage updates, and manage features on your devices. Starting with Windows 11, the OS feature updates are installed annually. For more information on servicing channels, and what they are, see Servicing channels. Like Windows 10, Windows 11 receives monthly quality updates.
You have options to install updates on your Windows devices, including Intune, Group Policy, Windows Server Update Services (WSUS), and more. For more information, see Assign devices to servicing channels.
Some updates are large, and use bandwidth. Delivery optimization helps reduce bandwidth consumption. It shares the work of downloading the update packages with multiple devices in your deployment. Windows 11 updates are smaller, as they only pull-down source files that are different. You can create policies that configure delivery optimization settings. For example, set the maximum upload and download bandwidth, set caching sizes, and more.
For more information, see Delivery Optimization for Windows updates.
For more information on the end-user experience, see:
- Installation & updates
- Manage updates in Windows
Education and apps
Windows 11 SE is a new edition of Windows designed for education. It runs on low-cost devices, and runs essential apps, including Microsoft 365. For more information, see Windows 11 SE for Education.
Windows 11 requirements
In this article
- Hardware requirements
- OS requirements
- Feature-specific requirements
- Virtual machine support
This article lists the system requirements for Windows 11. Windows 11 is also supported on a virtual machine (VM).
Hardware requirements
To install or upgrade to Windows 11, devices must meet the following minimum hardware requirements:
- Processor: 1 gigahertz (GHz) or faster with two or more cores on a compatible 64-bit processor or system on a chip (SoC).
- Memory: 4 gigabytes (GB) or greater.
- Storage: 64 GB or greater available disk space.
Note
There might be more storage requirements over time for updates, and to enable specific features within the OS. For more information, see Windows 11 specifications.
- Graphics card: Compatible with DirectX 12 or later, with a WDDM 2.0 driver.
- System firmware: UEFI, Secure Boot capable.
- TPM: Trusted Platform Module (TPM) version 2.0.
- Display: High definition (720p) display, 9″ or greater monitor, 8 bits per color channel.
- Internet connection: Internet connectivity is necessary to perform updates, and to download and use some features.
- Windows 11 Home edition requires an internet connection and a Microsoft Account to complete device setup on first use.
OS requirements
To upgrade directly to Windows 11, eligible Windows 10 devices must meet both of the following criteria:
- Running Windows 10, version 2004 or later.
- Installed the September 14, 2021 security update or later.
Note
- S mode is only supported on the Home edition of Windows 11.
- If you’re running a different edition of Windows in S mode, before upgrading to Windows 11, first switch out of S mode.
- To switch a device out of Windows 10 in S mode also requires internet connectivity. If you switch out of S mode, you can’t switch back to S mode later.
Feature-specific requirements
Some features in Windows 11 have requirements beyond the minimum hardware requirements.
- 5G support: requires 5G capable modem.
- Auto HDR: requires an HDR monitor.
- BitLocker to Go: requires a USB flash drive. This feature is available in Windows Pro and above editions.
- Client Hyper-V: requires a processor with second-level address translation (SLAT) capabilities. This feature is available in Windows Pro editions and greater.
- Direct Storage: requires an NVMe SSD to store and run games that use the Standard NVM Express Controller driver and a DirectX12 GPU with Shader Model 6.0 support.
- DirectX 12 Ultimate: available with supported games and graphics chips.
- Presence: requires sensor that can detect human distance from device or intent to interact with device.
- Intelligent Video Conferencing: requires video camera, microphone, and speaker (audio output).
- Multiple Voice Assistant: requires a microphone and speaker.
- Snap: three-column layouts require a screen that is 1920 effective pixels or greater in width.
- Mute and unmute: from Taskbar requires video camera, microphone, and speaker (audio output). App must be compatible with feature to enable global mute/unmute.
- Spatial Sound: requires supporting hardware and software.
- Microsoft Teams: requires video camera, microphone, and speaker (audio output).
- Touch: requires a screen or monitor that supports multi-touch.
- Two-factor authentication: requires use of PIN, biometric (fingerprint reader or illuminated infrared camera), or a phone with Wi-Fi or Bluetooth capabilities.
- Voice Typing: requires a PC with a microphone.
- Wake on Voice: requires Modern Standby power model and microphone.
- Wi-Fi 6E: requires new WLAN IHV hardware and driver and a Wi-Fi 6E capable AP/router.
- Windows Hello: requires a camera configured for near infrared (IR) imaging or fingerprint reader for biometric authentication. Devices without biometric sensors can use Windows Hello with a PIN or portable Microsoft compatible security key. For more information, see IT tools to support Windows 10, version 21H1.
- Windows Projection: requires a display adapter that supports Windows Display Driver Model (WDDM) 2.0 and a Wi-Fi adapter that supports Wi-Fi Direct.
- Xbox app: requires an Xbox Live account, which isn’t available in all regions. Go to the Xbox Live Countries and Regions page for the most up-to-date information on availability. Some features in the Xbox app require an active Xbox Game Pass subscription.
Virtual machine support
The following configuration requirements apply to VMs running Windows 11.
- Generation: 2
Note
In-place upgrade of existing generation 1 VMs to Windows 11 isn’t possible.
- Storage: 64 GB or greater disk space.
- Security:
- Azure: Trusted launch with vTPM enabled.
- Hyper-V: Secure boot and TPM enabled.
- General settings: Secure boot capable, virtual TPM enabled.
- Memory: 4 GB or greater.
- Processor: Two or more virtual processors.
- The VM host processor must also meet Windows 11 processor requirements.
Note
There may be some instances where this requirement for the VM host doesn’t apply. For more information, see Options for using Windows 11 with Mac computers.
- Procedures to configure required VM settings depend on the VM host type. For example, VM hosts running Hyper-V, virtualization (VT-x, VT-d) must be enabled in the BIOS. Virtual TPM 2.0 is emulated in the guest VM independent of the Hyper-V host TPM presence or version.
Plan for Windows 11
In this article
- Deployment planning
- Determine eligibility
- Windows 11 availability
- Windows 11 readiness considerations
This article provides guidance to help you plan for Windows 11 in your organization.
Deployment planning
Since Windows 11 is built on the same foundation as Windows 10, you can use the same deployment capabilities, scenarios, and tools—and the same basic deployment strategy that you use today for Windows 10. You’ll need to review and update your servicing strategy to adjust for changes in Servicing and support for Windows 11.
At a high level, this strategy should include the following steps:
- Create a deployment plan
- Define readiness criteria
- Evaluate infrastructure and tools
- Determine application readiness
- Define your servicing strategy
If you’re looking for ways to optimize your approach to deploying Windows 11, or if deploying a new version of an operating system isn’t a familiar process for you, some items to consider are provided below:
Determine eligibility
As a first step, you’ll need to know which of your current devices meet the Windows 11 hardware requirements. Most devices purchased in the last 18-24 months will be compatible with Windows 11. Verify that your device meets or exceeds Windows 11 requirements to ensure it’s compatible.
Microsoft is currently developing analysis tools to help you evaluate your devices against the Windows 11 hardware requirements. When Windows 11 reaches general availability, users running Windows 10 Home, Pro, and Pro for Workstations will be able to use the PC Health Check app to determine their eligibility for Windows 11. Users running Windows 10 Enterprise and Education editions should rely on their IT administrators to let them know when they’re eligible for the upgrade.
Enterprise organizations looking to evaluate device readiness in their environments can expect this capability to be integrated into existing Microsoft tools, such as Endpoint analytics and Update Compliance. This capability will be available when Windows 11 is generally available. Microsoft is also working with software publishing partners to facilitate adding Windows 11 device support into their solutions.
Windows 11 availability
The availability of Windows 11 will vary according to a device’s hardware and whether the device receives updates directly, or from a management solution that is maintained by an IT administrator.
Managed devices
Managed devices are devices that are under organizational control. Managed devices include those devices managed by Microsoft Intune, Microsoft Configuration Manager, or other endpoint management solutions.
If you manage devices on behalf of your organization, you’ll be able to upgrade eligible devices to Windows 11 using your existing deployment and management tools at no cost when the upgrade reaches general availability. Organizations that use Windows Update for Business will have added benefits, such as:
- Ensuring that devices that don’t meet the minimum hardware requirements aren’t automatically offered the Windows 11 upgrade.
- More insight into safeguard holds. While safeguard holds will function for Windows 11 devices just as they do for Windows 10 today, administrators using Windows Update for Business will have access to information on which safeguard holds are preventing individual devices from taking the upgrade to Windows 11.
Note
Also, Windows 11 has new Microsoft Software License Terms. If you are deploying with Windows Update for Business or Windows Server Update Services, you are accepting these new license terms on behalf of the users in your organization.
Unmanaged devices
Unmanaged devices are devices that aren’t managed by an IT administrator on behalf of an organization. For operating system (OS) deployment, these devices aren’t subject to organizational policies that manage upgrades or updates.
Windows 11 will be offered to eligible Windows 10 devices beginning later in the 2021 calendar year. Messaging on new devices will vary by PC manufacturer, but users will see labels such as This PC will upgrade to Windows 11 once available on products that are available for purchase.
The Windows 11 upgrade will be available initially on eligible, unmanaged devices to users who manually seek the upgrade through Windows Update. As with all Windows Update managed devices, the Windows Update Settings page will confirm when a device is eligible, and users can upgrade if they choose to.
Just like Windows 10, the machine learning-based intelligent rollout process will be used when rolling out upgrades. Machine learning uses a combination of testing, close partner engagement, feedback, diagnostic data, and real-life insights to manage quality. This process improves the update experience and ensures that devices first nominated for updates are the devices likely to have a seamless experience. Devices that might have compatibility issues with the upgrade get the benefit of resolving these issues before the upgrade is offered.
Windows 11 readiness considerations
The recommended method to determine if your infrastructure, deployment processes, and management tools are ready for Windows 11 is to join the Windows Insider Program for Business. As a participant in the Release Preview Channel, you can validate that your devices and applications work as expected, and explore new features.
As you plan your endpoint management strategy for Windows 11, consider moving to cloud-based mobile device management (MDM), such as Microsoft Intune. If a cloud-only approach isn’t right for your organization yet, you can still modernize and streamline essential pieces of your endpoint management strategy as follows:
- Create a cloud management gateway (CMG) to manage Configuration Manager clients over the internet.
- Attach your existing Configuration Management estate to the cloud with tenant attach so you can manage all devices from within the Microsoft Intune admin center.
- Use co-management to concurrently manage devices using both Configuration Manager and Microsoft Intune. This concurrent management allows you to take advantage of cloud-powered capabilities like Conditional Access.
For more information on the benefits of these approaches, see Cloud Attach Your Future: The Big 3.
The introduction of Windows 11 is also a good time to review your hardware refresh plans and prioritize eligible devices to ensure an optimal experience for your users.
Servicing and support
Along with user experience and security improvements, Windows 11 introduces enhancements to Microsoft’s servicing approach based on your suggestions and feedback.
Quality updates: Windows 11 and Windows 10 devices will receive regular monthly quality updates to provide security updates and bug fixes.
Feature updates: Microsoft will provide a single Windows 11 feature update annually, targeted for release in the second half of each calendar year.
Lifecycle:
- Home, Pro, Pro for Workstations, and Pro for Education editions of Windows 11 will receive 24 months of support from the general availability date.
- Enterprise and Education editions of Windows 11 will be supported for 36 months from the general availability date.
When Windows 11 reaches general availability, a consolidated Windows 11 update history is available, similar to what is available today for Windows 10. Similarly, the Windows release health hub will offer quick access to Windows 11 servicing announcements, known issues, and safeguard holds.
It’s important that organizations have adequate time to plan for Windows 11. Microsoft also recognizes that many organizations will have a mix of Windows 11 and Windows 10 devices across their ecosystem. Devices on in-service versions of Windows 10 will continue to receive monthly Windows 10 security updates through 2025, and incremental improvements to Windows 10 to support ongoing Microsoft 365 deployments. For more information, see the Windows 10 release information page, which offers information about the Windows 10 General Availability Channel and Long-term Servicing Channel (LTSC) releases.
Application compatibility
Microsoft’s compatibility promise for Windows 10 is maintained for Windows 11. Data from the App Assure program shows that Windows 10 compatibility rates are over 99.7% for enterprise organizations, including line of business (LOB) apps. Microsoft remains committed to ensuring that the apps you rely upon continue to work as expected when you upgrade. Windows 11 is subject to the same app compatibility validation requirements that are in place for Windows 10 today, for both feature and quality updates.
App Assure and Test Base for Microsoft 365
If you run into compatibility issues or want to ensure that your organization’s applications are compatible from day one, App Assure and Test Base for Microsoft 365 can help.
- App Assure: With enrolment in the App Assure service, any app compatibility issues that you find with Windows 11 can be resolved. Microsoft will help you remedy application issues at no cost. Since 2018, App Assure has evaluated almost 800,000 apps, and subscriptions are free for eligible customers with 150+ seats.
- Test Base for Microsoft 365: Test Base is a cloud testing platform that can help you evaluate applications readiness for Windows 11 upgrade or migration. IT administrators, software publishers, and system integrators can find desired test cases throughout the entire Windows validation lifecycle. Tests include, but aren’t limited to, in-place upgrade validation, monthly quality updates, and tests against Windows preview features.
You might already be using App Assure and Test Base in your Windows 10 environment. Both of these tools will continue to function with Windows 11.
Prepare for Windows 11
In this article
- Infrastructure and tools
- Cloud-based management
- Review servicing approach and policies
- Prepare a pilot deployment
Show 3 more
Windows 10 and Windows 11 are designed to coexist so that you can use the same familiar tools and processes to manage both operating systems. Using a single management infrastructure that supports common applications across both Windows 10 and Windows 11 helps to simplify the migration process. You can analyse endpoints, determine application compatibility, and manage Windows 11 deployments in the same way that you do with Windows 10.
After you evaluate your hardware to see if it meets requirements for Windows 11, it’s a good time to review your deployment infrastructure, tools, and overall endpoint and update management processes and look for opportunities to simplify and optimize. This article provides some helpful guidance to accomplish these tasks.
Infrastructure and tools
The tools that you use for core workloads during Windows 10 deployments can still be used for Windows 11. A few nuanced differences are described below.
Important
Be sure to check with the providers of any non-Microsoft solutions that you use. Verify compatibility of these tools with Windows 11, particularly if they provide security or data loss prevention capabilities.
On-premises solutions
- If you use Windows Server Update Services (WSUS), you’ll need to sync the new Windows 11 product category. After you sync the product category, you’ll see Windows 11 offered as an option. If you would like to validate Windows 11 prior to release, you can sync the Windows Insider Pre-release category as well.
Note
During deployment, you will be prompted to agree to the Microsoft Software License Terms on behalf of your users. Additionally, you will not see an x86 option because Windows 11 is not supported on 32-bit architecture.
- If you use Microsoft Configuration Manager, you can sync the new Windows 11 product category and begin upgrading eligible devices. If you would like to validate Windows 11 prior to release, you can sync the Windows Insider Pre-release category as well.
Note
Configuration Manager will prompt you to accept the Microsoft Software License Terms on behalf of the users in your organization.
Cloud-based solutions
- If you use Windows Update for Business policies, you’ll need to use the Target Version capability (either through policy or the Windows Update for Business deployment service) rather than using feature update deferrals alone to upgrade from Windows 10 to Windows 11. Feature update deferrals are great for moving to newer versions of your current product (for example, Windows 10, version 20H2 to 21H1), but won’t automatically move devices between products (Windows 10 to Windows 11).
- If you use Microsoft Intune and have a Microsoft 365 E3 license, you’ll be able to use the feature update deployments page to select Windows 11, version 21H2 and upgrade Windows 10 devices to Windows 11. You can also continue using the same update experience controls to manage Windows 10 and Windows 11 on the Update Rings page in Intune. If you aren’t ready to move to Windows 11, keep the feature update version set at the version you’re currently on. When you’re ready to start upgrading devices, change the feature update deployment setting to specify Windows 11.
- In Group Policy, Select target Feature Update version has two entry fields after taking the 9/1/2021 optional update (KB5005101) or a later update: Product Version and Target Version.
- The product field must specify Windows 11 in order for devices to upgrade to Windows 11. If only the target version field is configured, the device will be offered matching versions of the same product.
- For example, if a device is running Windows 10, version 2004 and only the target version is configured to 21H1, this device will be offered version Windows 10, version 21H1, even if multiple products have a 21H1 version.
- Quality update deferrals will continue to work the same across both Windows 10 and Windows 11, which is true regardless of which management tool you use to configure Windows Update for Business policies.
- If you use Microsoft Intune and have a Microsoft 365 E3 license, you’ll be able to use feature update deployments to easily update devices from one release of Windows 10 to another, or to upgrade Windows 10 devices to Windows 11. You can also continue using the same update experience controls to manage Windows 10 and Windows 11. If you aren’t ready to move to Windows 11, keep the feature update version set at the version you’re currently on. When you’re ready to start upgrading devices, change the feature update deployment setting to specify Windows 11.
Note
Endpoints managed by Windows Update for Business will not automatically upgrade to Windows 11 unless an administrator explicitly configures a Target Version using the TargetReleaseVersion setting using a Windows CSP, a feature update profile in Intune, or the Select target Feature Update version setting in a group policy.
Cloud-based management
If you aren’t already taking advantage of cloud-based management capabilities, like those available in the Microsoft Intune family of products, it’s worth considering. In addition to consolidating device management and endpoint security into a single platform, Microsoft Intune can better support the diverse bring-your-own-device (BYOD) ecosystem that is increasingly the norm with hybrid work scenarios. It can also enable you to track your progress against compliance and business objectives while protecting user privacy.
The following are some common use cases and the corresponding Microsoft Intune capabilities that support them:
- Provision and pre-configure new Windows 11 devices: Windows Autopilot enables you to deploy new Windows 11 devices in a “business-ready” state that includes your desired applications, settings, and policies. It can also be used to change the edition of Windows. For example, you can upgrade from Professional to Enterprise edition and gain the use of advanced features. The Windows Autopilot diagnostics page is a new feature that is available when you use in Windows Autopilot to deploy Windows 11.
- Configure rules and control settings for users, apps, and devices: When you enrol devices in Microsoft Intune, administrators have full control over apps, settings, features, and security for both Windows 11 and Windows 10. You can also use app protection policies to require multifactor authentication (MFA) for specific apps.
- Streamline device management for frontline, remote, and onsite workers: Introduced with Windows 10, cloud configuration is a standard, easy-to-manage, device configuration that is cloud-optimized for users with specific workflow needs. It can be deployed to devices running the Pro, Enterprise, and Education editions of Windows 11 by using Microsoft Intune.
If you’re exclusively using an on-premises device management solution (for example, Configuration Manager), you can still use the cloud management gateway, enable tenant attach, or enable co-management with Microsoft Intune. These solutions can make it easier to keep devices secure and up-to-date.
Review servicing approach and policies
Every organization will transition to Windows 11 at its own pace. Microsoft is committed to supporting you through your migration to Windows 11, whether you’re a fast adopter or will make the transition over the coming months or years.
When you think of operating system updates as an ongoing process, you’ll automatically improve your ability to deploy updates. This approach enables you to stay current with less effort, and less impact on productivity. To begin, think about how you roll out Windows feature updates today: which devices, and at what pace.
Next, craft a deployment plan for Windows 11 that includes deployment groups, rings, users, or devices. There are no absolute rules for exactly how many rings to have for your deployments, but a common structure is:
- Preview (first or canary): Planning and development
- Limited (fast or early adopters): Pilot and validation
- Broad (users or critical): Wide deployment
For detailed information, see Create a deployment plan.
Review policies
Review deployment-related policies, taking into consideration your organization’s security objectives, update compliance deadlines, and device activity. Apply changes where you can gain a clear improvement, particularly regarding the speed of the update process or security.
Validate apps and infrastructure
To validate that your apps, infrastructure, and deployment processes are ready for Windows 11, join the Windows Insider Program for Business, and opt into the Release Preview Channel.
If you use Windows Server Update Services (WSUS), you can deploy directly from the Windows Insider Pre-release category using one of the following processes:
- Set Manage Preview Builds to Release Preview in Windows Update for Business.
- Use Azure Virtual Desktop and Azure Marketplace images.
- Download and deploy ISOs from Microsoft’s Windows Insider Program ISO Download page.
Regardless of the method you choose, you have the benefit of free Microsoft support when validating pre-release builds. Free support is available to any commercial customer deploying Windows 10 or Windows 11 Preview Builds, once they become available through the Windows Insider Program.
Analytics and assessment tools
If you use Microsoft Intune and have onboarded devices to Endpoint analytics, you’ll have access to a hardware readiness assessment later this year. This tool enables you to quickly identify which of your managed devices are eligible for the Windows 11 upgrade.
Desktop Analytics doesn’t support Windows 11. You must use Endpoint analytics.
Prepare a pilot deployment
A pilot deployment is a proof of concept that rolls out an upgrade to a select number of devices in production, before deploying it broadly across the organization.
At a high level, the tasks involved are:
- Assign a group of users or devices to receive the upgrade.
- Implement baseline updates.
- Implement operational updates.
- Validate the deployment process.
- Deploy the upgrade to devices.
- Test and support the pilot devices.
- Determine broad deployment readiness based on the results of the pilot.
User readiness
Don’t overlook the importance of user readiness to deliver an effective, enterprise-wide deployment of Windows 11. Windows 11 has a familiar design, but your users will see several enhancements to the overall user interface. They’ll also need to adapt to changes in menus and settings pages. Therefore, consider the following tasks to prepare users and your IT support staff for Windows 11:
- Create a communications schedule to ensure that you provide the right message at the right time to the right groups of users, based on when they’ll see the changes.
- Draft concise emails that inform users of what changes they can expect to see. Offer tips on how to use or customize their experience. Include information about support and help desk options.
- Update help desk manuals with screenshots of the new user interface, the out-of-box experience for new devices, and the upgrade experience for existing devices.
Working On Windows 11
Meet Windows 11: The basics
Get to know your way around Windows 11, from where to search to how to stay organized:
Try it!
Universal search
Select Search on the taskbar or press Windows logo key + S, then type what you want to find. You’ll get personalized search results for people, email, and files in local and shared sites, or from the web.
Desktop groups
Use desktops to keep different tasks organized or for different parts of your life, like work and home. To create a new desktop, select Task view > New desktop. To switch between desktops, select Task view .
To change a background on a desktop, in Task view, right-click (or press and hold) on the desktop and select Choose background.
Microsoft account
Your Microsoft account is your free all-access pass to Microsoft’s premier services. Sign in with your Microsoft account to access passwords, files, and more across your devices.
Learn more about Microsoft accounts
Keyboard shortcuts
No mouse? No problem! Keyboard shortcuts provide alternate ways to do something you’d typically do with a mouse.
Press this | To do this |
|---|---|
Windows logo key + Left arrow | Maximize the app or desktop window to the left side of the screen |
Windows logo key + V | Open the clipboard history |
Windows logo key + semicolon (;) | Open emoji panel |
Windows logo key + H | Open voice typing |
Windows logo key + S | Open Search |
OneDrive
Save your photos and files in the cloud with OneDrive and access them from any device, anywhere. 5 GB of free OneDrive storage comes with your Microsoft account.
Explore Tips
Open Tips to discover surprising and useful things you can do with Windows.
Get Started app
Get your PC set up just the way you want it with the Get Started app.
WEB BROWSING
Web browsing is the act of exploring and navigating the internet using a web browser, such as Chrome, Edge, or Safari. Think of it like flipping through the pages of a vast digital library where you can access websites, articles, videos, images, and so much more.
Web browsers allow you to search for information, shop online, connect with others, watch content, and interact with various services. It’s essentially your gateway to the endless world of online resources and entertainment. Does this make sense? Let me know if you’d like to dive deeper into how browsers work or anything specific about the internet!
What is WEB BROWSER?
A web browser is a software application that allows you to access, view, and interact with websites and other content on the internet. It acts as a bridge between you and the online world, interpreting web content written in various languages like HTML, CSS, and JavaScript, and displaying it in a way that’s easy for you to understand.
Popular web browsers include Google Chrome, Microsoft Edge, Safari, and Mozilla Firefox. Each browser comes with features like search bars, bookmarks, tabs, and privacy settings to enhance your browsing experience. It’s essentially your portal to explore everything the internet has to offer! Do you have a specific web browser in mind you’d like to learn more about?
Browsing in a web browser
Browsing the web using a web browser is quite simple! Here are some basic steps to help you get started:
- Open a Web Browser: Launch a browser like Google Chrome, Microsoft Edge, Safari, or Firefox on your device.
- Enter a URL or Search Query: In the address bar at the top of the browser, type either:
- A website’s URL (e.g., www.example.com) to go directly to that website.
- A search term (e.g., “how to cook pasta”) and press Enter to use the browser’s default search engine.
- Navigate Websites: Once you’re on a website, you can:
- Click on links to visit related pages.
- Use the back/forward buttons to revisit previous pages.
- Scroll to explore the content on each webpage.
- Open Multiple Tabs: Use tabs to browse several websites at once. You can open a new tab by clicking the “+” button at the top.
- Bookmark Favourites: Save websites you like for quick access later by bookmarking them.
- Explorer Browser Settings: Check out additional features like downloading files, enabling private browsing, or customizing your preferences.
Downloading a file from a web browser is straightforward! Here’s how you can do it:
1. Find the Download Link
- Look for a link or button on the website that indicates a download, such as “Download,” “Get File,” or similar.
- It might also be a file name, an icon, or an attachment.
2. Click on the Link/Button
- Clicking it will usually start the download immediately.
- Sometimes, you may be prompted to choose the location where you want to save the file.
3. Save the File
- If prompted, select a folder on your computer where you’d like to save the file, then click “Save.”
- If it starts downloading without asking, the file is typically saved to your Downloads folder by default.
4. Check the Progress
- Most browsers show download progress at the bottom or in a separate downloads section.
- You can click on the progress indicator to view or open the file once it’s downloaded.
5. Access the File
- After downloading, go to the folder where it was saved, or use the browser’s “Downloads” option to locate and open it.
Logging into a website is pretty straightforward! Here’s what to do:
- Go to the website: Open your browser and type in the web address.
- Find the login page: Look for a “Sign In” or “Login” button—usually at the top right.
- Enter your details: Type in your username/email and password.
- Click ‘Login’ or ‘Sign In’: This should take you to your account.
- Use two-factor authentication (if enabled): Some sites may ask for a code sent to your email or phone.
If you’re having trouble, check that your details are correct or try resetting your password. Is there a specific website you need help with?
MS Office


Shortcut Keys System!!
1) CTRL + A = Select text
2) CTRL + B = Bold text
3) CTRL + C = Copy text
4) CTRL + D = Open font formatting window
5) CTRL + E = Center text
6) CTRL + F = Find a phrase
7) CTRL + G = Go To a specific page or bookmark
8) CTRL + H = Replace text with another text
9) CTRL + I = Italicize text
10) CTRL + J = Justify text
11) CTRL + K = Open Insert Hyperlink window
12) CTRL + L = Left align text
13) CTRL + M = Indent a paragraph from the left
14) CTRL + N = Open new Word document
15) CTRL + O = Open an existing Word document
16) CTRL + P = Print Word document
17) CTRL + Q = Remove paragraph formatting
18) CTRL + R = Right align text
19) CTRL + S = Save Word document
20) CTRL + T = Create a hanging indent
21) CTRL + U = Underline text
22) CTRL + V = Paste text
23) CTRL + W = Close Word document
24) CTRL + X = Cut text
25) CTRL + Y = Redo an action previously undone
26) CTRL + Z = Undo a previous action
FUNCTION KEYS
F1 . . . . . . . . . . . . . . . . . . . . . . Help
F2 . . . . . . . . . . . . . . . . . . . . . Rename selected object
F3 . . . . . . . . . . . . . . . . . . . . . Find all files
F4 . . . . . . . . . . . . . . . . . . . . . Opens file list drop-down in dialogs
F5 . . . . . . . . . . . . . . . . . . . . . Refresh current window
F6 . . . . . . . . . . . . . . . . . . . . . Shifts focus in Windows Explorer
F10 . . . . . . . . . . . . . . . . . . . . Activates menu bar options
ALT+TAB . . . . . . . . . . . . . . . . Cycles between open applications
ALT+F4 . . . . . . . . . . . . . . . . . Quit program, close current window
ALT+F6 . . . . . . . . . . . . . . . . . Switch between current program windows
ALT+ENTER. . . . . . . . . . . . . . Opens properties dialog
ALT+SPACE . . . . . . . . . . . . . . System menu for current window
ALT+¢ . . . . . . . . . . . . . . . . . . opens drop-down lists in dialog boxes
BACKSPACE . . . . . . . . . . . . . Switch to parent folder
CTRL+ESC . . . . . . . . . . . . . . Opens Start menu
CTRL+ALT+DEL . . . . . . . . . . Opens task manager, reboots the computer
CTRL+TAB . . . . . . . . . . . . . . Move through property tabs
CTRL+SHIFT+DRAG . . . . . . . Create shortcut (also right-click, drag)
CTRL+DRAG . . . . . . . . . . . . . Copy File
ESC . . . . . . . . . . . . . . . . . . . Cancel last function
SHIFT . . . . . . . . . . . . . . . . . . Press/hold SHIFT, insert CD-ROM to bypass auto-play
SHIFT+DRAG . . . . . . . . . . . . Move file
SHIFT+F10. . . . . . . . . . . . . . . Opens context menu (same as right-click)
SHIFT+DELETE . . . . . . . . . . . Full wipe delete (bypasses Recycle Bin)
ALT+underlined letter . . . . Opens the corresponding menu
PC Keyboard Shortcuts
Document Cursor Controls
HOME . . . . . . . . . . . . . . to beginning of line or far left of field or screen
END . . . . . . . . . . . . . . . . to end of line, or far right of field or screen
CTRL+HOME . . . . . . . . to the top
CTRL+END . . . . . . . . . . to the bottom
PAGE UP . . . . . . . . . . . . moves document or dialog box up one page
PAGE DOWN . . . . . . . . moves document or dialog down one page
ARROW KEYS . . . . . . . move focus in documents, dialogs, etc.
CTRL+ > . . . . . . . . . . . . next word
CTRL+SHIFT+ > . . . . . . selects word
Windows Explorer Tree Control
Numeric Keypad * . . . Expand all under current selection
Numeric Keypad + . . . Expands current selection
Numeric Keypad – . . . Collapses current selection
¦ . . . . . . . . . . . . . . . . . . Expand current selection or go to first child
‰ . . . . . . . . . . . . . . . . . . Collapse current selection or go to parent
Special Characters
‘ Opening single quote . . . alt 0145
’ Closing single quote . . . . alt 0146
“ Opening double quote . . . alt 0147
“ Closing double quote. . . . alt 0148
En dash. . . . . . . . . . . . . . . alt 0150
Em dash . . . . . . . . . . . . . . alt 0151
Ellipsis. . . . . . . . . . . . . . . . alt 0133
• Bullet . . . . . . . . . . . . . . . . alt 0149
® Registration Mark . . . . . . . alt 0174
© Copyright . . . . . . . . . . . . . alt 0169
™ Trademark . . . . . . . . . . . . alt 0153
° Degree symbol. . . . . . . . . alt 0176
¢ Cent sign . . . . . . . . . . . . . alt 0162
1⁄4 . . . . . . . . . . . . . . . . . . . . . alt 0188
1⁄2 . . . . . . . . . . . . . . . . . . . . . alt 0189
3⁄4 . . . . . . . . . . . . . . . . . . . . . alt 0190
PC Keyboard Shortcuts
Creating unique images in a uniform world! Creating unique images in a uniform world!
é . . . . . . . . . . . . . . . alt 0233
É . . . . . . . . . . . . . . . alt 0201
ñ . . . . . . . . . . . . . . . alt 0241
÷ . . . . . . . . . . . . . . . alt 0247
File menu options in current program
Alt + E Edit options in current program
F1 Universal help (for all programs)
Ctrl + A Select all text
Ctrl + X Cut selected item
Shift + Del Cut selected item
Ctrl + C Copy selected item
Ctrl + Ins Copy selected item
Ctrl + V Paste
Shift + Ins Paste
Home Go to beginning of current line
Ctrl + Home Go to beginning of document
End Go to end of current line
Ctrl + End Go to end of document
Shift + Home Highlight from current position to beginning of line
Shift + End Highlight from current position to end of line
Ctrl + f Move one word to the left at a time
Ctrl + g Move one word to the right at a time
MICROSOFT® WINDOWS® SHORTCUT KEYS
Alt + Tab Switch between open applications
Alt +
Shift + Tab
Switch backwards between open
applications
Alt + Print
Screen
Create screen shot for current program
Ctrl + Alt + Del Reboot/Windows® task manager
Ctrl + Esc Bring up start menu
Alt + Esc Switch between applications on taskbar
F2 Rename selected icon
F3 Start find from desktop
F4 Open the drive selection when browsing
F5 Refresh contents
Alt + F4 Close current open program
Ctrl + F4 Close window in program
Ctrl + Plus
Key
Automatically adjust widths of all columns
in Windows Explorer
Alt + Enter Open properties window of selected icon
or program
Shift + F10 Simulate right-click on selected item
Shift + Del Delete programs/files permanently
Holding Shift
During Bootup
Boot safe mode or bypass system files
Holding Shift
During Bootup
When putting in an audio CD, will prevent
CD Player from playing
WINKEY SHORTCUTS
WINKEY + D Bring desktop to the top of other windows
WINKEY + M Minimize all windows
WINKEY +
SHIFT + M
Undo the minimize done by WINKEY + M
and WINKEY + D
WINKEY + E Open Microsoft Explorer
WINKEY + Tab Cycle through open programs on taskbar
WINKEY + F Display the Windows® Search/Find feature
WINKEY +
CTRL + F
Display the search for computers window
WINKEY + F1 Display the Microsoft® Windows® help
WINKEY + R Open the run window
WINKEY +
Pause /Break
Open the system properties window
WINKEY + U Open utility manager
WINKEY + L Lock the computer (Windows XP® & later)
OUTLOOK® SHORTCUT KEYS
Alt + S Send the email
Ctrl + C Copy selected text
Ctrl + X Cut selected text
Ctrl + P Open print dialog box
Ctrl + K Complete name/email typed in address bar
Ctrl + B Bold highlighted selection
Ctrl + I Italicize highlighted selection
Ctrl + U Underline highlighted selection
Ctrl + R Reply to an email
Ctrl + F Forward an email
Ctrl + N Create a new email
Ctrl + Shift + A Create a new appointment to your calendar
Ctrl + Shift + O Open the outbox
Ctrl + Shift + I Open the inbox
Ctrl + Shift + K Add a new task
Ctrl + Shift + C Create a new contact
Ctrl + Shift+ J Create a new journal entry
WORD® SHORTCUT KEYS
Ctrl + A Select all contents of the page
Ctrl + B Bold highlighted selection
Ctrl + C Copy selected text
Ctrl + X Cut selected text
Ctrl + N Open new/blank document
Ctrl + O Open options
Ctrl + P Open the print window
Ctrl + F Open find box
Ctrl + I Italicize highlighted selection
Ctrl + K Insert link
Ctrl + U Underline highlighted selection
Ctrl + V Paste
Ctrl + Y Redo the last action performed
Ctrl + Z Undo last action
Ctrl + G Find and replace options
Ctrl + H Find and replace options
Ctrl + J Justify paragraph alignment
Ctrl + L Align selected text or line to the left
Ctrl + Q Align selected paragraph to the left
Ctrl + E Align selected
MS-WORD 2024
Opening Microsoft Word in Windows 11 is a breeze! Here are a few ways to do it:
- Via the Start Menu
- Click the Start button (Windows icon).
- Type Word into the search bar.
- Click Microsoft Word from the search results.
- Using the Run Command
- Press Windows + R to open the Run dialog.
- Type winword and press Enter.
- From the Taskbar or Desktop
- If Word is pinned to the taskbar, just click its icon.
- If you have a shortcut on your desktop, double-click it.
- Using Voice Commands (if enabled)
- If Windows Speech Recognition or Copilot in Windows is enabled, you can say “Open Microsoft Word”.
Microsoft Word 2024 in Windows 11 has a variety of powerful tools to enhance your productivity. Here are some key features and tools you might find useful:
1. Basic Editing & Formatting Tools
- Use the Home tab for font styles, text alignment, bullets, and numbering.
- The Styles section lets you quickly format text with predefined styles.
2. Collaboration & Cloud Integration
- Work on documents together using Real-Time Collaboration with Microsoft 365.
- Save files directly to OneDrive for easy access from anywhere.
3. AI-Powered Writing Assistance
- Copilot in Word helps refine text, generate summaries, and improve content flow.
- Use the built-in Editor tool for spelling, grammar, and clarity suggestions.
4. Design & Layout Tools
- The Design tab offers themes, colors, and page formatting.
- Insert tables, charts, and SmartArt for better visual representation.
5. Advanced Document Tools
- Use Track Changes in the Review tab to collaborate on edits.
- The References tab helps with citations, footnotes, and bibliographies.
6. Macros & Automation
- Automate repetitive tasks using Macros under the View tab.
- Use shortcuts like Ctrl + B for bold, Ctrl + C for copy, and Ctrl + V for paste.
Are you looking for guidance on a specific tool or feature in Word 2024?
The Ribbon in Microsoft Word 2024 on Windows 11 is your central hub for all editing, formatting, and design tools. It sits at the top of the window and is divided into different tabs, each containing specific features.
Key Aspects of the Ribbon
- Tabs: The Ribbon is divided into tabs like Home, Insert, Design, Layout, References, Review, View, and more.
- Groups: Each tab has groups of related commands. For example, the Home tab includes groups like Font, Paragraph, Styles.
- Commands: Inside each group, you’ll find individual buttons for specific actions, such as Bold, Italic, Underline in the Font group.
How to Work with the Ribbon
- Expanding & Collapsing the Ribbon
- Click the small arrow in the top-right corner or press Ctrl + F1 to collapse/expand the Ribbon for a cleaner workspace.
- Using the Quick Access Toolbar
- Customize the toolbar to include frequently used commands like Save, Undo, Redo.
- Contextual Tabs
- Special tabs appear when working with tables, pictures, or drawings, like Picture Format or Table Tools.
- Customizing the Ribbon
- Go to File > Options > Customize Ribbon to add/remove commands based on your workflow.
It looks like you meant “Ribbon” in Microsoft Word 2024! The Ribbon is the central toolbar in Word that organizes commands into different tabs for easy access.
How to Use the Ribbon in Word 2024
- Navigating the Ribbon
- The Ribbon consists of multiple tabs like Home, Insert, Design, Layout, References, Review, View, and more.
- Each tab contains groups of related commands (e.g., the Font group in the Home tab has Bold, Italics, and Underline options).
- Expanding and Collapsing the Ribbon
- To hide the Ribbon: Press Ctrl + F1 or click the small arrow in the top-right corner.
- To show it again: Click on any tab or press Ctrl + F1 again.
- Using Contextual Tabs
- Some tools appear only when needed, like Table Tools when you insert a table or Picture Format when selecting an image.
- Customizing the Ribbon
- Go to File > Options > Customize Ribbon to modify Ribbon tabs and commands based on your preferences.
- Quick Access Toolbar
- The small toolbar above the Ribbon lets you pin frequently used actions like Save, Undo, Redo.
Creating a document in Microsoft Word 2024 on Windows 11 is simple! Here’s how you can do it:
1. Open Microsoft Word
- Click the Start menu and type Word, then select Microsoft Word.
- If Word is pinned to your taskbar or desktop, just click its icon.
2. Start a New Document
- When Word opens, click Blank Document to start fresh.
- You can also choose from available templates like resumes, reports, or newsletters.
3. Begin Typing and Formatting
- Use the Home tab to change font, size, color, and alignment.
- Add headings and styles using the Styles group in the Ribbon.
4. Save Your Document
- Click File > Save As, then choose a location (e.g., OneDrive, This PC).
- Name your document and select the format (Word Document .docx, PDF, etc.).
5. Enhance Your Document
- Insert images, tables, or charts using the Insert tab.
- Use Review tools like Spell Check and Track Changes to refine your work.
Opening, editing, and saving a document in Microsoft Word 2024 is straightforward! Here’s a quick guide:
Opening a Document
- Launch Microsoft Word 2024 on your computer.
- Click on File > Open.
- Browse to the location of your document and select it.
- Click Open to start working on it.
Editing a Document
- Click anywhere in the document to begin editing.
- Use the toolbar to format text, add images, or make other changes.
- If needed, use Track Changes (under the Review tab) to keep a record of edits.
Saving a Document
- Click File > Save (if you’ve already saved the document before).
- If it’s a new document, click File > Save As.
- Choose a location and enter a file name.
- Select the format (e.g., .docx, .pdf) and click Save.
Previewing and printing a document in Microsoft Word 2024 is simple! Here’s how:
Preview a Document Before Printing
- Open your document in Microsoft Word 2024.
- Click File > Print.
- A preview of your document will appear on the right side of the screen.
- Use the zoom controls to check details before printing.
Print a Document
- Click File > Print.
- Select your printer from the list.
- Choose print settings (e.g., number of copies, page range, orientation).
- Click Print to send the document to the printer.
💡 Shortcut for Print Preview: Press Ctrl + P to quickly access the print preview screen.
Exercise MS-WORD
- How to open MS word?
- How to copy & Pest text in MS word?
- How to change FONT in MS Word?
- How to resize text in MS WORD?
- How to change text colour in MS WORD?
- How to select text in MS WORD?
- How to select whole line or paragraph at once by mouse in MS WORD?
- How to save a file in MS WORD?
- How to check document for spellings correction?
- How to align paragraph or line in MS WORD document?
- How to insert border in paragraph or line in MS WORD?
- How to insert list number or bullets in MS WORD document?
- How to colour a text area in MS WORD document? (Shading)
- How to manage line spacing in MS WORD document?
- How to insert Image in a document in MS WORD?
- How to draw a shape and insert image in Shape in MS WORD document?
- In MS WORD how to insert a smart art & fill images in it?
- How to insert a chart in MS WORD document?
- How to insert online videos in MS WORD document?
- How to insert outer Link in a document in MS WORD?
- How to insert internal Link in a document in MS WORD?
- How to draw or design a Table in a document in MS WORD?
- How to draw page border in MS WORD Document?
- How to colour a page in MS WORD Document?
- How to insert watermark in a document in MS WORD?
- How to set page margin in MS WORD Document?
- How to Write text in 2 or 3 columns in MS WORD Document?
- What is the default paper size of MS WORD Document?
- What is the orientation in MS WORD Document?
- Where to set ZOOM the MS WORD document page?
- How to print the document?
- What are Templates in MS WORD & how to create a template?
Power Point
Creating a Basic Presentation
PowerPoint is the great equalizer. Even if you’re familiar with previous versions of PowerPoint, when it comes to PowerPoint you’re pretty much in the same boat as someone who’s never even heard of presentation software. That’s because the entire PowerPoint interface has changed. As you saw in the Introduction, Microsoft has done away with toolbars, renamed and reorganized menu options, and even axed a couple of features.
Fortunately, the new interface makes quite a bit of sense once you get used to it. That’s what this chapter is for: to familiarize you with PowerPoint by walking you through the creation of a basic bullets-and-background slideshow presentation. You’ll learn how to create a new slideshow, choose a look and feel, add text and slides, print speaker notes and handouts, and finally, how to unveil your masterpiece.
Beginning a New Presentation
You’ve got two basic choices when it comes to creating a new presentation:
- You can start from scratch, using a blank canvas. If you’re familiar with earlier incarnations of the PowerPoint program, or if you’re interested in learning the ins and outs of PowerPoint quickly, then you’ll probably want to choose this option. (As daunting as “from scratch” sounds, you don’t have to do all the work yourself.
- You can create a new presentation based on an existing template, theme, or presentation. A template is a generic presentation file designed for you to reuse. Complete with themes (see the box), background images, and even generic content (such as page numbers and placeholder text), templates let you jump-start your presentation by giving you everything you need except your specific content. If you’re creating a presentation for your local school board, for example, then you’ll need to add the content that describes your findings, conclusions, and suggestions.
Templates are the better option when you need to crank out a presentation in a jiffy. PowerPoint comes with a handful of professionally designed templates and themes, but you can also create presentations based on a template, theme, or presentation that you’ve previously created, or one that you’ve found online and downloaded onto your computer.
PowerPoint divides these two basic choices into six specific options that are based on whether you want to piggyback your new presentation on an existing template, theme, or presentation. When you fire up PowerPoint and select Office button → New, you see the following six choices for creating a presentation, each of which is described in detail in the following sections:
- Blank and recent. Let’s you create either a blank presentation or a presentation based on one of the themes or templates you recently applied to a PowerPoint presentation.
- Installed Templates. Let’s you create a presentation based on one of the handful of generic templates that comes with PowerPoint, such as Classic Photo Album or Corporate Presentation.
- Installed Themes. Let’s you create a presentation based on one of the canned look and feel options that comes with PowerPoint, such as Apex, Metro, or Opulent.
- My templates. Let’s you create a presentation based on a template that you created, or that you downloaded from the Web.
- New from existing. Let’s you load an old presentation into PowerPoint, make changes, and save the newly changed presentation using a new filename.
- Microsoft Office Online. Let’s you hunt for professionally designed templates and themes on Microsoft’s Web site.
Creating a New Presentation from Scratch
When you launch PowerPoint, the program starts you off with a brand-new presentation cleverly named Presentation1.
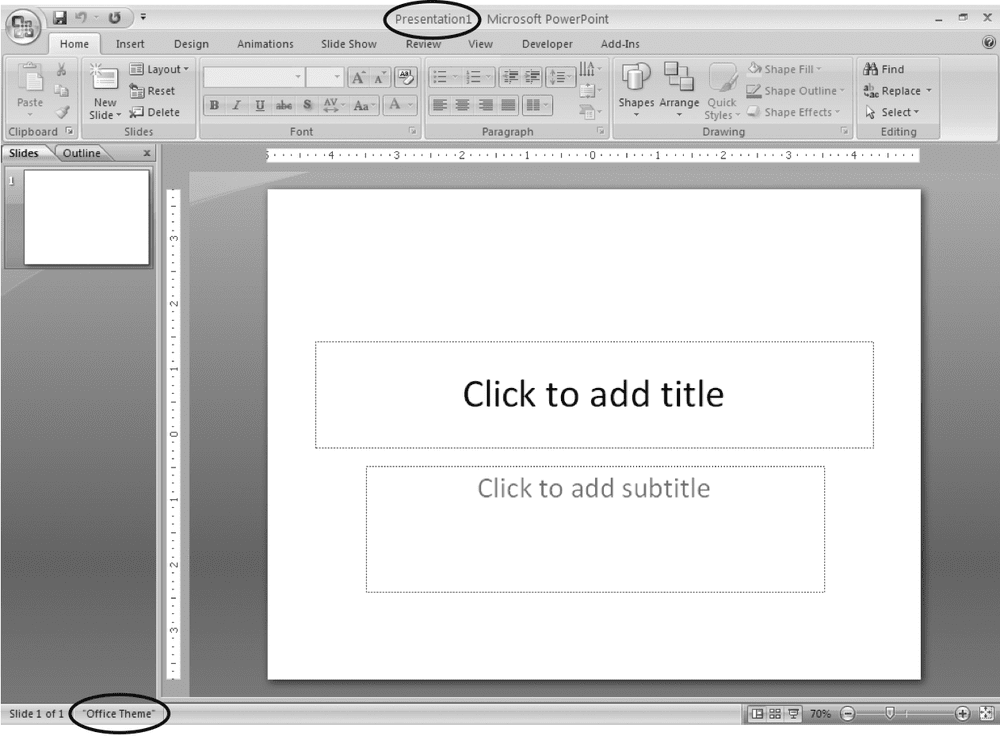
Figure 1-1. PowerPoint calls this a “blank” presentation even though technically it’s not blank at all: It contains placeholders for the first slide’s title and subtitle. PowerPoint hands you to something more colorful and more artfully laid out.
Typically, you dive right in, adding a look and feel (Section 1.2), text, pictures, and so on to the blank presentation PowerPoint hands you. But if you’ve closed or saved your freebie, here’s how you create an additional blank presentation:
NOSTALGIA CORNER: GOOD-BYE, AUTOCONTENT WIZARD
Clear back in 1994, as part of PowerPoint 4—spurred by reports that thousands of folks were firing up PowerPoint and then just sitting there sipping coffee while they stared at the screen, unsure of how to proceed—Microsoft debuted a feature called the AutoContent wizard. The AutoContent wizard asked a series of questions, beginning with what type of presentation you wanted to create, such as “Communicating Bad News” or “Project Post-Mortem”. Then, based on your answer, it suggested possible titles, bullet points, and so on. The result: a quick-and-dirty presentation for next to no effort.
Some folks loved the AutoContent wizard. Others blamed it for the fall of Western civilization, insisting it was responsible for millions of boring, cookie-cutter presentations devoid of meaning. Whether or not those accusations affected Microsoft’s decision to pull the AutoContent wizard from PowerPoint is anyone’s guess. But pull it they did, leaving you just two options for creating a new presentation: from scratch, or from an existing template, theme, or presentation, as described in this chapter.
- Select Office button → New.
The New Presentation window appears.
Because folks typically want to create a new presentation either from scratch or based on a favorite (and, therefore, recently used) template, the “Blank and recent” option is automatically selected. But you can choose instead to create a presentation based on an existing presentation, or on a theme or template you’ve created or downloaded from the Web.
- On the left side of the New Presentation window, make sure the “Blank and recent” option is selected.
If it’s not, click it to select it.
- In the New Presentation window, double-click Blank Presentation. Or you can click Blank Presentation and then click Create.
Either way, a new blank presentation named Presentation2 (or Presentation3, or Presentation4 depending on how many new presentations you’ve created since you launched the program) appears in your PowerPoint workspace.
TIP
To create a new blank presentation without going through the New Presentation window, press Ctrl+N.
To find out how to add content and design elements to your newly created presentation, zip down shows you how to save your new presentation.
Creating a Presentation from an Existing Template, Theme, or Presentation
PowerPoint lets you get a jump on your new presentation by starting with an existing template, theme, or presentation and then filling in your content. You can choose from the many templates and themes that come with PowerPoint, or you can go online and search for a specific template or theme that matches your needs. You can also reuse any of the templates, themes, or presentations that you (or your co-workers) have previously created. The following sections describe each of your options.
From an existing template
A template is a generic presentation designed (by Microsoft, by a third-party vendor, by you, or by whoever created the template) to be used again and again. Templates help you crank out presentations quickly, because all the design work has been done for you. All you have to do is add your content: the text, charts, graphics, and other elements that convey your particular message.
Templates vary widely, but all contain predefined themes (colour schemes, background images, title and bullet point layouts, and text fonts). Some templates contain additional format and design elements and even some generic or placeholder content. Some templates are business-like, with sober colours and artwork; some are whimsical, with wacky fonts and brightly coloured balloons all over the place. The template motifs you can find are nearly endless, which makes it relatively easy to choose a template that fits the mood and structure you want to create for your presentation.
WORD TO THE WISE: THE TROUBLE WITH TEMPLATES
The downside to using PowerPoint’s pre-built templates is that you can end up with a presentation that looks exactly like the one Bob in Accounting presented last week. If that happens, then not only do you look bad, but your audience may tune out, assuming they’ve heard the same message before.
Another potential downside to using templates is that you may be tempted to shoehorn your presentation into the template—which is almost never a good idea.
On the other hand, tons of graphic designers sell PowerPoint templates on the Web, so if you look hard enough—or spend the time to create your own template—you should be able to come up with something both original and appropriate.
Just keep in mind that to create an effective presentation, you need to focus first and foremost on your message, and then choose a template (or a theme, which are described on) that supports your message. You may also want to consider tweaking the template—adjusting the font or replacing the background image with a tasteful gradient, for example—both to fit your message and to help ensure your presentation is as original and memorable as you are.
PowerPoint gives you four different options for creating a new presentation using an existing template: Recently used templates, Installed Templates, “My templates” (templates you’ve created yourself), and Microsoft Office Online. The option you choose depends on where you want PowerPoint to hunt for the template, as described in the following sections.
Recently used templates
PowerPoint keeps track of the templates you apply to your presentations and displays the last few in a list. So if you tend to use the same two or three templates to create all your presentations, chances are you’ll find this option the easiest.
Here’s how to create a new presentation using a template you recently applied to another presentation:
- Select Office button → New.
The New Presentation window appears.
- In the left side of the New Presentation window, make sure the “Blank and recent” option is selected. (If it’s not, click to select it.)
- In the middle of the New Presentation window, scroll through the template thumbnails.
TIP
Moussing over a template briefly displays the location of the template (for example, C:\Program Files\Microsoft Office\Templates\QuizShow.potx for a built-in template stored on your computer, or “Office Website” for a template located on Microsoft’s Web server). You might find this information useful if, for example, you’re hunting for a template you remember finding online.
- Click to select the template you want to base your new presentation on.
In the right side of the New Presentation window, a preview appears. Depending on whether the selected template is stored on your computer or on Microsoft’s Web server, PowerPoint displays a Create or Download button, respectively, at the bottom of the New Presentation window.
- Click Create (or Download).
The New Presentation window disappears. (If you clicked Download, then a Downloading Template message flashes briefly on the screen.) PowerPoint then loads the selected template into a new presentation it names Presentation1 (or Presentation2, or Presentation3, depending on how many presentations you’ve created since you launched PowerPoint).
To see a larger version of a tiny template thumbnail—as well as to display any available identifying information, such as the template’s file size and popularity rating—simply click to select the template.
Installed templates
When you installed PowerPoint, you automatically installed a handful of professionally designed templates, including templates that let you set up photo albums (Classic Photo Album and Contemporary Photo Album), corporate-style slideshows (Corporate Presentation), layouts for print publications (Pitch book), animated question-and-answer tutorials (Quiz Show), and big-screen slideshows (Wide Screen Presentation 16×9).
To use one of these built-in templates to create a new presentation, follow these steps:
- Select Office button → New.
The New Presentation window appears.
- In the left side of the New Presentation window, click Installed Templates.
Several template thumbnails appear in the middle of the New Presentation window.
- Click a template to select it.
A larger version of the template appears in the preview area (the right side) of the New Presentation window.
- Click Create.
The New Presentation window disappears, and you see a new presentation file based on the template you selected.
TIP
Instead of clicking a template and then clicking Create, you can save a step by simply double-clicking the template.
Templates are nothing more than presentations for which someone (the template author) has defined Slide and Title masters. Masters, which you’ll learn all about in Chapter 5, define the way your slides look overall (like this crisp, clean background) as well as the way your text looks (the colour and font). Templates also typically include helpful slide layouts and content, like the attractive section headings and replaceable text shown here.
My templates
Each time you create your own template or download a template from Microsoft’s Web site, PowerPoint automatically stores the template in a special directory on your computer similar to this one: C:\Documents and Settings\[Your Name]\Application Date\Microsoft\Templates.
NOTE
PowerPoint controls where you store the templates you download from Microsoft’s Office Online Web site, and it suggests where to store the templates you create from scratch. But if you bypass Microsoft’s Office Online Web site and download a template from another Web site—or if you override PowerPoint’s suggestion of where to store a template you create from scratch—then you won’t be able to reuse these rogue templates using the steps described in this section.
To use one of these templates to create a new presentation, follow these steps:
- Select Office button → New.
The New Presentation window appears.
- On the left side of the New Presentation window, click “My templates.”
The New Presentation window vanishes, and the New Presentation dialog box shown in Figure 1-5 appears.
- In the New Presentation dialog box, select the template you want to use and click OK.
The New Presentation dialog box disappears, and PowerPoint displays a new presentation file based on the template you selected.
PowerPoint stores the templates you create—or that you download from Microsoft’s Office Online Web site—in a special folder so that you won’t confuse them with PowerPoint’s built-in templates. To change how the template icons, appear, choose from Large Icons (which makes the template names easier to read), List (shown here), and Details (which displays the date the template was created).
Online
Although lots of Web sites offer PowerPoint templates for download, you should check Microsoft’s Office Online Web site first for a couple of reasons. One, Microsoft’s templates are free; and two, checking Microsoft’s site is one-click easy, as described next.
TIP
Because Microsoft lets its customers upload templates willy-nilly, the quantity and quality of the templates you find on its site can vary widely.
- Select Office button → New.
The New Presentation window appears.
- On the left side of the New Presentation window, under Microsoft Office Online, choose the type of template you’re looking for, such as Brochures or Content Slides.
Template thumbnails appear in the center of the New Presentation window.
- Click a template thumbnail to select it; then click Download.
A validation message box appears, letting you know that Microsoft is gearing up to check your copy of PowerPoint to make sure it’s not bootlegged. (If Microsoft doesn’t find a legitimately purchased copy of PowerPoint on your computer, then you won’t be able to download templates.)
- In the validation message box, click Continue.
Microsoft checks out your copy of PowerPoint. If it passes muster, a Downloading Template message appears briefly, after which PowerPoint displays a new presentation file based on the template you selected.
Figure 1-6. For finer control over the templates you see, select Rating Sort (which displays the most popular templates first, as determined by other PowerPoint fans), Name Sort (which displays named templates in alphabetical order), Show Customer Submitted (which displays all templates, including the ones other PowerPoint folks have uploaded), or Hide Customer Submitted (which shows only those templates created by Microsoft).
The rest of this chapter shows you how to add text and change the look of your newly created presentation.
NOSTALGIA CORNER: OUT WITH COLOR SCHEMES, IN WITH THEMES
Earlier versions of PowerPoint let you customize your presentations using design templates and colour schemes.
But in PowerPoint, your customization choices have changed: now you’re working with templates and themes.
- Templates in PowerPoint are similar to the design templates found in pre- versions. A template is any presentation you plan to reuse. You tell PowerPoint—and remind yourself and your co-workers—that you plan to reuse it by saving it in the special template file format, .potx. Templates typically define custom slide layouts and, in some cases, generic content. Every template has a theme.
- Themes in PowerPoint are more accurately referred to as Office Themes, since you can use the same .thmx theme files in Microsoft Word and Microsoft Excel as you can in PowerPoint. A theme tells PowerPoint what colour to use for your slides’ titles, subtitles, body text, background, and so forth. It also describes which fonts and graphic effects to use; for example, some themes automatically add shadows to title text and blurring to the shapes you add to your slides.
From an existing (built-in) theme
If you know which theme you want to apply to the new presentation you’re creating, then you can save a click or two by applying it when you create the presentation file. (The alternative is to create the presentation file and then apply the theme.
NOTE
PowerPoint only lets you apply PowerPoint-supplied themes when you create a presentation. If you’ve created your own theme or downloaded one from the Web, then you need to create your presentation first and then apply the theme.
To create a new presentation based on one of the themes that comes with PowerPoint:
- Select Office button → New.
The New Presentation window appears.
- On the left side of the New Presentation window, click Installed Themes.
Several theme thumbnails appear in the middle of the New Presentation window.
- Click a theme to select it.
A larger version of the theme appears in the preview area (the right side) of the New Presentation window.
- Click Create.
The New Presentation window disappears and you see a new presentation based on the theme you selected.
TIP
Instead of clicking a theme and then clicking Create, you can save a step by simply double-clicking the theme.
Unlike applying a template to a newly created presentation, applying a theme doesn’t start you out with custom slide layouts or content. Instead—as you can see by the single slide shown here—themes give you coordinated colour, font, and background effects. PowerPoint automatically applies these effects to each new slide you create.
From an existing presentation
If you’ve already got a presentation on your computer—created in any version of PowerPoint—then you can load that presentation into PowerPoint and use it as the basis of a new presentation.
You’ve got two options for loading an existing presentation: The Existing Presentation window, which is a good choice if you’ve never used PowerPoint before; and the Open window, which is handy if you’re familiar with PowerPoint.
NOTE
A third, quickie alternative exists for creating a new presentation from an existing one—but this alternative works only if you’ve recently edited the existing presentation. To try it out, click the Office button and then, from the list of Recent Documents that appears, choose an existing document. After PowerPoint opens the document, immediately save it (Office button → Save As) with a different name.
The New from Existing Presentation window
If you’re new to PowerPoint, then you’ll appreciate the New from Existing Presentation window, which simplifies the process of opening an existing presentation. And unlike using the Open window, using the New from Existing Presentation window automatically generates a new file name, so you don’t have to worry about accidentally overwriting your original presentation.
To create a presentation using the New from Existing Presentation window:
- Select Office button → New.
The New Presentation window appears.
- Click “New from existing.”
The New from Existing Presentation window appears.
- Select the file you want to open, and then click Create New.
The New from Existing Presentation window disappears, and the presentation you selected appears in your PowerPoint workspace. PowerPoint gives the presentation a new, generic name (PowerPoint2, PowerPoint3, and so on) to remind you to rename the file before you save it.
To browse your computer for an existing PowerPoint file, either click the folder icons you see on the left side of the window, or click the “Look in” drop-down menu. When you see the PowerPoint file you’re looking for, click it to select it. Then click Create New to load it into PowerPoint under a new name.
NOTE
Creating a new presentation from an old one is very similar to creating a new presentation from a template.
The Open window
The Open window gives you more options for opening an existing presentation than the New from Existing window does. You’ll find these options useful in certain situations, such as when you want to protect an existing presentation by opening it in read-only mode, read through all the slides to make sure it’s the one you want, and then save a copy.
To open an existing presentation using the Open window:
- Choose Office button → Open (or press Ctrl+O).
- Select the file you want to open, either by clicking the folder icons you see on the left side of the window, or by clicking the “Look in” drop-down menu. When the PowerPoint file you’re looking for appears in the list, click it to select it.
TIP
To see a preview of each file on the right side of the Open window as you select it, click the Open window’s Views icon and select Preview.
To open a file quickly, double-click it (instead of selecting it and then clicking Open or one of the Open options).
- Choose one of the following options:
- Open. Opens the selected file.
- Open → Open Read-Only. Opens a protected version of the file that lets you make changes to the presentation, but doesn’t let you save them unless you specify a new filename.
- Open → Open as Copy. Opens the presentation file, but renames it Copy (1) filename.pptx.
- Open → Open in Browser. Opens the selected HTML file in Internet Explorer (or your default browser).
- Open → Open and Repair. Tells PowerPoint to fix a corrupted file before it tries to open it.
The file you selected appears in your PowerPoint workspace.
Choosing a Theme for Your Presentation
No matter which approach you use to create a presentation—from scratch, from an existing presentation, from a template, or from a built-in theme—once you have a presentation, you can change how it looks in one fell swoop by changing its theme.
A theme is a collection of characteristics including colours, fonts, and graphic effects (such as whether the shapes you add to your slides have drop shadows). For example, applying the built-in Deluxe theme turns your background a tasteful shade of blue and displays your title text (which appears in the Corbel font) in an attractively contrasting, gently shadowed shade of yellow—all thanks to the theme.
You can change all of these characteristics individually, of course, as you’ll see in Chapter 3. But applying themes gives you more bang for your buck in several important ways:
- Using themes is quicker than changing individual settings one at a time. Applying a theme is a two-click proposition. Changing the dozen-plus settings controlled by a theme would exercise your click finger a lot more than that. And themes save you time you’d otherwise spend figuring out which colours look good together.
- Using themes helps ensure a decent-looking, readable slide. Consistency is an important design principle: it sets the tone for your presentation and lets your audience focus on your message. When you change settings manually, you can end up with a distracting mishmash of colours and fonts on a single slide or across slides. Not so with themes. Once you apply a theme, the theme takes control of your settings. If you change the background colour of your slides, then the theme automatically changes the title and subtitle fonts to compatible colours—colours that aren’t just readable against your new background, but attractive, too.
NOTE
You can change the colour scheme, fonts, effects, background, and layering order for any given theme without “breaking” the theme. For example, if you change the subtitle colour from white to black, then PowerPoint automatically adjusts the background colour and other settings so that your subtitle text is still readable. But you can also override theme settings. Section 3.2.4 shows you how.
- Using themes lets you create a consistent look and feel across Microsoft Office-produced materials. You can use the same themes you use in PowerPoint in Word and Excel, too. That’s handy if you use Microsoft Office to produce multimedia presentations: no more Arial 12 spreadsheets paired with Baskerville 10 reports and purple Helvetica PowerPoint slides. When you apply the same theme to your Word documents, Excel spreadsheets, and PowerPoint slides, you end up with a consistently presented, harmonious whole.
Here’s how to apply a theme to a PowerPoint presentation:
- Click the Design tab.
The Design ribbon appears, complete with a Theme gallery. (For more on PowerPoint ’s new ribbons.
The Themes section of the Design ribbon contains just a snippet of the Themes gallery; to see more themes, you need to click the More icon.
- Click the More icon at the bottom-right corner of the Themes section.
Additional themes appear in the gallery,
You can find additional themes on the Web and download them into PowerPoint by clicking More Themes on Microsoft Office Online.
- Mouse over the themes in the gallery one by one.
PowerPoint previews each theme as you mouse over it (Figure 1-12) so you can get an idea of how each will look applied to your presentation’s content and layout.
No more clicking Preview or Apply and waiting around: simply moussing over a theme temporarily applies it to your presentation. To apply the theme for good, click the theme to select it. If you change your mind, you can revert back to your presentation’s original theme by applying the Office Theme theme.
NOTE
If you mouse over a theme and PowerPoint doesn’t immediately preview it on your slide, wait a few seconds: the process is quick, but it’s not instantaneous.
- Click a theme to select it.
PowerPoint applies the selected theme to all of the existing slides in your presentation, as well as all the new slides you create.
TIP
In addition to letting you apply a theme to all the slides in your slideshow—which is normally what you want to do, and what’s described in this section—PowerPoint lets you apply a theme to only selected slides. Applying more than one theme to a slideshow is useful when you’re creating a distinct before-and-after presentation or other multi-section slideshow and want each section to look distinct. For details, check out Chapter 4.
Adding Text
You’ll want to add at least some text to most, if not all, PowerPoint presentations you create. (See the box for advice on how much prose to add to your presentation.) Knowing that, the PowerPoint designers made it easy for you to add text to your slides. The following sections show you how.
Adding Text to an Existing Text Box
When you start to work with a new presentation, the ribbon displays the Home tab, which should look somewhat familiar if you’ve used PowerPoint 2003 (Figure 1-13).
Until you click a text box, most of the text-related options appear greyed out, meaning you can’t use them. See Figure 1-14 for a glimpse of the subtitle box.
Blank presentations come complete with title and subtitle placeholder text boxes. To replace the placeholder text in either of these two text boxes with your own text, simply click inside the placeholder and begin typing. When you do, two things happen:
- PowerPoint displays the Drawing Tools | Format tab and, on the Home ribbon, activates many of the text formatting options (Figure 1-14). You can use these options to change the font, size, and colour of your text, turn your text into a right-justified paragraph or a bullet point, and much more. (Chapter 3 describes your options in detail.)
- Resize and transform handles appear at the corners and edges of the text box (Figure 1-14). Tiny white resize handles, which are square on the edges of the text box and circular on the corners, let you stretch or shrink your text box by dragging them. The circular green transform handle appears above the top of your text box and lets you tilt it. Drag the handles to tilt or resize your text box.
Figure 1-14. As soon as you click a text box, PowerPoint activates the text formatting and drawing tools and reveals the Drawing Tools | Format tab. Now, in addition to typing your text, you can format it, change its colour, or add an effect (such as a glow or bevel). Drag any of the eight white resize handles to resize your text box; drag the circular green transform handle to rotate the text box. Chapter 3 covers text manipulation in more detail.
Adding a New Text Box
You’re not limited to the placeholder text boxes PowerPoint starts you off with: you can add as many additional text boxes to your slides as you like.
NOTE
Chapter 3 shows you how to format text boxes, as well as the text inside them. Chapter 5 shows you how to add placeholder text boxes to slide masters.
DESIGN TIME: THE EVILS (OR NOT) OF TEXT
There are two schools of thought when it comes to using text in PowerPoint presentations. One says text is king; the other advises Power Pointers to use as little text as possible. Here’s the rationale for each approach:
- Text rules—always has, always will. According to the more-bullets-the-better crowd, a presentation is text. Period. It’s how we think, it’s what we’re used to, and it helps us organize our thoughts, reactions, and questions. Folks who subscribe to this approach may quibble about the number of words an effective bullet point should be limited to (the number five comes up a lot), and whether to put the most important bullets at the beginning of the presentation or at the end; but the focus is always on how—not whether—to use text.
- Text distracts. The other school of thought is that it is nearly impossible for audiences to read more than a couple of words on a slide, even if they’re sitting up front and wearing their glasses. And if your audience does read your slides, that means they are busy reading and forming opinions instead of paying attention to the actual presentation (which is you). According to these folks, using a lot of text results in lazily constructed, ineffective, and boring brain-dumps-disguised-as-presentations. These folks believe the best use of PowerPoint is carefully chosen charts, graphs, and worth-a-thousand-word pictures. The theory is that pictures pique your audience’s curiosity without satisfying it: your audience has to listen to you for explanation and clarification. (And you can always give them handouts containing those all-important bullet points after the show, if you must.)
So which approach should you take? It depends. In a perfect world, you’d have time to find or create super-compelling graphics and animations that beautifully complement your presentation. You’d deliver the message of your presentation by engaging your audience with your wit, knowledge, body language, and persuasive powers. You’d use text sparingly and appropriately: to pose questions (which you’d answer in your talk) and to hammer home main points.
But not everyone’s comfortable with this freewheeling presentation style. Plus, it’s a lot more work (which explains why most of the PowerPoint presentations you’ve sat through in your life have been riddled with bullet points). And in some cases—academic lectures, for example—using text as a springboard for discussion and audience note-taking just makes more sense.
Ultimately, you get to make the call. As long as you choose an approach that supports your presentation goals, you’re golden.
To add a new text box to a slide:
- Click the Insert tab.
The Insert ribbon appears.
Figure 1-15. As you can see in the Text section of the Insert ribbon, PowerPoint makes it easy to add not just text boxes, but headers, footers, date- and timestamps, and more.
- On the Insert ribbon, click Text Box.
In the status bar at the bottom of the screen, PowerPoint displays a helpful hint (“Click and drag to insert a text box”). When you mouse over your slide, you notice that your cursor looks like a tiny down arrow.
- On the slide, click where you want your new text box to appear.
A text box appears with the cursor handily positioned inside. The Drawing Tools | Format tab pops up, and on the Home ribbon, PowerPoint activates most of the formatting options, ready for you to format your text.
Choosing one or more formatting options (such as Bold, Italics, or Font) before you begin typing tells PowerPoint to apply those options to your text automatically as you type. (You’ll find more on formatting in Chapter 3.)
NOTE
Alternatively, you can click and drag to draw the outline of your text box before you begin typing. It’s another step, but it’ll help you get an idea of how much space your text will take up on your slide before you actually type it in.
- Type your text.
The text box expands automatically to accommodate your text.
NOTE
In addition to adding text directly to your slides, as shown here, you can also paste or type text onto shapes (for example, a Stop sign). Chapter 9 shows you how.
DESIGN TIME: USING TEXT EFFECTIVELY
If you choose to include text in your presentation, then keep these tips in mind:
- Distill. Your audience’s eyes will glaze over if you hit them with a barrage of text on every slide, so you want to distill your message into as few words as possible. (Three to six bullets and a dozen or so words per slide is a good guideline.) In other words, reserve text for the few salient points you want your audience to take home with them. When you need back-up documentation, examples, supporting facts and figures, and so on, distribute hard-copy handouts—don’t try to cram the information onto your slides.
- Carefully consider word placement. The Space Shuttle Columbia disaster a few years back put PowerPoint in the limelight for a sobering reason: In a PowerPoint presentation delivered to NASA officials before the disaster, engineers mentioned the problem that, ultimately, contributed to the tragic breakup of the shuttle over Texas in 2003. But the crucial information was buried in an avalanche of bullet points near the end of a long presentation, and none of the decision-makers in the audience realized its significance. Your presentation may not address life-and-death issues, but you still want to reserve the first and last slides of your presentation for critical information.
Adding More Slides
When you create a new blank presentation, PowerPoint spots you one slide. But in most cases, you’ll want your presentation to contain a lot more slides than that. Fortunately, adding a new slide is easy, as you’ll see in the following sections.
PowerPoint gives you two options: adding a slide with layout identical to the current slide, and specifying a different slide layout. A slide layout is a description of what content appears where on a slide. For example, applying a Title Slide layout to a slide positions title and subtitle text placeholders near the middle of your slide, and nothing else. Applying a Title and Content layout positions a title text placeholder near the top of a slide, and an object placeholder beneath that.
To add a slide with a layout identical to the current slide:
- Select any non-title slide.
PowerPoint doesn’t automatically duplicate title slides for a pretty obvious reason: 99 percent of the time, you don’t want two title slides in a single presentation.
NOTE
For the one percent of the time when that’s exactly what you want, add a slide, and then change the slide’s layout to Title Slide.
- Click the Home tab.
Clicking the New Slide button is the quickest way to add a slide to your presentation. You can always change the layout, of course, but when you want to add a different kind of slide—say, one with a subtitle or columns—you can save yourself some time by choosing a new slide layout right off the bat, as shown in the steps below.
- Click the New Slide button.
PowerPoint inserts a new slide after the current slide. If that’s not what you want (for example, if you want to add a slide to the beginning of your presentation), then you can easily change the order of your slides.
TIP
PowerPoint gives you another way to add a new slide with a layout similar to the current slide. In the Slides pane (at the left side of your workspace, as shown in Figure 1-16), you can right-click the page after which you want to create a new slide. Then, from the menu that appears, select Duplicate.
To add a slide with a different layout:
- On the Home ribbon, click the down-arrow next to New Slide.
- Click to select the slide layout you want. Your choices include Title Slide, Title and Content, Section Header, Two Content, Comparison, Title Only, Blank, Content with Caption, and Picture with Caption.
PowerPoint adds your new slide after the current slide.
Figure 1-18. The appearance and number of slide layouts you see in this menu depend on the theme (and template, if any) you’ve applied to your presentation. If you add a slide and then change your mind, you can either click Undo (Ctrl+Z), or delete the slide by choosing Home → Delete.
TIP
To make an exact copy of the current slide—content and all—make sure you have the slide selected in the Slides pane, and then press Ctrl+D.
Moving Around Inside a Presentation
Moving around your presentation when you only have one slide isn’t much of an issue. But once you start adding slides, you’ll want a way to hop quickly from your first slide to your last. You’ll also want to jump to specific slides in the middle of your presentation; for example, to tweak a particular slide’s layout, to add content, or to delete it.
PowerPoint gives you several ways to flip through your presentation. This section acquaints you with the easiest and most useful options: using your workspace scroll bar, using the View pane on the left side of the screen, and using the Home Ribbon’s Find function.
Navigating with the Scroll Bar
In PowerPoint, you see a scroll bar on the right side of your workspace similar to the one in
If you’ve got more than one slide, the vertical scroll bars always appear in PowerPoint, no matter which tab you select or which ribbon appears at the top of your workspace. Scrolling tells PowerPoint to display slides not just in the main workspace, but also to display thumbnail versions in the Slides pane.
To scroll through your presentation, all you need to do is click the scroll bar and drag up (to scroll toward the beginning of your presentation) or down (to scroll toward the end). As you go, PowerPoint displays each slide in turn.
TIP
To flip forward (or back) through your presentation one slide at a time, click the Next Slide (or Previous Slide).
Navigating with the Slides and Outline Tabs
Slides and Outline tabs are not views (they both appear in Normal view) but are tabs that let you see slide thumbnails or an outline of your slideshow, respectively.
Here, the Slides tab is selected. You’re viewing the contents of the first (selected) slide.
Here’s the same presentation in outline form. To banish the View pane altogether, click the X in the upper-right corner. To resize it, simply drag the resize handle on the right side of the pane. (In keeping with its new-and-improved design philosophy, PowerPoint doesn’t let you make the View pane larger than one-quarter of the total interface.)
PowerPoint assumes you want to use Slides view until you tell it otherwise. To change views, click the Outline tab To switch back to Slides view, click the Slides tab.
NOTE
If you don’t see the View pane at all, select View → Normal (or click the Normal icon.
NOTE
The View ribbon offers you a bunch of additional ways to view your presentation, including Slide Sorter (Chapter 5) and Notes.
Using Find
When you’ve got a lot of slides and you’re looking for one containing a specific word or phrase, you’ll want to bypass Views in favour of the Find function. Similar to the Find feature in other Windows programs, PowerPoint’s Find function lets you search for specific words quickly and easily. Here’s how to use it.
- Press Ctrl+F.
The Find dialog box appears.
Another way to display this Find box is to head to the Editing section of the Home tab and then click the Find button. Chapter 2 shows you how to use the more advanced Find functions, including Replace, which lets you automatically replace the text you find with different text.
- In the “Find what” box, type in the text you want to find..
If you like, you can click to turn on the “Match case” checkbox (which tells PowerPoint to look for marshmallow but not Marshmallow, MARSHMALLOW, or MaRsHmAlLoW) or the “Find whole words only” checkbox (which tells PowerPoint to look for marshmallow but not chocolatemarshmallowgraham). When you finish, click Find Next.
PowerPoint displays the slide containing your text. If it doesn’t find a match, it shows this message: “PowerPoint has finished searching the presentation. The search item wasn’t found.”
Adding Speaker Notes
Speaker notes are optional text notes you can type into PowerPoint. You can associate a separate speaker note with each slide of your presentation. Your audience can’t see speaker notes, but you can. You may find speaker notes useful:
- While you’re putting your presentation together. If you know you need to add a graphic to slide six and a couple of bullet points to slide 33, then you can jot down reminders to yourself in the Speaker Notes pane (Figure 1-23). Then, before you put your presentation to bed, you can view your speaker notes and double-check that you’ve caught everything.
- While you’re delivering your presentation. You can set up your presentation so that your audience sees your slideshow on the screen while you see your notes (on your own computer monitor). Or, if you’re the tactile type, you may prefer to print out your speaker notes and keep them with you during your presentation.
NOTE
Chapter 8 : covers speaker notes in more detail.
To add speaker notes for a particular slide, click in the Speaker Notes pane and type away.
Speaker notes are specific to individual slides, so when you select a new slide, PowerPoint displays a fresh, clean Speaker Notes pane. You can make the pane bigger by dragging the resize handle.
NOTE
If you don’t see the Speaker Notes pane, then click the Speaker Notes pane’s resize bar at the bottom of the workspace and drag upward.
Figure 1-24. Depending on the view you choose, the Speaker Notes pane doesn’t always appear automatically—and it’s not obvious that you can drag the resize bar at the bottom of the workspace to display it. Fortunately, you can. The farther you drag, the larger the notes display (and the smaller the slide display).
Creating and Printing Handouts
You don’t have to do anything special to create handouts in PowerPoint. That’s because handouts in PowerPoint are nothing more than slides printed one or more to a page.
FROM THE FIELD: HANDOUTS: KILLING TREES UNNECESSARILY?
The value of handouts depends both on your presentation and your audience. If you think your audience will benefit from printouts of your slides, then by all means, go for it. Say, for example, that your presentation slides consist of graphic images accompanied by a few well-placed questions. What you want is a participatory, interactive presentation. Your audience should listen to you and jot down the answers to those questions—and what better way to encourage this interaction than to pass out hard copies of each slide?
But for some presentations, slide printouts are pretty worthless. Instead, you’re going to want to give your audience printouts containing facts, figures, contact information, and other in-depth supporting information that you didn’t have room for in your actual presentation.
One way to jump-start the process of creating truly useful handouts is to pull your PowerPoint presentation text into Word (assuming you have a copy installed on your computer). Using your presentation text as a starting point, you can add information until you’ve built handouts your audience will actually take back to their homes and offices.
To pull your slides into a Word document, click Office button → Publish → Create Handouts in Microsoft Office Word.
To print handouts:
- Select Office button → Print → Print Preview.
The Print Preview ribbon appears, and PowerPoint’s best guess at how you want your handouts printed appears in the workspace.
NOTE
You can change the way your handouts print on a presentation-by-presentation basis, as described in this section. But if you find yourself making the same changes time after time, then you’ll want to customize PowerPoint’s printing assumptions.
- Click the “Print what” drop-down box and then, from the menu that appears, choose how you want PowerPoint to print your handouts..
PowerPoint redisplays the handouts preview based on your selection.
You can tell PowerPoint to print up to nine slides per page. Here, you see the effect of printing three per page, which is a nice compromise: large enough to read the slides, but roomy enough for note taking.
- Click Print.
The familiar Print dialog box appears.
NOTE
Chapter 8, which shows you how to print your presentation, walks you through the Print dialog box step by step.
- Click OK.
PowerPoint prints your handouts.
- Click Close Print Preview to dismiss the Print Preview ribbon and return to your workspace.
Saving and Closing a Presentation
Lightning storms hit, coffee cups spill, and power cords work themselves out of walls (especially if you have a dog who likes to chase squeaky toys). After you’ve created a new presentation file and spent some time working on it, you’ll want to save it every so often so that when your system crashes, you can recover your work. And if you’re like most folks, you’ll also want to save and close your presentation each time you wrap up a work session.
Saving and closing a PowerPoint presentation are both straightforward tasks. If you’re familiar with any other Windows programs, then you’ll recognize most of the steps.
To save a newly created presentation:
- Select Office button → Save.
The Save As dialog box appears.
NOTE
Alternatively, you can press Ctrl+S or click the Save button (the little diskette icon) that appears in the Quick Access toolbar.
- Click the “Save in” drop-down box to choose a directory to store your file in.
- In the File name field, type a new name for your file.
Shoot for short, unique, and memorable; you don’t want to have to spend a lot of time hunting for your file a week from now.
- Click the “Save as Type” drop-down box to select a file format. (The box explains your options.) Most of the time, you’ll choose the .pptx format.
- Click Save.
The Save As dialog box disappears and PowerPoint saves the file in the format you specified.
Most of the time, you’ll choose the .pptx file type (a plain-vanilla PowerPoint presentation) or .ppt (the old, pre- PowerPoint format). But you’ve got about a dozen choices, including the template (.potx) and show (.ppsx) formats. (Chapter 7 discusses saving your presentation to these file formats and many others.)
TIP
You can set PowerPoint’s Auto Recovery options so that the program saves your files automatically every few minutes—a boon for folks whose computers tend to crash frequently.
TIP
An easy way to save your presentation as a PowerPoint 2003 (or earlier) file is to select Office button → Save As → PowerPoint 97–2003 Format.
To close a presentation, simply select Office → Close. When you do, PowerPoint closes your presentation with no fanfare. If you’ve never saved this particular file, however, a dialog box pops up asking you if you want to save the changes you made. Click Yes to display the Save As dialog box shown in Figure 1-26 and proceed as described above.
Running a Presentation
Chapter 7 shows you everything you need to know about setting up and running special types of presentations: for example, recording narration, hiding certain slides, and creating stand-alone presentations that run on kiosks.
But for running through a basic presentation on your very own computer, the process is simple:
- Press F5 or click the Slideshow icon you see at the bottom of the screen.
PowerPoint replaces your workspace with a full-screen version of your slideshow, beginning with the currently selected slide.
Clicking the Slideshow icon at the bottom of your workspace is one of the easiest ways to run your presentation.
UP TO SPEED: POWERPOINT FILE TYPES
PowerPoint (and Office more generally) introduces a slew of new file types, complete with unfamiliar file extensions. The Introduction describes these file types in more detail, and Chapter 7 describes why you’d want to choose one over the other. But here they are, in a nutshell:
- .pptx (PowerPoint presentation). Most of the time, you want to save your file in this format.
- .potx (PowerPoint template). Let’s you save a presentation as a reusable design template.
- .potm (PowerPoint macro-enabled design template). Let’s programmers save a macro-filled presentation as a design template.
- .ppsx (PowerPoint show). Let’s you save this file as a PowerPoint show that folks can run using the PowerPoint viewer, as described in Chapter 7.
- . pops (PowerPoint macro-enabled show). Let’s programmers save a macro-filled presentation as a show.
- .ppam (PowerPoint add-in). Let’s programmers save presentations that actually add to PowerPoint’s interface; see Chapter 13.
- .pptm (PowerPoint macro-enabled presentation). Let’s programmers save presentations that contain VBA macros; see Chapter 14.
- .thmx (Microsoft Office Theme). Let’s you save your presentation as a reusable collection of colours, fonts, and graphic effects so that you can apply it to another PowerPoint slideshow, Word document, or Excel spreadsheet.
- .ppt (PowerPoint 2003—and earlier—presentation). Let’s you save your presentation in a form that folks running PowerPoint 2003 can edit.
In addition to .ppt, earlier versions of PowerPoint handled the following file types (PowerPoint handles them, too):
- .pot (PowerPoint 2003—and earlier—design template). Let’s programmers save a macro-filled presentation as a design template that folks running PowerPoint 2003 can edit and apply.
- .pps (PowerPoint 2003—and earlier—show). Let’s you save a presentation as a show that folks can run using the PowerPoint viewer.
- .ppa (PowerPoint 2003—and earlier—add-in). Let’s programmers save a macro-filled presentation as a design template that folks running PowerPoint 2003 can edit and apply.
- .mht/.mhtml/.htm/.html (Web pages). Let’s you save your slides as a series of Web pages.
- .gif, .jpg, .png, .tif, .bmp, .wmf, .emf (Image files). Let’s you save your slides as a series of image files.
- rtf (Rich text format [word processing file]). Let’s you save your slides as editable text.
TIP
Pressing Shift+F5 and clicking the Slideshow icon both tell PowerPoint to run your slideshow beginning at the current slide (not necessarily the first slide). To run your slideshow from the beginning, you have three choices: press F5, click the Slideshow icon, or select Slide Show → Start Slide Show → From Beginning.
- Click the forward and backward arrows that appear at the bottom of the screen to step through your presentation.
After the last slide, PowerPoint displays a black screen containing the words “End of slide show, click to exit.”
Figure 1-28. PowerPoint displays ghosted controls (Back, Ink, Slide, and Next) when you run a presentation. Moussing over these controls highlights them so you can see where to click. To end your slideshow immediately without having to flip through every last slide, you have two choices: either hit Esc or click the Slide icon and then, from the menu that appears, choose End Show.
- Click anywhere on the screen (or press the Space bar or Enter).
PowerPoint returns you to your workspace.
MS-EXCEL
Examples for Practice of MS-Excel
MS EXCEL is a spreadsheet program of the software package MS Office created by Microsoft. It is also called EXCEL in short.
Any spreadsheet is a group of many cells which are arranged in rows and columns. Cells are formed from the intersection points of rows and columns. Each spreadsheet is also called a worksheet. In a spreadsheet, rows are identified by numbers and columns by letters, such as A, B, C, etc.
The address of a cell is made up of the combination of the name of its row and column. Like MS Word, many toolbars are available for formatting in a spreadsheet. The numbers and names (labels) present in the worksheet can be presented in the form of various types of graphs, such as pie chart, line graph, bar chart, three-dimensional chart etc.
Elements of Electronic Spreadsheet Window
Like a word processor, a spreadsheet also has a main application window. This window has many parts such as title bar, access toolbar, ribbon etc. Inputting data in a spreadsheet and its processing takes place in the worksheet area.
The description of various elements of the main window of a spreadsheet is as follows
Office Button (Office Button in MS Excel)
A large button in the left corner of the Excel sheet is called the Office Button. On clicking this button, there are options like New, Open, Save, Save As and Print.
Quick Access Toolbar (Quick Access Toolbar in MS Excel)
This toolbar is on the right side of the Office button. A small triangle is made with it. By clicking on it, additional options can be added to this toolbar. This toolbar can also be placed below the ribbon. For this, by clicking on the small triangle and selecting the option show below the ribbon, the Quick Access Toolbar appears below the ribbon.
Title Bar (Title Bar in MS Excel)
The bar on the right side of the Quick Access Toolbar is called the title bar. The name of the workbook is written on the title bar. It has three buttons on the right corner (Minimize, Restore and Close)
Ribbon (Ribbon in MS Excel)
The panel below the title bar and above the formula bar is called the ribbon. It has seven tabs (Home, Insert, Page Layout, Formulas, Data, Review and View). On clicking these tabs, various groups appear, in which various options/buttons are given for different functions.
Various Tabs and their Groups
Tabs | Groups |
Home | Clipboard, Font, Alignment, Number, Styles, Cells, Editing |
Insert | Tables, Illustrations, Charts, Links, Text |
Page Layout. | Themes, Page Setup, Scale to Fit, Sheet Options, Arrange |
Formulas | Function Library, Defined Names, Formula Auditing, Calculation |
Data | Get External Data, Connections, Sort and Filter, Data Tools, Outline |
Review | Proofing, Comments, Changes |
View | Workbook Views, Show/Hide, Zoom, Window, Macros |
The formula bar is located below the ribbon and above the column box. When data is entered in a cell, that data is also visible in the formula bar along with that cell. There is a big button on the right side of the formula bar on which fox is written and on clicking it two new buttons (√,×) appear. After entering some data in the formula bar and clicking on the (√) button that data gets entered in the selected cell whereas on clicking the (×) button that data disappears.
Worksheet (Work Sheet in MS Excel)
The large part below the formula bar is the worksheet area. It is divided into many rows and columns. There is a straight bar above it on which column names (A,B,C,.D……..) and on the left side there is a vertical bar on which row names (1,2,3,.) are written.
The scroll bar on the right side of the worksheet is called vertical scroll bar and the scroll bar below is called horizontal scroll bar. These scroll bars are used to move the worksheet up-down or right-left.
Workbook (Workbook in MS Excel )
Excel file is also called workbook, its extension is .xls. Every workbook is made up of many worksheets. Usually there are 3 worksheets in a workbook but the number of worksheets can be increased as per the requirement. A workbook can have a maximum of 255 worksheets.
Sheet Tab (Sheet Tab in MS Excel )
On the left side of the horizontal scroll bar is the sheet tab on which the total number of sheets of a workbook is marked. There are four boxes on the left side of this tab, these are called worksheet tab scroll buttons. Using these, the worksheet tab can be moved back and forth.
Status Bar (Status Bar in MS Excel)
The tab at the bottom of the worksheet is called the status bar. Various options are displayed on this status bar. To add or remove new options, move the mouse to the status bar and click the right button. Customized status bar opens, from which desired options can be selected.
Context Menu (Context Menu in MS Excel)
This toolbar is displayed on going to the worksheet and right clicking with the mouse. It contains general formatting keys.
In this toolbar, the most used options of Font Group, Clip Art Group, Alignment Group of Home Tab are given.
HOW TO OPEN EXCEL SOFTWARE?
Opening Of Spreadsheet
Generally, the spreadsheet is started from the Start menu in the following manner:
Start – All Programs – MS-Office – Click MS-Excel.
As soon as you do this, the main window of the spreadsheet will open on the computer screen, which will have a blank worksheet.
Opening Worksheet
Generally, a blank worksheet opens automatically in the spreadsheet window and three workbooks named Book 1, Book 2, Book 3 are attached to a spreadsheet. If the user wants, a new worksheet can also be added to any workbook. For this, by going to the sheet tab and clicking on the button located on the right side of Sheet 3, a new sheet opens or for this the shortcut key ” (Shift + F11)” can also be used. Addressing the Cells The worksheet area of a spreadsheet has many horizontal rows and vertical columns. Rows are identified by the numbers 1, 2, 3 etc. lying on their left and columns are identified by the letters A, B, C etc. written above them. A cell is identified by the combination of its row number and column name which is called the cell address. The address of the cell is shown in the name box, for example, the address of the cell formed by the intersection of B column and 10 rows will be B10. While writing formulas in MS-Excel, mostly single cells or ranges of cells are referred to. There are three types of cell references
- Absolute
- Relative
- Mixed
Absolute Cell Reference
In absolute cell references, a dollar sign is placed before the row number and column name in a cell address. For example, $B$3 is an absolute cell reference. When such a reference is copied somewhere, it does not change, but remains the same.
Relative Cell Reference
In relative cell references, the addresses are given directly, that is, the dollar sign is not used. When such cell references are copied from one cell to another, those references change according to their new relative position. For example =B5*A4
Mixed Cell Reference
In mixed cell references, either only the row number or only the column name is absolute. For example, $B2 and B82 are both mixed cell references. When such references are copied from one cell to another, their absolute part remains the same, only the relative part changes like a relative reference.
Printing A Spreadsheet
Before printing a spreadsheet, the user should set the paper size, type and margins etc. This work is usually done through the Page Layout tab box.
Setting Page In Spreadsheet
These settings are also done from the Page Layout tab just like MS Word. There are five different groups in this tab. There is a Page Setup group in this group. Through which the user can easily set the page. All these groups are attached together in the Page Setup dialog box, due to which the page can be set directly from the Page Setup dialog box.
For this page Layout – Page- Setup – Click it. By doing this a dialog box gets displayed.
This dialog box has four tab sheets in which information regarding Page, Margins and Header/Footer is given in the first three tab sheets respectively. Paper size and orientation etc. are set in this tab sheet which is just like MS Word.
This additional Scaling section has two radio buttons. User can print the content by setting the first radio button to Adjust to and by setting the scaling factor in percentage in its spin box. 100% scaling factor means the same size i.e. whatever the user has formatted. 50% means half size i.e. small letters. By decreasing the scaling percentage, more content can be printed on a single page. Page Margins The margins of each page in the report, right, left, top, bottom, header and footer etc. are set from the Margins tab sheet of this dialog box.
After making all the necessary settings, on clicking the OK button, the settings made by the user will be applied.
Setting Print Area In MS Excel
The following steps are followed to set the print area: 1. Page Layout tab – Print Area group – Select Set Print option. By selecting this option, two options will be displayed. First Set Print Area and second Clear Print Area. To set the print area, select the area and click Set Print Area. By this the selected area will be selected for printing. 2. If user wants to cancel the settings of Print Area, then select Clear Print Area option in Page Layout tab – Print Area group. This will clear the previously set print area.
Printing The Data In MS Excel
Following are the steps to print any worksheet:
Select Office button –> Print
or
Click the Print button in Customize Quick Access toolba
or
Press Ctrl + P combination key
The following dialog box will appear.
- In this dialog box, you will see the options for printer and printer.
- After making necessary settings of printer and number of copies etc. in this dialog box, click OK button, this will start printing.
To print only the selected part, set the radio button in the Print range section and press OK button.
Apart from this, before printing the worksheet, the user can view it on the screen by using Office Button – Print – Print Preview command. In Print Preview, the user can modify user settings, margins etc. To close this window, click Close command button.
Saving Spreadsheet in MS Excel
When the user completes the work in the worksheet, it is necessary to save his work before exiting. For this
- On clicking the Office Button – Save, the Save As dialog box will appear.
- In this dialog box, the name of the folder in which the file is to be stored is selected or entered in the save list box.
- After writing the name of the file in the File Name box, the file is saved on clicking the Save button. Apart from this, if the file is to be stored with some other name, then click the Office Button – Save As button, by doing this the above dialog box will be obtained and the rest of the process will be as before.
- Click on the Close button
Manipulating cells (Manipulation of cells in MS Excel)
Before manipulating the data in Excel, it should be entered correctly. For this, the user can select more than one cell in the spreadsheet at the same time and can enter various types of data in the cells. The following table shows the different sizes of the cell pointer along with its use.
Formatting The Cells In MS Excel
In Excel, any data does not always appear in a cell exactly the way it is entered. It depends on the format of that cell. To format cells in Access, the Format Cells option is given. This dialog box is displayed by pressing Ctrl + 1 keys simultaneously on the keyboard. This dialog box has six tabs – Number tab, Alignment tab, Font tab, Border tab, Fill tab and Protection tab. Tabs of Excel are briefly described below.
Number Tab (Number Tab In MS Excel)
The Number tab of the Format Cell dialog box has a list box named Category. In which a list of different formats is shown. The description of some formats given in the list is as follows:
General
There is no special format for numbers in it. Text data is displayed on the left, but numbers are displayed according to their nature. Initially, when a user creates a new worksheet, all the cells are formatted in the General format. Later, the user can change any of those cells or all the cells to any other format.
Number
In this, numbers are shown as simple decimal numbers, which can also have a decimal point or symbol. In this, the user can decide the places after the decimal point. Initially all the numbers are displayed from the right side. Date
In this, numbers are shown as a date by considering them as the serial number of days. There are many formats available in Excel to show the date, from which the user can choose any format of his choice. If a cell is in General format and the user enters such data in it which looks like a date, then Excel automatically shows it as a date. Time
In this, numbers are shown as time. For time, the user can choose any one of the many available formats. This format is used like Date format. Text
In this format, all types of data are shown as simple text. If a number is entered in a cell formatted in Text, it is shown exactly as it is entered.
Alignment Tab
To set the alignment of the entry made in the cell, click on the Format menu option, after that Format Cell dialog box will open, click on its second tab Alignment.
By default in Excel, horizontal alignment is left for text entry and right for value entry. With the help of this tab, alignment of text can be set.
Font Tab
To change the font of the entry made in the cell, you can specify the font type, font size, font style, font color etc.
Border Tab
To select this tab, click on the Border tab in the Format Cells dialog box. With the help of this tab, the options like border, style, border color etc. of the selected cell can be selected.
Fill Tab
The Fill tab of the Format Cells dialog box is used to fill the pattern of a selected cell in Excel. Background color, fill effect, pattern color, pattern style, etc. are displayed in this tab.
Protection Tab
The last tab of the Format Cells dialog box, Protection Tab is used to protect the selected cells in Excel. There are two check boxes in this dialog box. The first one is Locked, with the help of which the selected cell can be protected from changing its size or making any changes in it. On selecting the second check box Hidden, the selected cell or cells on the worksheet cannot be seen in the formula bar when selected again, these cells become hidden.
Entering Text, Numbers and Dates in Work Sheet
Entering and Editing Text
The text data kept in a cell is often called a label. It is often used to identify data entered in other cells, such as the title of a column.
The following steps are followed to label a cell:
- Move the pointer to that cell and click.
- Now the user can type text. While typing, three new buttons appear on the left side of the formula bar, the first one has an excision symbol (x) and the second one has a tick mark (/). On completion of typing, by pressing Enter or the (/) symbol, the data becomes permanent in the cell.
A user can type a maximum of 255 characters of text data in any cell.
Apart from this, if the user wants to stop typing text in that cell for some reason, i.e. does not want to fill anything in it, then by pressing the Escape key or clicking the Cancel button (×) in the formula bar, the data is deleted. This will cancel the new data typed in the cell and the old data (if any) will remain.
Backspace key is used to correct the mistake made while typing data in a cell and the following steps are used to edit the entered data.
You can edit the data in the formula bar by clicking on a cell with the mouse pointer or by selecting it from the keyboard.
Formatting the Label
The font, shape, style and color of the text in the spreadsheet can be formatted just like in MS Word. For this, the cell in which the changes are to be made is selected and the formatting toolbar buttons are used.
Entering Numbers
Any number entered in the cells of the spreadsheet is called a value. To enter a value in a cell, first that cell is activated and then the number is typed. To indicate negative numbers, a (-) sign is placed before the number. Numbers can also be expressed in scientific form. For example, entering 12345 E + 4 in place of 12845. On entering a dollar sign ($), comma, or percent sign (%), the spreadsheet automatically changes the format of that number.
Formatting Numbers
Any cell in the spreadsheet can be formatted anytime before or after entering a number. When a user opens a new worksheet, all its cells are formatted in a general range. To change the format of a cell or range, first
- Select it
- Click on the Format Cells option in the Home tab → Cells group → Format drop down list
This will present a dialog box
- From the Number tab sheet of this dialog box, select the range for which the user wants to format the selected range and also specify the places after the decimal point in the Decimal Places spin box and click the OK button. The above process does not affect the value of the number stored in the cell, it only affects the style in which that number is displayed.
Apart from this, the Increase Decimal and Decrease Decimal buttons of the Formatting toolbar can also be used to increase or decrease the number of decimal places visible in a cell or range. Every time these buttons are clicked, the decimal point in all the cells of the selected range increases or decreases by one place.
Entering Date and Time
To see the actual date or time, the user has to format the cell in date or time format. The process for this is as follows:
- Open the Format Cells dialog box
- Select the Date or Time category from the Number Option in the dialog box and choose the appropriate format. After formatting it once, the user can enter the date in that cell normally. But if the date/time is not formatted, the spreadsheet understands it in mm/dd/yy format.
Creating Text, Number and Data Series
The steps to complete this process are as follows:
- Click on any particular cell to make it active.
- Place the mouse pointer on the fill handle of this cell, which is the square + dot in the bottom right corner of the cell, which will change it to black.
- While holding down the left mouse button, drag the fill handle down to the desired cell.
- Then release the mouse button.
Editing the Data of Worksheet
While editing a cell entry, you can edit the text and formula of the cell.
- Undoing and Repeating Actions
The Edit menu (Undo and Repeat commands) is used to undo and repeat actions in a spreadsheet. In Excel 2007, both these commands are found in the Quick Access Toolbar.
- Copying Of Cells
This process in a spreadsheet can be understood by the following example
- First of all, under this method, select the range B2:D4.
- To copy this range, click on the Copy button from Home tab – Clipboard go – Copy or context menu or press Ctrl + C keys simultaneously. By doing this, ant-like lines will be formed around that range.
Move the mouse pointer to cell A7 and click on it, which will make it active.
To paste the copied data in the active cell, either give the Paste command from the Clipboard group or click the Paste button in the context menu. By doing this, the magic square will also appear in the range A7:C9.
- Moving Data In Cells
This task is also done by the Cut and Paste commands of the Clipboard group. It can be understood better by the following procedure
Select the Magic Square in the range B2:D4 from the worksheet shown in the following figure.
Give the Cut command from the Clipboard group or click the Cut button in the context menu. This will create a circle of broken lines around that range. The cell C6 will be created.
Click on the cell C6, which will make it active.
Now, click on the Paste button from the Clipboard group or press Ctrl + V keys together or click on the Paste option in the context menu. This will make the magic square placed in the selected range disappear from its place and appear in the range C6:E8, as shown in the figure.
Users can also use the mouse pointer to move the data of the cells. For this, first select the cells (or range) to be moved. Now move any boundary line of that range by holding it with the mouse pointer. Along with this, the entire selected range will also appear to move. Move it to the new place and release the mouse button. This will move the data to the new place. If the user keeps the Control key pressed while performing the move action, the range gets copied instead of moving.
1. Simple insertion of the formula (Typing a formula in the cell): Typing a formula into a cell or the formula bar is the simplest way to insert basic Excel formulas. Typically, the process begins with typing an equal sign followed by the name of an Excel function. Excel is quite intelligent in that it displays a pop-up function hint when you begin typing the name of the function.
2. Using the Insert Function option on the Formulas Tab: If you want complete control over your function insertion, use the Excel Insert Function dialogue box. To do so, go to the Formulas tab and select the first menu, Insert Function. All the functions will be available in the dialogue box.
3. Choosing a Formula from One of the Formula Groups in the Formula Tab: This option is for those who want to quickly dive into their favorite functions. Navigate to the Formulas tab and select your preferred group to access this menu. Click to reveal a submenu containing a list of functions. You can then choose your preference. If your preferred group isn’t on the tab, click the More Functions option — it’s most likely hidden there.
4. Use Recently Used Tabs for Quick Insertion: If retyping your most recent formula becomes tedious, use the Recently Used menu. It’s on the Formulas tab, the third menu option after AutoSum.
Basic Excel Formulas and Functions:
1. SUM: The SUM formula in Excel is one of the most fundamental formulas you can use in a spreadsheet, allowing you to calculate the sum (or total) of two or more values. To use the SUM formula, enter the values you want to add together in the following format: =SUM(value 1, value 2,…..). Example: In the below example to calculate the sum of price of all the fruits, in B9 cell type =SUM(B3:B8). this will calculate the sum of B3, B4, B5, B6, B7, B8 Press “Enter,” and the cell will produce the sum: 430.
2. SUBTRACTION: To use the subtraction formula in Excel, enter the cells you want to subtract in the format =SUM (A1, -B1). This will subtract a cell from the SUM formula by appending a negative sign before the cell being subtracted. For example, if A3 was 300 and B3 was 225, =SUM(A1, -B1) would perform 300 + -225, returning a value of 75 in D3 cell.
3. MULTIPLICATION: In Excel, enter the cells to be multiplied in the format =A3*B3 to perform the multiplication formula. An asterisk is used in this formula to multiply cell A3 by cell B3. For example, if A3 was 300 and B3 was 225, =A1*B1 would return a value of 67500. Highlight an empty cell in an Excel spreadsheet to multiply two or more values. Then, in the format =A1*B1…, enter the values or cells you want to multiply together. The asterisk effectively multiplies each value in the formula. To return your desired product, press Enter. Take a look at the screenshot above to see how this looks.
4. DIVISION: To use the division formula in Excel, enter the dividing cells in the format =A3/B3. This formula divides cell A3 by cell B3 with a forward slash, “/.” For example, if A3 was 300 and B3 was 225, =A3/B3 would return a decimal value of 1.333333333. Division in Excel is one of the most basic functions available. To do so, highlight an empty cell, enter an equals sign, “=,” and then the two (or more) values you want to divide, separated by a forward slash, “/.” The output should look like this: =A3/B3, as shown in the screenshot above.
5. AVERAGE: The AVERAGE function finds an average or arithmetic mean of numbers. to find the average of the numbers type = AVERAGE(A3.B3,C3….) and press ‘Enter’ it will produce average of the numbers in the cell. For example, if A3 was 300, B3 was 225, C3 was 180, D3 was 350, E3 is 400 then =AVERAGE(A3,B3,C3,D3,E3) will produce 291.
6. IF formula: In Excel, the IF formula is denoted as =IF(logical test, value if true, value if false). This lets you enter a text value into a cell “if” something else in your spreadsheet is true or false. For example, You may need to know which values in column A are greater than three. Using the =IF formula, you can quickly have Excel auto-populate a “yes” for each cell with a value greater than 3 and a “no” for each cell with a value less than 3.
7. PERCENTAGE: To use the percentage formula in Excel, enter the cells you want to calculate the percentage for in the format =A1/B1. To convert the decimal value to a percentage, select the cell, click the Home tab, and then select “Percentage” from the numbers dropdown. There isn’t a specific Excel “formula” for percentages, but Excel makes it simple to convert the value of any cell into a percentage so you don’t have to calculate and reenter the numbers yourself. The basic setting for converting a cell’s value to a percentage is found on the Home tab of Excel. Select this tab, highlight the cell(s) you want to convert to a percentage, and then select Conditional Formatting from the dropdown menu (this menu button might say “General” at first). Then, from the list of options that appears, choose “Percentage.” This will convert the value of each highlighted cell into a percentage. This feature can be found further down.
8. CONCATENATE: CONCATENATE is a useful formula that combines values from multiple cells into the same cell. For example , =CONCATENATE(A3,B3) will combine Red and Apple to produce RedApple.
9. DATE: DATE is the Excel DATE formula =DATE(year, month, day). This formula will return a date corresponding to the values entered in the parentheses, including values referred to from other cells.. For example, if A2 was 2019, B2 was 8, and C1 was 15, =DATE(A1,B1,C1) would return 15-08-2019.
10. TRIM: The TRIM formula in Excel is denoted =TRIM(text). This formula will remove any spaces that have been entered before and after the text in the cell. For example, if A2 includes the name ” Virat Kohli” with unwanted spaces before the first name, =TRIM(A2) would return “Virat Kohli” with no spaces in a new cell.
11. LEN: LEN is the function to count the number of characters in a specific cell when you want to know the number of characters in that cell. =LEN(text) is the formula for this. Please keep in mind that the LEN function in Excel counts all characters, including spaces: For example,=LEN(A2), returns the total length of the character in cell A2 including spaces. The Date and Timestamp is a type of data type that determines the date and time of a particular region. It contains some characters along with some encoded data. This format may vary from language to language. Keeping track of date and time helps in managing records of our work as well as segregate the information day-wise. In this article, we will be going to learn how we can automatically insert Date and Timestamp in Excel. There are multiple ways to insert Date and Timestamp in Excel. These methods include both static and dynamic methods.
1. Inserting Date And Timestamp using keyboard shortcuts (Static method) The static method is helpful when there are only a few cells where you need to insert the Date and Timestamp. You can quickly use the keyboard shortcut to manually insert the Date and Timestamp. Follow the below steps to implement the same:
> Select the cell into which the current date or time needs to be inserted.
> Use this shortcut – [Ctrl + ;] (Control + semicolon) to insert the current date.
> Use this shortcut – [Ctrl + Shift + ;] (Control + Shift + semicolon) to insert the current time.
> Use this shortcut – Press the combination [Ctrl + ;] and [Ctrl + Shift + semicolon] to insert the current time and time.
2. Inserting Date And Timestamp using Formulas: The NOW() and TODAY() functions can be used to insert the current date and time that will update automatically. This method dynamically updates the date-time whenever a change is made in the worksheet. 1. NOW(): To insert current date and time.
2. TODAY(): To insert the current date. Follow the below steps to implement the same:
> Select the cell into which the current date or time needs to be inserted.
> Enter the function NOW() or TODAY().
> Press the Enter key. The current date-time or date will be inserted into the selected cell.
3. Insert Timestamp Automatically While Entering Data In Different Column This method will enable the insertion of the timestamp in a column while entering data into another column. For example, consider two columns A and B in your worksheet. While you enter data in a cell of column A, the current date and time in the corresponding cell in Column B will get updated automatically. Follow the below steps to implement the same:
> Click File -> Options and the Excel Options dialogue box will appear. Now from the left pane, select the Formulas option. You will see Enable interactive calculation in the right pane below Calculation options. Check this option and select OK.
> In this next adjoining column (say column B), enter this formula: =IF(A1<>””,IF(B1<>””,B1,NOW()),””)
> Drag and select cells to auto-fill the formula. You can also customize the format of the date and time. To do this, right-click on the selected formula cells, go to the context menu, and select Format Cells. You will see the Format cells dialogue box. Go to the bottom and select Custom. In the right pane select the suitable format for your cells.
> Now when you enter the data in a column, you will get the date and time in your chosen format in the adjoining cell. 4. Using VBA To Insert Timestamp Automatically While Entering Data In a Different Column If you are familiar with working on VBA, then there is another method for you to automatically insert the timestamp in your excel sheet using VBA. Follow the below steps to implement the same:
> To open Microsoft Visual Basic for Applications, press Alt + F11. The VBA window will open. Now go to Insert and select the Module to open a blank module.
> Now, add the code given below to your blank module and save the code. Function MyTimestamp(Reference As Range) If Reference. Value <> “” Then MyTimestamp = Format(Now, “dd-mm-yyyy hh:mm:ss”) Else MyTimestamp = “” End If End Function
> Go back to your worksheet and type the below formula in your cell in which you want to insert timestamp. A is the column for inserting entries of data. B is corresponding column, into which the date and timestamp will be updated. Type the below formula into B1 cell: =MyTimestamp(A1)
> Now, if you insert the entry in a column, you will get the date and time in the adjoining cell automatically.
MS-Excel Exercise
Attendance Sheet Count of Presents, Absents, Leaves, Holidays, Count of days.
Headings on sheet –
S.NO – NAME- DAY1 – DAY31 – PRESENTS – ABSENTS – LEAVES – HOLIDAYS – TOTAL DAYS COUNT FORMULAS – COUNTIF, SUM,
CONDITIONAL FORMATTING – “P” (GREEN), “A” (RED), “L” (YELLOW), “H” (CUSTOM COLOR)
- Result Sheet – Marks, Obtained Marks, Min-Max, Result, Average, %, Grade, Rank.
Headings on sheet – S.No. – Name – Subject 1 to 5 – Total Marks – Obtained marks – Max – Min – Result (fail, Pass) – Average, Percentage, Grade, Rank
Formulas – SUM, MAX. MIN, IF, AVERAGE, PERCENTAGE, IF <>, RANK
Conditional Formatting – Less then, Greater then, Equal to, Text that contain, - Sales Sheet 1 – Sales of Article, Quantity, Price, Amount.
Headings on sheet – S.No. – Name – Articles 1 to 5 – Total Sold – Blanks – Total Sale
Formulas – Countif, Countblank, SUM, Counta
Conditional Formatting – Text that contain, Less then, Greater then, Equal to
Sales Sheet 2 – Sales of Article, Quantity, Price, Amount.
Headings on sheet – S.No. – Name – Articles – Quantity – Price – Amount – Total Sale
Formulas – SUM,
Conditional Formatting –
Sales Sheet 3 – Sales of Article, Quantity, Price, Amount.
Headings on sheet – S.No. – Name – Articles – Quantity – Price – Amount – Total Sale
Formulas – SUM,
Conditional Formatting – - Target Sheet – Sales Target Achievement + Incentive –
Bonus.
Headings on sheet – S.NO – NAME – 1 2 3 4 5 6 7 8 9 10 11 12 13 14 15 16 17 18 19 20 21 22 23 24 25 26 27 28 29 30 31 – TOTAL SALE – TARGET – TARGET RESULT
Formulas – SUM, IF, IF(YES,NO)
Conditional Formatting – Less then, Greater then, Text that contain - Budget Sheet – Conclusion of Purchase, TAX, In Budget or Out Budget, Difference.
Headings on sheet -S.N – Articles – Price – Quantity – Budget – Conclusion
Formulas – Product, IF <=,
Conditional Formatting – Cell reference <=, Text that contain - Salary Sheet – Employee Salary Calculation & Deductions.
Headings on sheet -S.N – NAME – BASIC SALARY – DA 8% – HRA 9% – PF 6% – MA 3% – GROOS SALARY – EPF 11% – LIC 10% – IT 5% – DEDUCTION – NET SELARY – REMARK
Formulas – % Count, SUM, Subtract,
Conditional Formatting – Less then, Greater then, Text that contain - Age Sheet – Calculate Age Full Age, Years, Months, Days from D.O.B.
Headings on sheet –
Formulas –
Conditional Formatting – - Concatenate Sheet – Generating Information from Different Cells.
Headings on sheet –
Formulas –
Conditional Formatting – - DATA Record + List – Complete Database with restrictions & Validation.
Headings on sheet –
Formulas –
Conditional Formatting – - DATA Record + Hide List – Complete Database with restrictions & Validation with hidden feature.
Headings on sheet –
Formulas –
Conditional Formatting – - DATA Record+ Data Validation – Complete Database with restrictions & Validation with No List – Hidden feature.
Headings on sheet –
Formulas –
Conditional Formatting – - Performance Sheet – Performance of Business/ Growth.
Headings on sheet –
Formulas –
Conditional Formatting –
Advance Excel Formulas
FORMATTING CELLS FOR CUSTOM TEXT
FORMAT CELLS > CUSTOM > write #” – DOZ.” for showing DOZ. after value OR write “DOZ. -” # for showing DOZ. before value.
FORMAT CELLS > CUSTOM > write “Rs. ” # for adding text Rs. before value.
ADD=UPPER (TO UPERCASE THE TEXT)
AUTO SERIAL NO. Based on other cell
Write this formula in cell
=if(D4=””,””,TEXT(SUBTOTAL(103,$D$4:D4),”0000)
AUTO SERIAL NO. – If a specific cell is containing specific text.
=IF(B2=””, “”, IF(B2=”Done“, COUNTIF($B$2:B2, “Done”), “”))
=IF(E1=”Paid“,TEXT(SUBTOTAL(103,$E$1:E1),”000″),”Collect”) Replace “Collect” with “” if no return needed.
ALPHBET BEFORE Number
=IF(D4=””,””,”SF-“&TEXT(SUBTOTAL(103,$D$4:D4)”0000”))
AUTO ID GENERATOR
=IF(D4=””,””,”SF-“&TEXT(SUBTOTAL(103,$D$4:D4)”0000“)&”-RR“)
=IF(D4=””,””,LEFT(D4,2)&=IF(D4=””,””,”SF-“&TEXT(SUBTOTAL(103,$D$4:D4)”0000”)&RIGHT(D4,3)))
You can choose cell reference from D4 to any other cell which you want to pick the data for
FIND &_ MARK DUPLICATE OR UNIQUE
Write this formula in cell
=IF(COUNTIF($A$2:$A$8, $A2)>1, “Duplicate”,”Unique”)
FIND HOW MANY DUPLICATES
Write this formula in cell
=COUNTIF($A$2:$A$8, $A2)
FIND IF CELL HAS CONTAINING A SPECIFIC VALUE
=(IF(K8<1000,”Small”,”Bigger”))
Categorize with specific text
Write this formula in cell
=(if(K8=”PC”,”IT”,”Non IT”))
BONUS COUNT ON TWO (Both) CELL BASED
=IFS(D4>=20,(C420%),D4>=10,(C410%))
=IFERROR(IFS(D4>=20,(C420%),D4>=10,(C410%)),”NOT QUALIFIED”)
BONUS CALCULATION BETWEEN TWO (Any One) CELLS
=IF(OR(J2>=15,K2>=5),”1000″,”0″)
======================================================
COUNT NAME WITH DIFFRENT CATEGORY
=COUNTIF(B2:B20,”ITEM”,F2:F20)
=COUNTIFS(SUM RENG,VALUE,CRITERIA,)
=COUNTIF(B2:B20,”ITEM*”,F2:F20)
COUNT TWO COLUMN DATA WITH SAME NAME WITH DIFFRENT CATEGORY
=COUNTIFS(CRITERIA1,CELL NO,CRITERIA2,CELL NO.,SUM RANGE)
=COUNTIFS(B2:B12,G6,C2:C12,H6) FORMULA MUST WRITE IN CELL WHERE YOU WANT TO GET OUTPUT
=CONTIFS(Rang B2:b12),Cell no. what to find(G6),2nd Rang(C:2C12,What to find(H6)
Exmp. =COUNTIFS(B2:B12,G6,C2:C12,H6)
========================================================
PERFORMANCE CALCULATOR IN LOOKUP
Make a table with parameters & Category then Name it.
10 poor
20 Fair
30 good
40 Very good
50 Best
60 Excellent
Formula
=Vlookup(cell no,”Table Name”,column no.,Exact Match)
=VLOOKUP(B2,”My Table”,C2,1)
LOOKUP
=lookup(cell no,Range,Return Range)
=vlookup(cell no,Table Range,Return column no, 0/1)
=iferror(vlookup(cell no,Table Range,Return column no, 0/1)),”TEXT”)
VLOOKUP
Find all category by first name
=vlookup(B2&”*”,A1:A20,1,0)
HLOOKUP
=hlookup(cell no,Table Range,Return Row no, 0/1)
=iferror(hlookup(cell no,Table Range,Return Row no, 0/1)),”TEXT”)
XLOOKUP
=xlookup(Cellno.,Row Range,Return Row Range)
=xlookup(Cellno.,Row Range,Return Row Range,”if not found text”,0 or 1)
PICTURE LOOKUP
=XLOOKUP(lookup cell no,Range(Column),Return (Column))
=XLOOKUP($F$4,$B$4:$B$7,$D$4:$D$7)
Formula TAB > Define Name > Select Picture > Pest formula name
COLOR IF OTHER CELL CONTAING DATA
Write this formula in desired cell
=NOT(ISBLANK(B4)) *[B4 is targeted cell]
COLOR IF OTHER CELL NOT CONTAING DATA
Write this formula in desired cell
=(ISBLANK(B5)) *[B5 is targeted cell]
====================================================================
COLOR IF CELL CONTAING LESS THE , GRATER THEN, BETWEEN OR EQULE TO VALUE
Condition Formula example
Equal to =$B2=10
Not equal to =$B2<>10
Greater than =$B2>10
Greater than or equal to =$B2>=10
Less than =$B2<10
Less than or equal to =$B2<=10
Between =AND($B2>5, $B2<10)
DCA
CorelDraw Basics
This division includes the following essential key points:
- Understanding bitmaps and vector Graphics
- Opening and starting drawings
- Scanning images
- Implementation with multiple drawings
- Repeating, redoing, and undoing actions
- Scrolling, panning, and zooming
- Previewing drawings
- Saving drawings
- Recovering and backing up files
- Accessing and adding drawing information
- Disclosing basic tasks
- Closing drawings
Understanding bitmaps and vector Graphics
The bitmaps and vector graphics are two primary computer graphics type. These vector graphics have been made of curves and lines, and are produced from a mathematical description. It examines the direction, length, and position where lines have been drawn. The bitmap is also called raster images. The bitmap is composed of tiny squares known as pixels. All the pixels are mapped to any location inside an image. It contains values as numerical color.
The vector graphic is ideal for illustration and logos because it is resolution-independent. It can be shown without losing quality. It can be detailed at a resolution and scaled at a printed, or size. In addition, we can generate a crisp and sharp outline along with the vector graphics.
We can make vector graphics within CorelDraw. Also, we can import bitmap (like TIFF and JPEG) in CorelDraw, insert them into our drawings.
Difference between JDK, JRE, and JVM
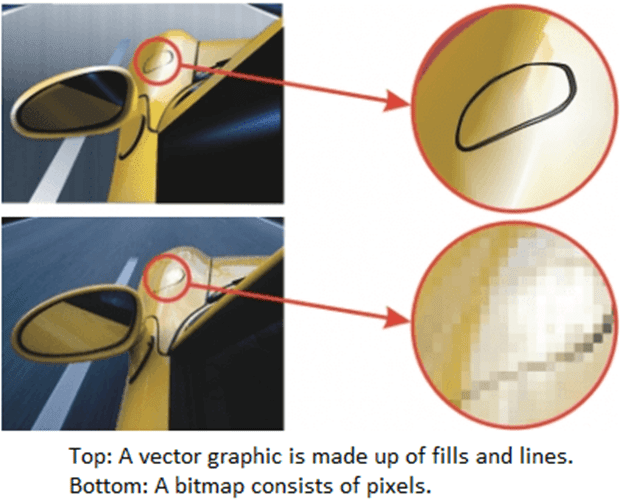
Opening and starting drawings
CorelDraw enables us to begin a drawing from an existing drawing, template, and blank page. Any black page provides us the freedom for specifying all the drawing aspects. The template gives us along with a beginning point.
To start any drawing
1. The following can be done:
Go to Welcome Screen and click on Get started > New Document
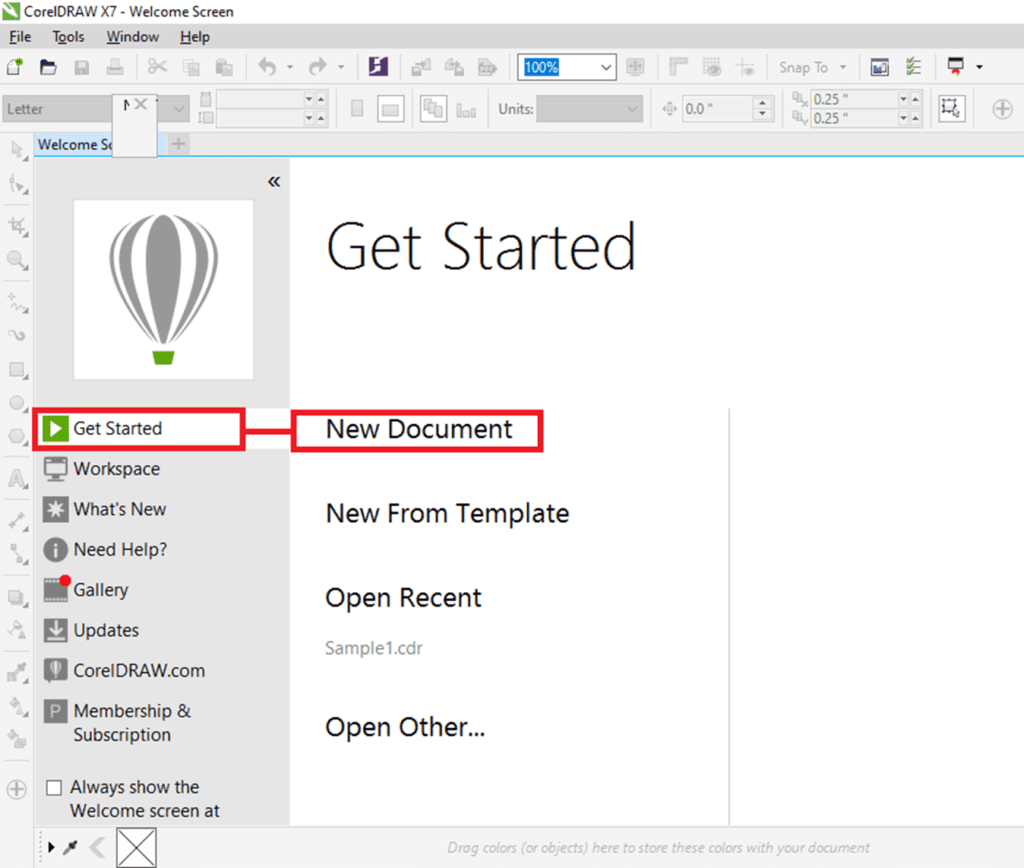
Inside the application window, press on File > New.
2. Fill the filename within the text box Name.
3. From the list box Preset destination, select an output destination to implement drawings:
- CorelDraw default: It can be used to apply default settings of CorelDraw to create graphics that can be destined to print.
- Default CMYK: It can be used to apply various settings to create graphics that can be destined for any commercial printing.
- Default RGB: It can be used to apply the settings to create graphics. It can also be destined to print for any high-fidelity type printer.
- Web: It can be used to apply the settings to create graphics that can be destined for the internet.
- Custom: It can be used to let us customize the destination settings to a document.
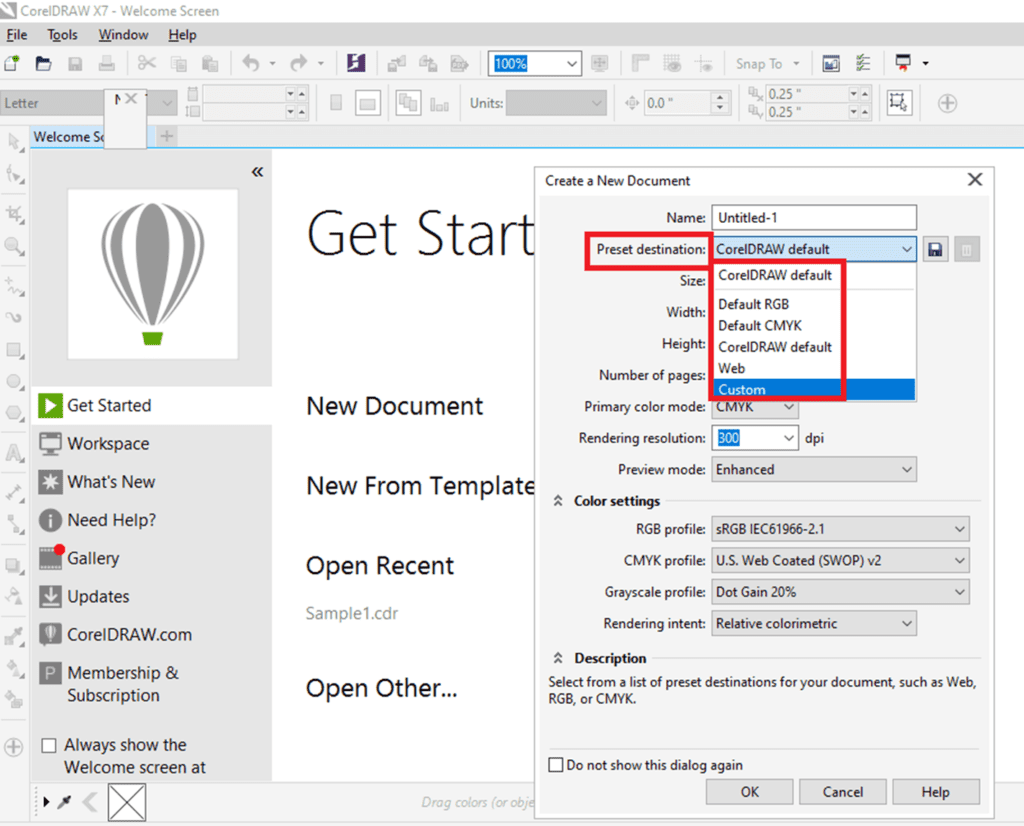
Scanning images
We can scan the images within CorelDraw. It helps scanners that apply WIA (Microsoft windows image Acquisition), which facilitates a specific interface for image scanning.
If our scanner doesn’t provide its support for WIA but contains the TWAIN driver, we can use the drive to scan the images inside CorelDraw. TWAIN drivers are supported by 64-bit and 32-bit versions of CorelDraw.
Note: There are very few TWAIN drivers of 64-bit available.
For image scanning
1. Go to File > Acquire image, click on any following command:
- Choose WIA source: It can be used for any scanner that applies WIA driver.
- Choose TWAIN source: It can be used for any scanner that applies TWAIN driver.
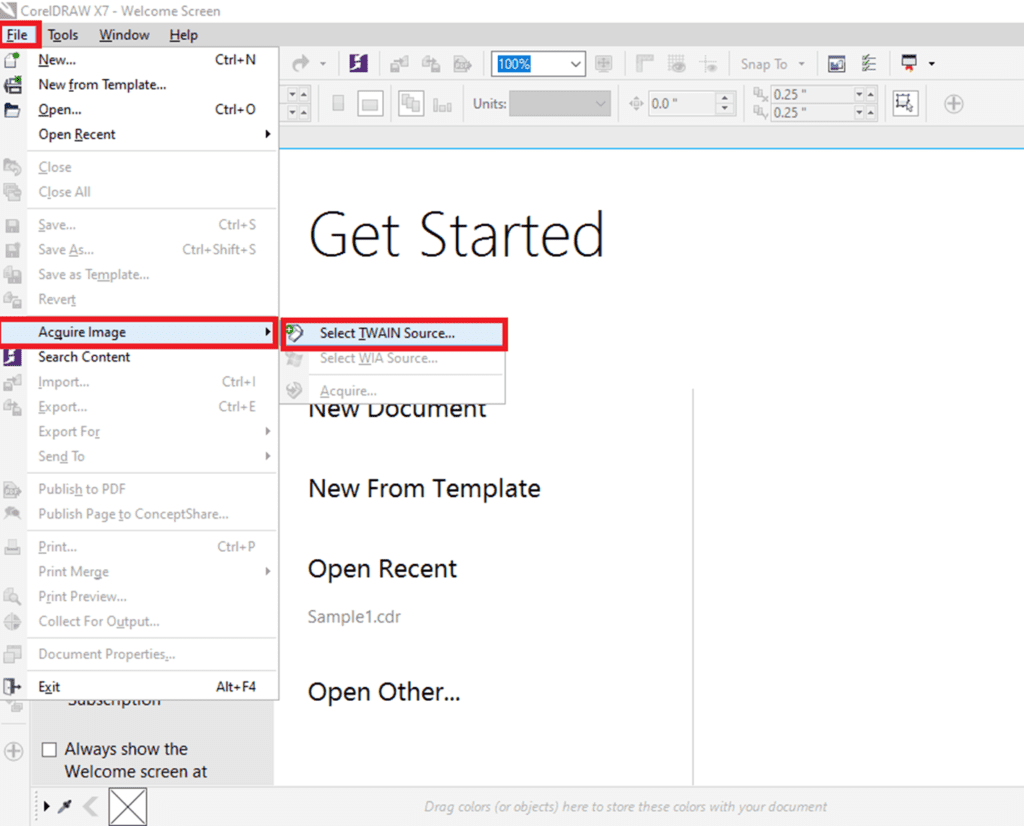
In case a compatible TWAIN and WIA drivers are not installed, then a command pops up disabled.
2. Select the scanner from a dialog box.
3. Click on
4. Click on File > Acquire image > Acquire.
5. Preview an image, and choose an area that we wish to scan.
6. Click on Scan.
Implementation with multiple drawings
Inside one drawing window, multiple drawings could be opened, which makes it efficient to manage several drawings simultaneously. We can access all the open designs from its drawing window top’s tab, and we can begin any new drawing.
We can also undock the drawing we drag and want it outside and inside any application window, but the open drawings illustrate as docked.
Repeating, redoing, and undoing actions
We can undo any action that we perform in the drawing, beginning with some most recent operations. If we do not like the undoing any operations result, we may redo it. Some essential operations are used to objects, like rotating, moving, filling, and stretching, which may be repeated for creating powerful visual effects.
Undo settings customization enables us to decrease and increase the operations number that we can redo and undo.
To undo
- Click on Edit > Undo manager.
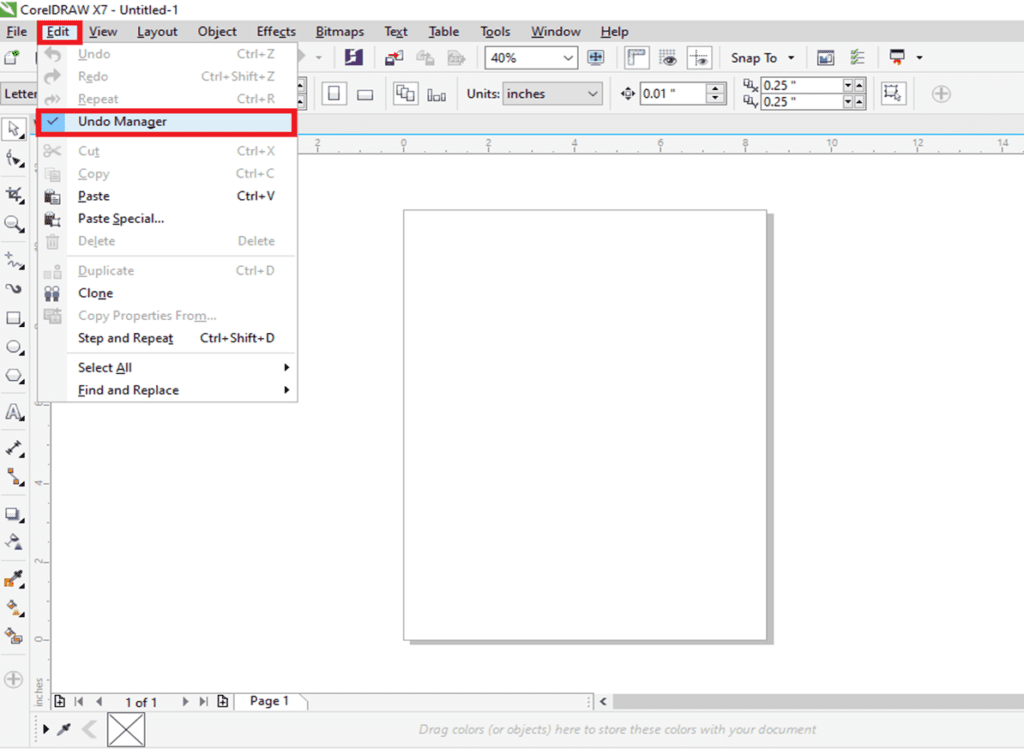
To redo
- Click on Edit > Redo.
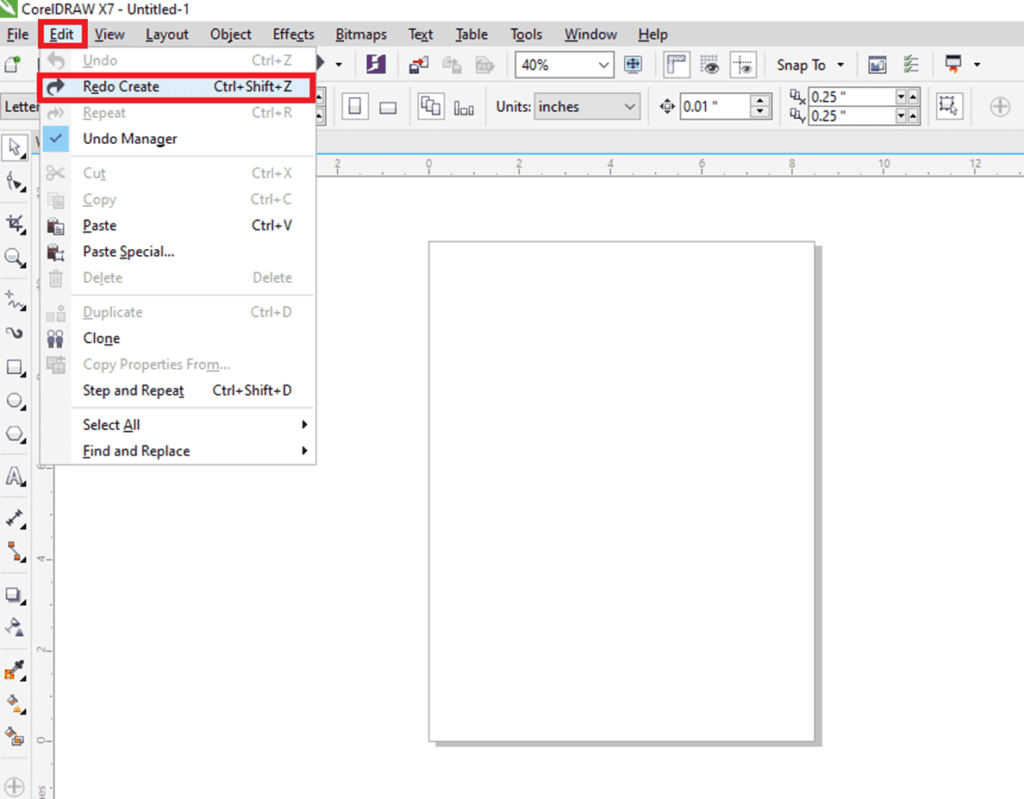
To repeat
- Click on Edit > Repeat.
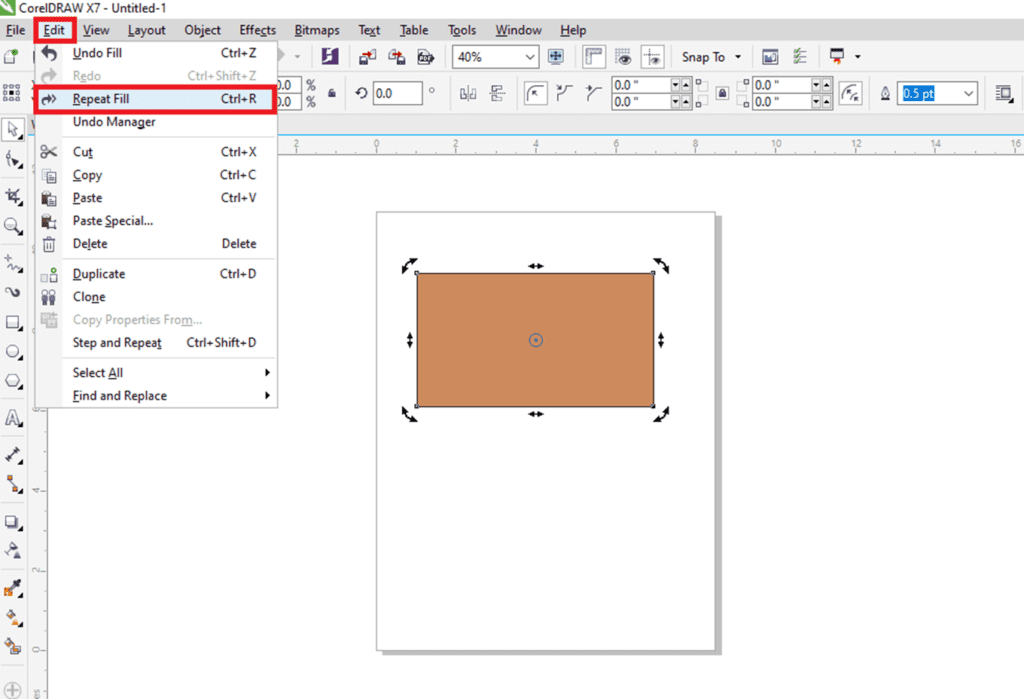
Scrolling, panning, and zooming
We can modify the drawing view by zooming-in for a closer appearance or by zooming-out for more drawing appearance. We can experiment along with the zoom option’s variety to examine the detail amount we want.
Scrolling and panning are additional ways for viewing drawing particular areas. When we work on levels of magnification or with other drawings, we may not see an entire drawing. Scrolling and panning let us move a page around inside a drawing window for viewing hidden previous areas.
We can zoom out and in while we are panning, and we can pan at the time we are zooming. We can ignore having to substitute between any two tools.
Also, we can apply the mode of Quick pan for switching from an active tool towards a Pan tool. It lets us pan without changing the tools.
In case, we apply the mouse wheel, it zooms-out, and zoom-in by default. We can also apply the wheel of the mouse for scrolling.
We can describe default panning and zooming settings.
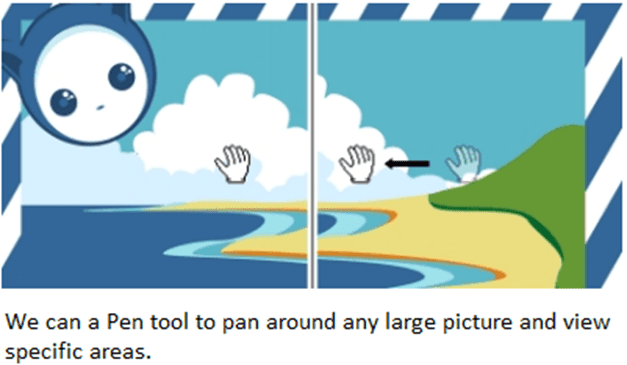
To zoom
1. within the toolbox, press on the Zoom tool.
2. Over the property bar, press anyone from the following:
- Zoom out
- Zoom in
- Zoom to selected
- Zoom to all objects
- Zoom to page
- Zoom to page width
- Zoom to page height
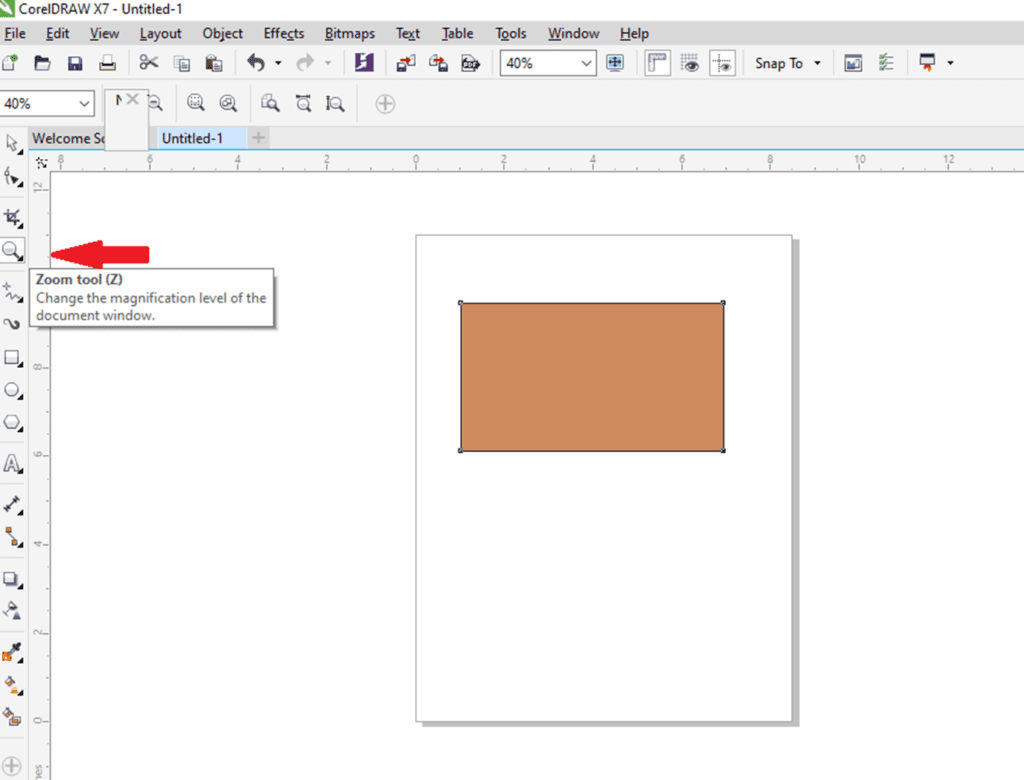
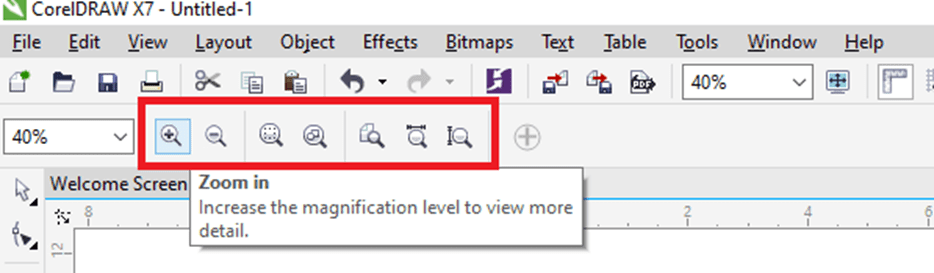
Previewing drawings
We can preview the drawing to look at how it would appear if exported and printed. If we preview any drawing, the objects over the page of drawing and in an immediate place of a drawing window will be displayed and we can see every layer that can be set for printing inside an Object manager. In case, we wish a closer appearance at particular objects within the drawing, we can preview and select them. If we preview some selected objects, the other drawings will be hidden.
Before we preview any drawing, we can specify the mode of the preview. A preview mode impacts the speed by which our preview represents and also the detail amount shown in a drawing window.
The page borders are shown inside a drawing window, although we can hide these borders at any time. In case, any drawing is planned for print, we can represent an area that can actually print and bleed as well, the drawing part that boosts beyond a border of the page. Bleeds can be helpful if a drawing includes the objects and background of a color page that is placed on a page border. It ensures that there are not display any white space between the drawing edges and the paper edges after a printer trims, binds, and cuts the document.
To preview the drawing
- Press View > Full-screen preview.
Press any key, or anywhere over the screen, to return on the application window. We can click Page down and Page up to preview the pages within the multipage drawing.
Saving drawings
The file format of CorelDraw (CDR) can be used to save the drawings. It is compatible with an application’s latest version. Also, we can save the drawing, and it is compatible with the CorelDraw Graphics Suite earlier version and specify the save options. These options are helpful if any file includes new transparency, outline, fill, and text that can’t be supported in the earlier versions.
If we wish to apply the drawing in other applications, we should save it for the file format, supported by the application. If we save any drawing, we can enclose the applied fonts to provide file sharing.
To save the drawing
1. Press File > Save as.
2. Fill the filename within the box of File name.
3. Locate this folder where we wish to save our file.
When we wish to save any drawing to the vector file format, select the file format through the list box of save as type.
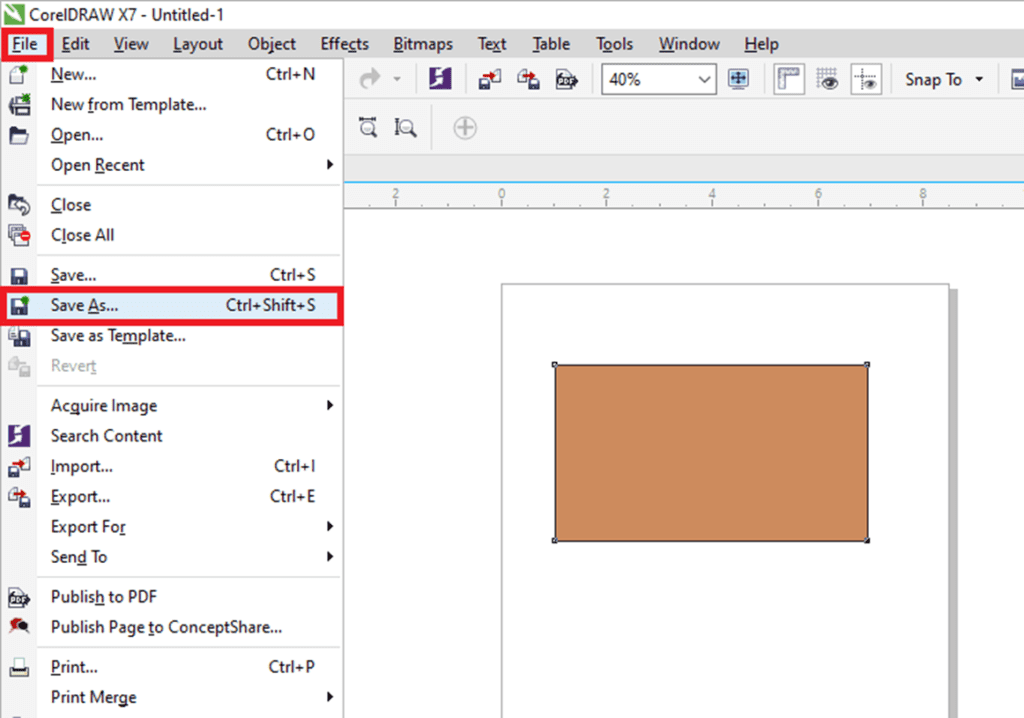
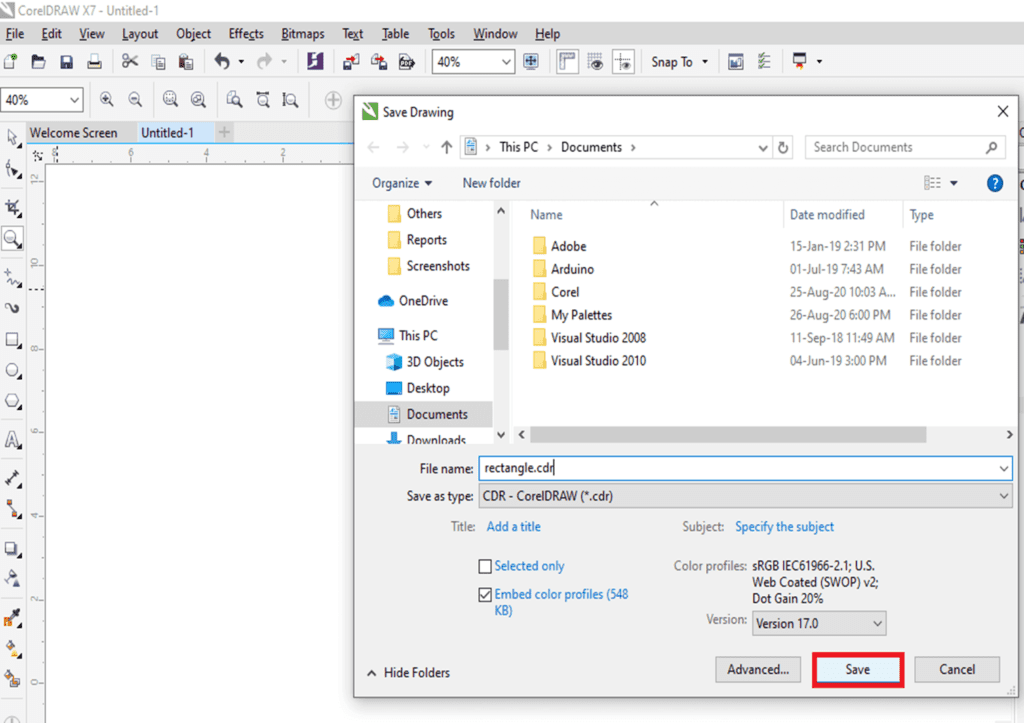
Recovering and backing up files
CorelDraw may save the backup copies of drawings automatically. It can prompt us to recover in the system error’s event.
A feature auto-backup saves drawings, we have modified and opened. We can set an interval of time for file’s backup automatically and specify if we wish any file to save in our specified folder or temporary folder (default location), with CorelDraw during the working session.
We can recover various files of backup from the specified or temporary folder if we reopen the CorelDraw after the system error. In case, we select not backup file recovery, it is erased automatically if we quite this application.
To recover any backup file
1. Reopen CorelDraw.
2. Press Ok within the dialog box of file recovery that represents.
The dialog box of file recovery represents under startup after the system error.
3. Save and rename that file within the described folder.
Accessing and adding drawing information
The CorelDraw Graphics Suit lets us include the reference information, like rating, keywords, subject, author, title, language, and some other notes for the drawing. But including the information of the document is optional, thus makes it efficient to locate and organize later on.
This application lets us access the other essential document information, like the number of text statistics and object, fonts, layers and pages, and the objects types any drawing includes.
We can also see the color information like color profile, applied to depict the colors of the document, mode of primary color, and rendering intent as well.
To insert drawing information
1. Press File > Document properties.
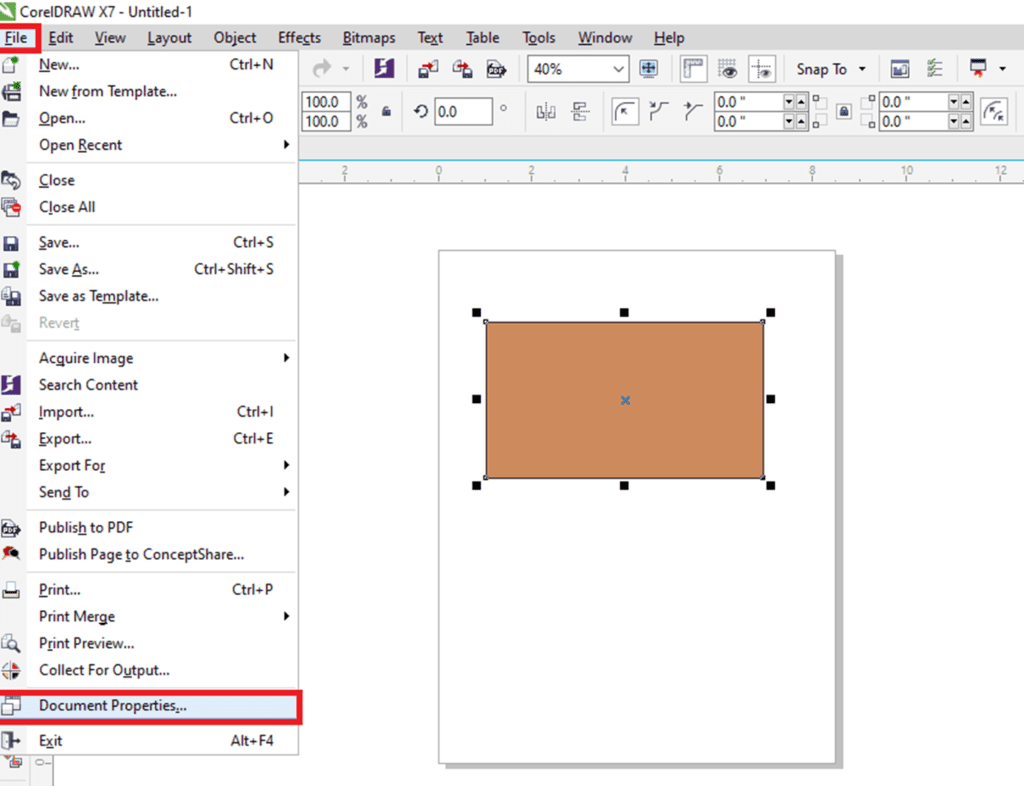
2. Within the dialog box of Document properties, fill text inside anyone from the following:
- Title
- Language
- Author
- Subject
- Copyright
- Notes
- Keywords
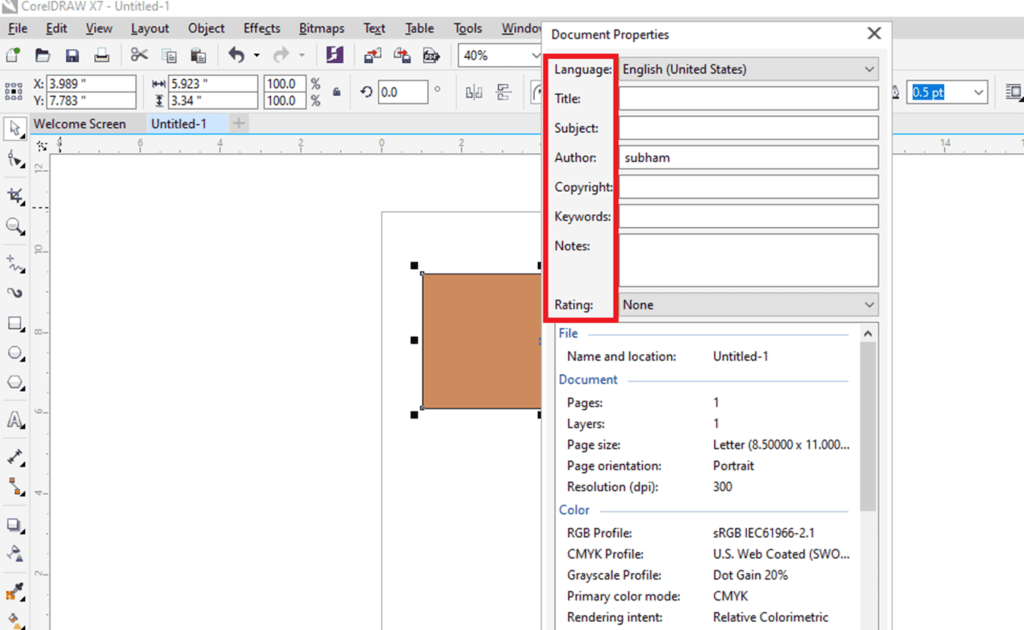
3. To describe the rating, select the rating through the list box of Rating.
4. Press Ok.
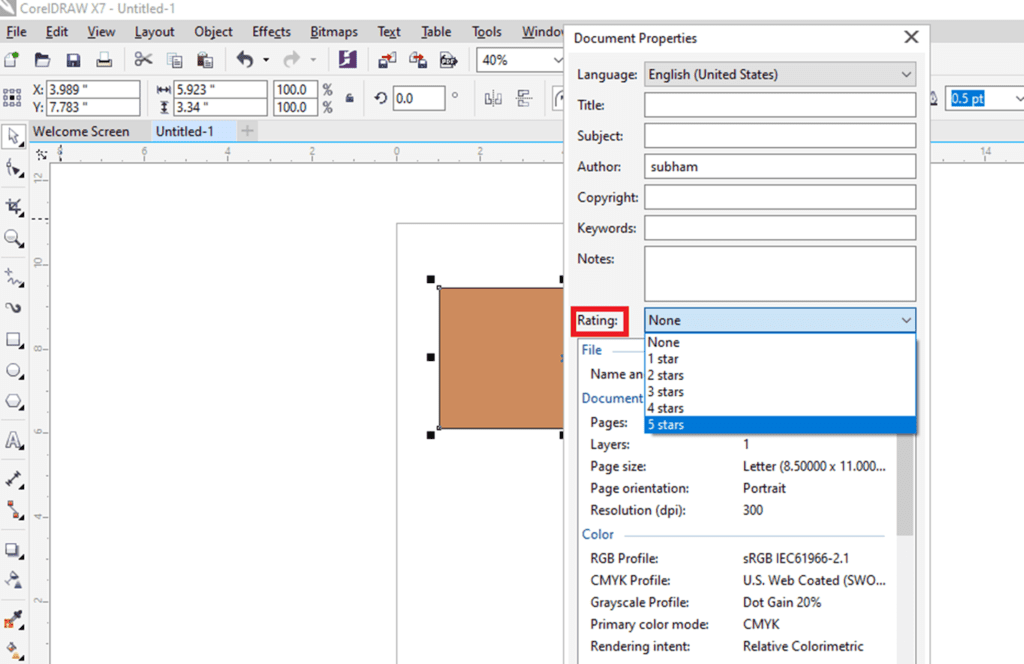
To access the drawing information
- Press File > Document properties.

CorelDraw: Filling Objects
We can add textured, patterned, colored, and some other fills towards an inside of objects enclosed areas. We can customize the fill and fix it as the default, thus all the objects we draw have a similar fill.
This chapter includes the following essential topics:
- Using uniform fills
- Using fountain fills
- Using pattern fills
- Using texture fills
- Using PostScript fills
- Using mesh fills
- Fills implementation
Using uniform fills
We can use the uniform fills in the objects. Uniform fill is a solid color we can create or select applying color palettes and color models.
To use the uniform fills
1. Choose the object.
2. Press any color over a color palette.
If we wish to mix the colors inside the uniform fill, click Ctrl, and press other colors over a color palette.
Also, we can select the uniform fill through pressing
- Uniform fill inside the Object property’s Fill section docker
- Interactive fill inside a toolbox and press the Uniform fill over property bar
Using fountain fills
A fountain fill is also called gradient fills. It is multiple colors’ smooth progression that inserts depth to the objects. There are some essential fountain fills types: rectangular, conical, elliptical, and linear.
We can select the fountain fills through content exchange or from any personal library. The fountain fills could be changed to suit our requirements, and we can design our fills. The fountain fills could include multiple colors, which we can place anywhere inside the progression of fills.
To use the fountain fill
1. Choose the object.
2. Press Object > Object properties.
3. Inside the Object properties, click on Fountain fill to show various options of fountain fills.

4. Open a Fill picker, click on the fill thumbnail.
5. Press on the Apply button inside a pop-up window which appears.
To create the fountain fills
1. Choose the object.
2. Press Object > Object properties.
3. Inside the Object properties, click on Fountain fill to show various options of fountain fills.
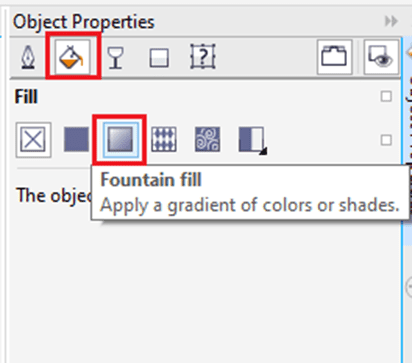
4. Press any one button to select a type of fountain fill:
- Rectangular fountain fill
- Conical fountain fill
- Elliptical fountain fill
- Linear fountain fill
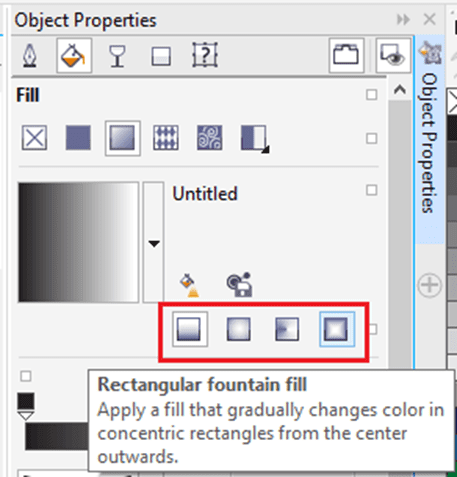
5. Click start node over a color band, open a Node color, and select the color.
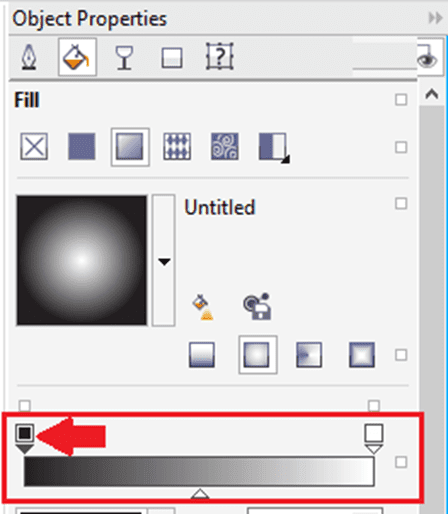

6. Click end node over a color band, open a Node color, and select the color.
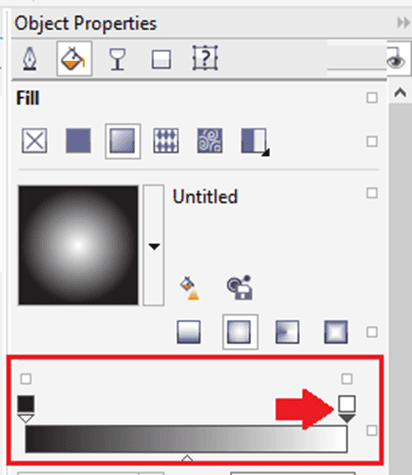
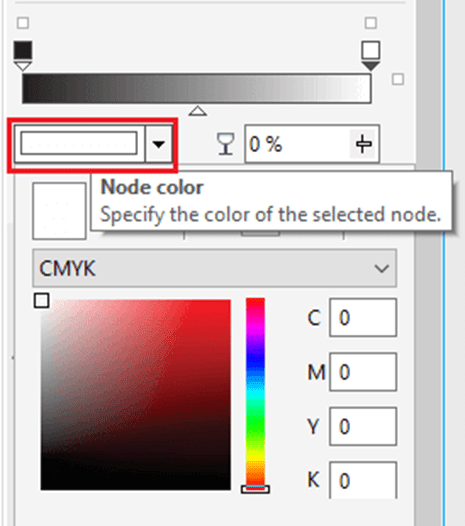
Using pattern fills
We can fill the objects along with bitmap and vector pattern fills, also two-color fills. CorelDraw facilitates a group of bitmap and vector patterns that we can access. We can browse some available patterns, find patterns through keywords, vote for some patterns that we like, mark patterns like favorites, or copy the patterns through a content exchange for our personal library.
Also, we can create our patterns. Such as, we can create the patterns from workspace’s areas and images that we import. Bitmap and vector patterns are created of some smaller units known as tiles.
To use the bitmap and vector pattern fill
1. Choose the object.
2. Press Object > Object properties.
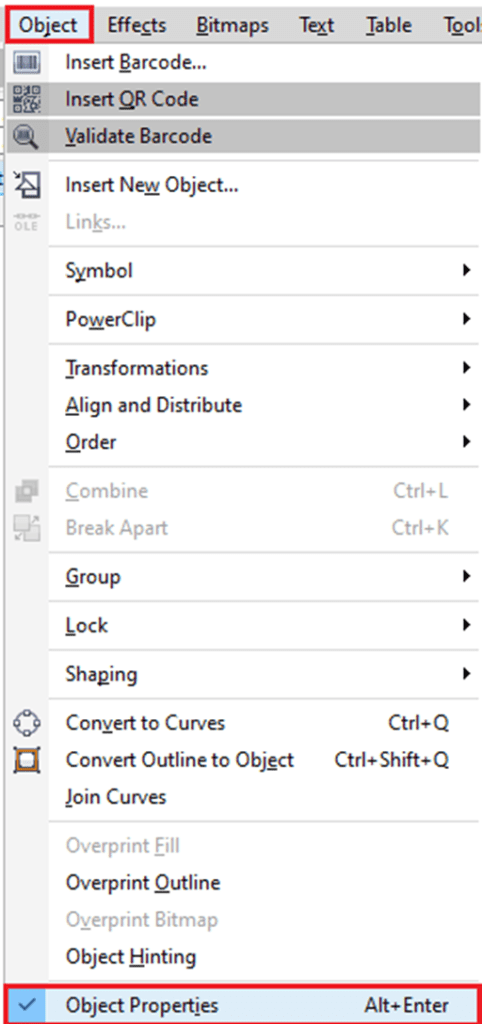
3. Inside Object properties, click any one button from the following:
- Bitmap pattern fill
- Vector pattern fill
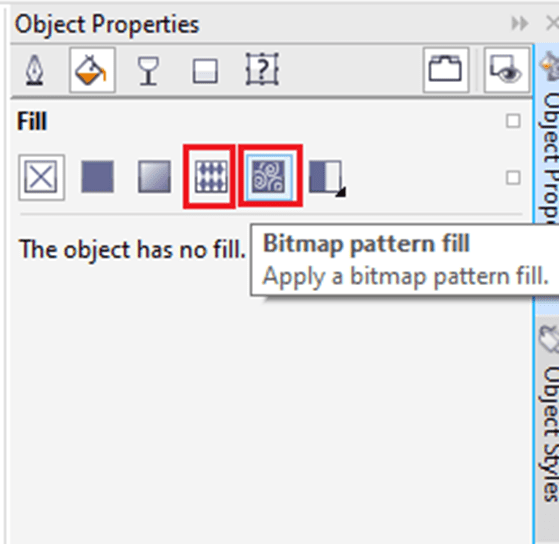
4. Open a Fill picker, press on pattern thumbnail.

5. Press on Apply inside a pop-up window which appears.

Using texture fills
The texture fills are the randomly produced fills that we can provide to our objects for a general appearance. We can apply an existing texture fill, like clouds, minerals, and water, or we can edit the texture to design our texture fill. We can apply colors through the palette or color model. Also, we can skew and rotate the fill, change the texture’s center, and adjust the size of the tile.
To use the texture fill
1. Choose the object.
2. Press Object > Object properties.
3. Inside Object property’s Fill area, click on flyout arrow over Two-color pattern fill, and click on Texture fill to show various options of texture fill.


4. Select the texture library through a list box, i.e., Texture library.
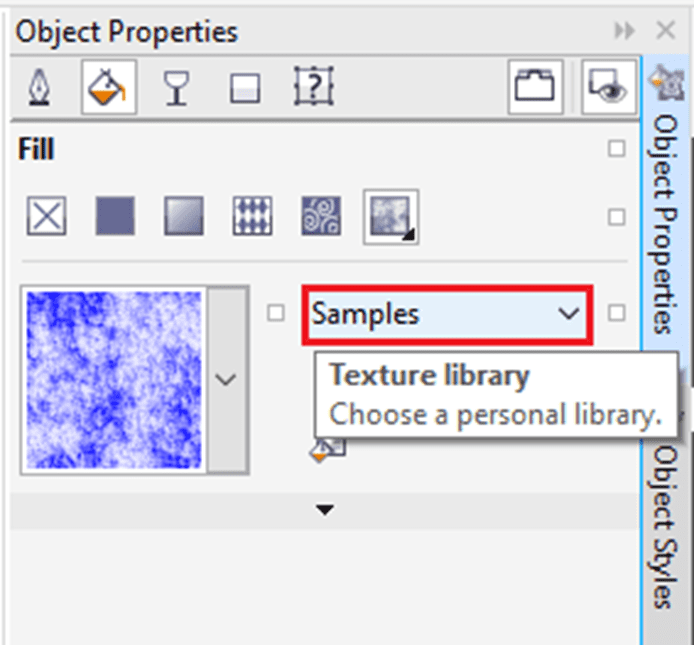
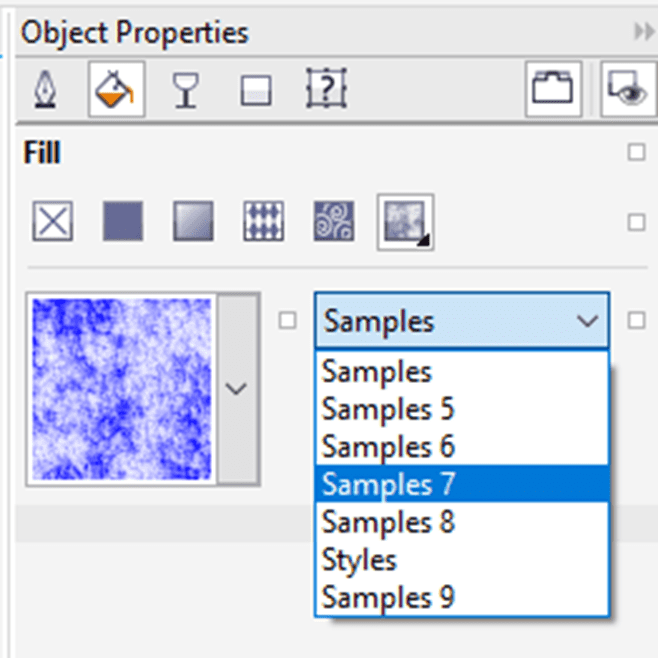
5. Select the texture from a Fill
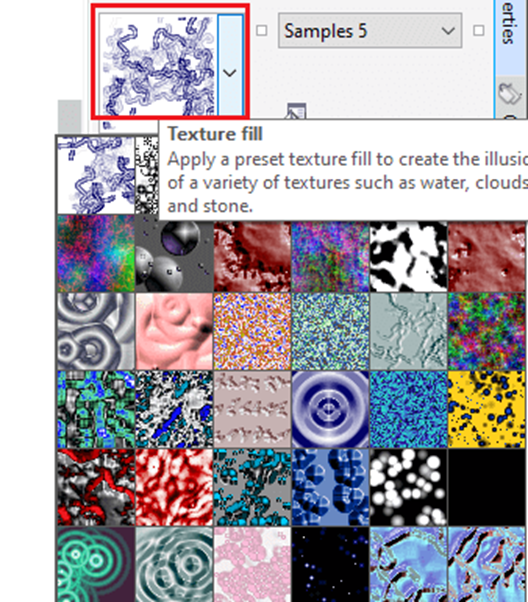
Also, we can use the texture fill through clicking on the Interactive fill inside a toolbox, pressing a Texture fill over a property bar, and then applying various controls over this property bar.
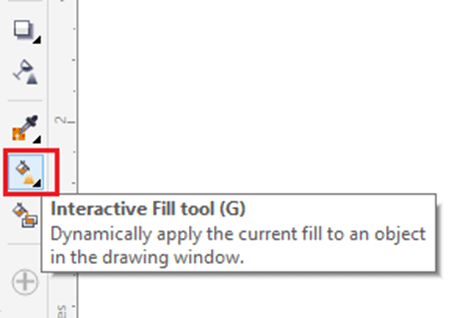
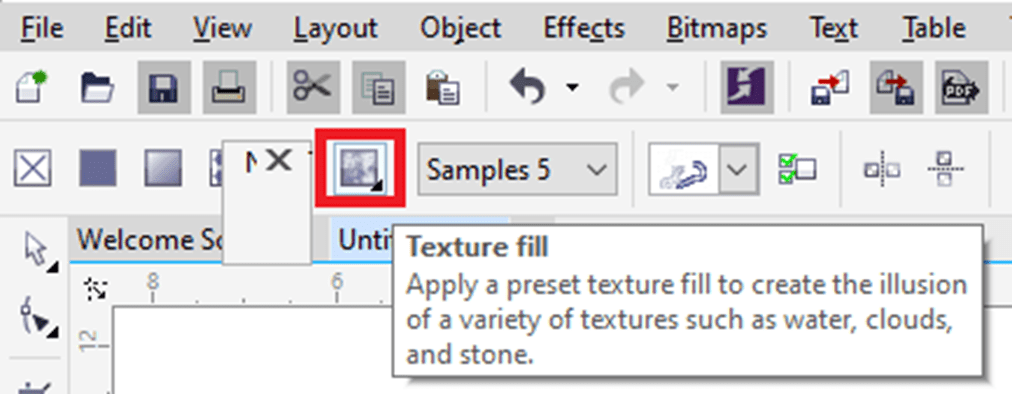
Using PostScript fills
We can use PostScript fills in the objects. The PostScript fill is designed within the PostScript language. A few textures can be very complicated, and the large objects which include PostScript fill can take time for updating or to be printed over a screen.
If we use the PostScript fills, we can modify various properties, like line width, gray amount, and size that appear within the background and foreground of texture.
To use the PostScript fills
1. Choose the object.
2. Press Object > Object properties.
3. Inside the Object properties docker, click on a flyout arrow over a Two-color pattern fill and click on the PostScript fill to show various options of PostScript.

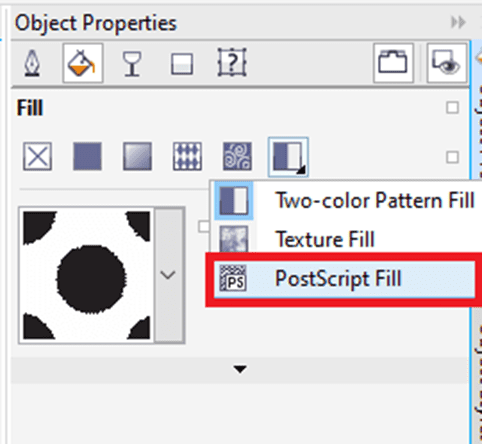
4. Select the fill from a list, i.e., PostScript fill textures.

- When we wish to modify any fill property, press on the Edit fill button and describe various settings we wish.
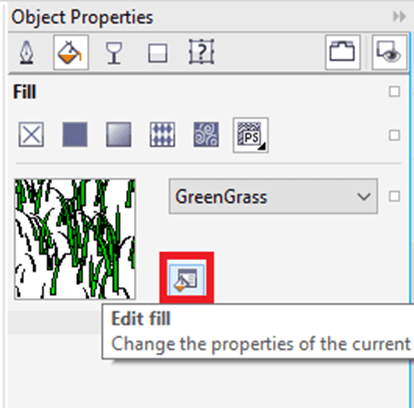
- Also, we can use the PostScript fill thru click on the Interactive tool, click on the PostScript fill button over a property bar, selecting the fill from a list box, i.e., PostScript fill textures.
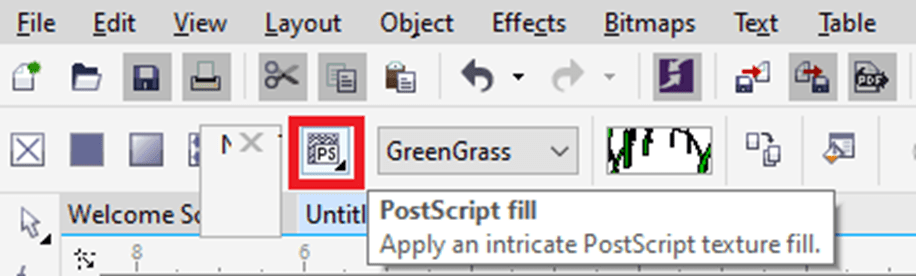
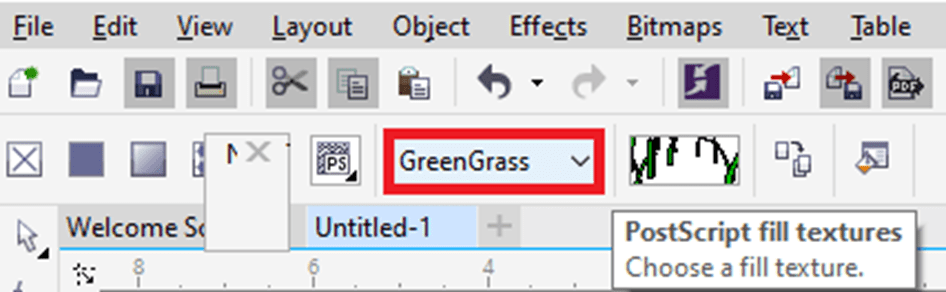
Using mesh fills
If we fill any object along with the mesh fills, we can create some unique effects. Such as, we can design various color transitions within a direction without creating contours and blends. If we use the mesh fills, we describe the columns and rows numbers inside a grid, and we describe the interaction points of the grid. After we have designed the mesh object, we can format any mesh fill grid thru removing and adding interactions and nodes. Also, we can remove any mesh.
The mesh fills can be used to an individual path or any closed objects only. When we wish to use any mesh fill for some complex objects, we should first design the mesh-filled object.
We can insert color to the mesh fill’s patch and to some individual interaction nodes. Also, we can select to some mix colors for an efficient blended appearance.
To use the mesh to the object
1. Choose the object.
2. Inside a toolbox, click on the Mesh fill
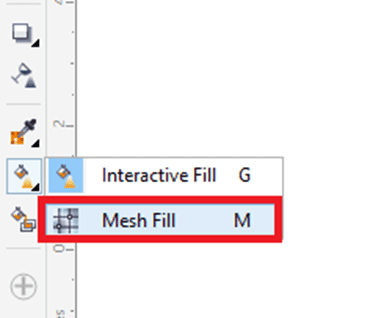
3. Fill the column’s number inside the Grid size box’s top portion over a property bar.
4. Fill the row’s number inside the Grid size box’s top portion over a property bar, and click Enter.
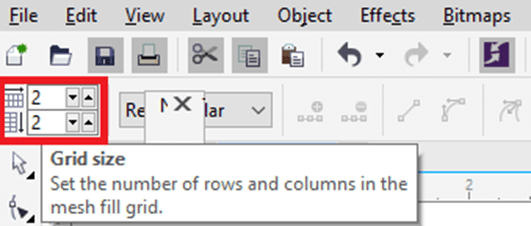
5. Adjust some grid nodes over the object.

To fill colors in a mesh
- Choose the mesh-filled object.
- Inside a toolbox, click on the Mesh fill
- Drag the color through a color palette for the patch inside an object.
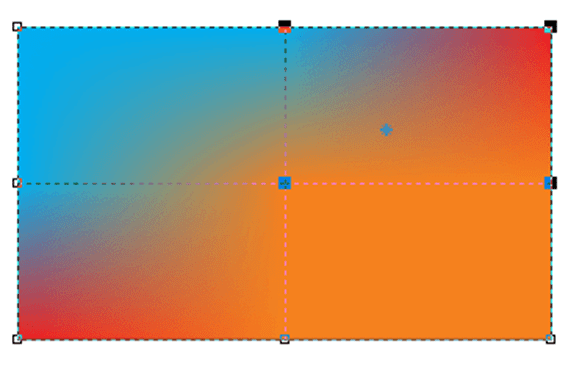
To use transparency in the mesh fill
- Choose the mesh-filled object.
- Inside a toolbox, click on the Mesh fill
- Press the node to choose the mesh’s part.
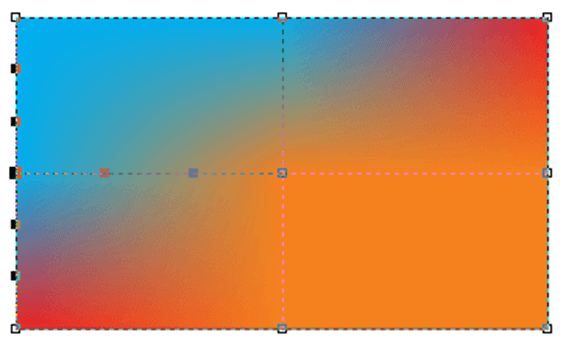
4. over a property bar, and move a Transparency slider on the right side for increasing a selected area’s transparency.
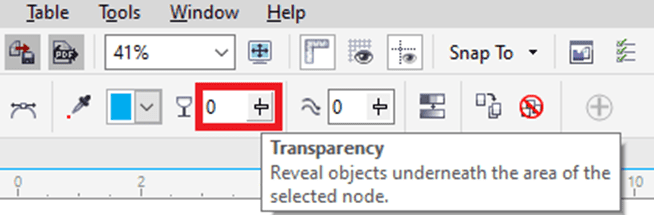
Fills implementation
There are various operations that are basic to every fill type. We can select the fill color (default) so that all the objects that we insert to any drawing have the same fill. Also, we can remove the fills, apply it for filling an area or copy it for other objects surrounded by the open curve.
When we wish to use similar fill to another object or change several object’s fill attributes simultaneously within the drawing, we can save various fill settings like the style.
To select the fill color (default)
1. Click on a blank area over a drawing page for deselecting every object.
2. Double-click on the Fill icon on the status bar.
3. Inside the dialog box Edit fill, select the fill type, select the fill color, and click Ok.
4. Inside the dialog box Change document defaults; let some checkboxes to object’s type whose fill (default) we wish to modify.

Also, we can modify the fill color (default) by formatting the style sets (default) inside an Object styles docker.
To remove the fill
- Choose the object.
- Press Object > Object properties.
- Inside Object properties docker, press on a No fill
To display fills inside an open curve
1. Press Tools > Options.
2. Inside the category’s list, double-click on Document, and press General.
3. Enable the checkbox, i.e., Fill open curves.
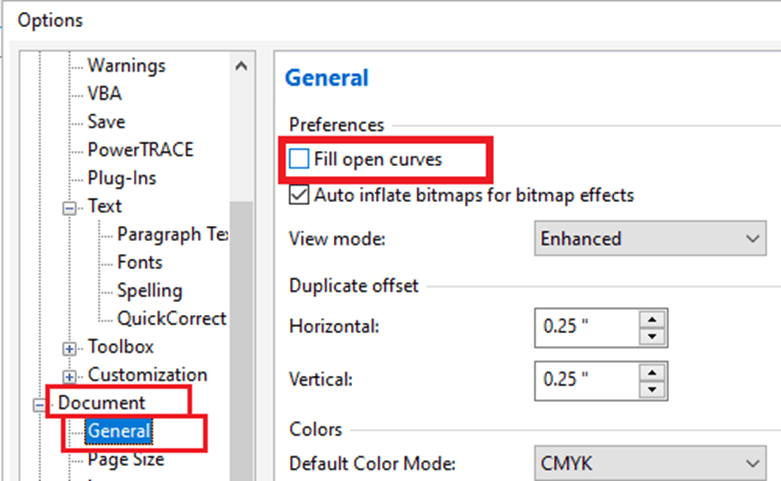
CorelDraw Workspace Customization
We will define some essential ways for CorelDraw workspace customization that most of our usable tools will be right at our fingertips.
Let’s begin by defining where the customization options places are inside the CorelDraw. Go to Tools > Customization. Inside this option’s dialog box, we will see a Customization division inside the left side menu. It is where we control what kinds of toolbars are shown. We will also add Commands (buttons) to the Command Bar (toolbar).
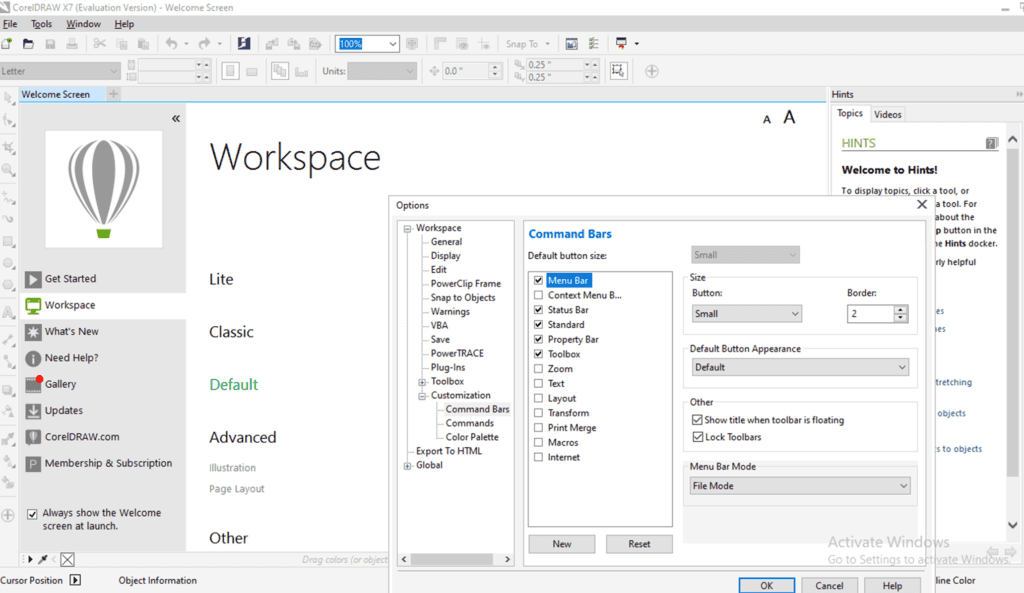
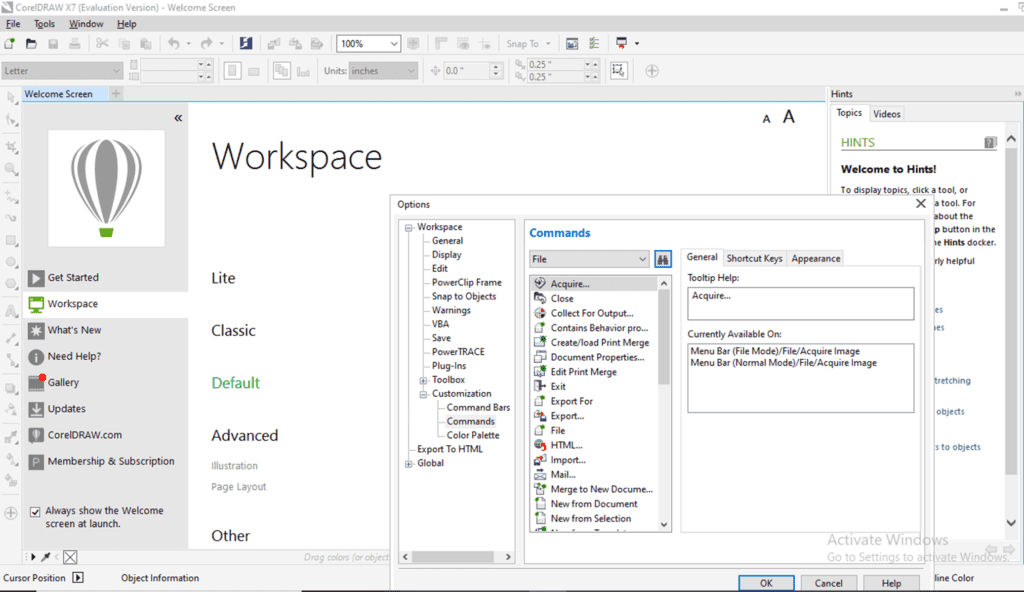
New Workspace Creation
We will have to create any newer workspace because it is an initial step for CorelDraw workspace customization. Inside the dialog box of Customization Options:
- Click on Workspace on the left column’s top
- Click on New for newer workspace creation
- Enter the description and name, after that click OK
Our workspace must have now any checkmark alongside it, illustrating it is a workspace that is in use.
New Toolbar Creation
In this division, we will design the custom toolbar (known as Command Bar also).
- Click Command Bars inside Customization after that click on New
- Type inside the name and then press on Enter
Somewhere inside the workspace, our newer toolbar will have appeared, although it could be complex to see as it is any tiny box along with X in the right corner’s top. We should move the dialog box of Options to a side and click on OK for closing it in an order to define the newer toolbar.
We can drag this toolbar everywhere we wish inside the workspace. We suggested left it floating over the page’s left side while we include the commands into it. We can dock it later.
Docking our Toolbar
We can dock our toolbar inside the Property Bar on the interface top.
- Click on our newer toolbar’s name
- Hold down our mouse key, drag it on Property Bar
- The shaded grey place will illustrate, and we can leave our toolbar there
Note: If we wish to move our toolbar to other spots, right-click on any tool and then uncheck the Lock Toolbars. A dotted gray line will present, illustrating that we can move our toolbar now.
When we insert any toolbar to a Property Bar, our workspace may compress the tools. We will detect two tiny right-side pointing arrows. It defines there are some more tools which are not shown. We can expand our toolbar by dragging a thin line to the right side until every button will be visible.
Substituting toolbar icons to Captions
We can turn our most widely used icons of toolbar into some captions (also called tool names), thus we can efficiently identify them. We will apply Ungroup and Group, as an illustration, although we require to create a few objects, we could group, in an order to enable them to display up.
Activate the tool Rectangle and make three rectangles over the page anywhere.
Activate the tool Pick and lasso these rectangles thru designing the marquee over them.
Right-click over the button Group objects and select Customize > Toolbar element > Caption Only.
We will see a Group object caption rather than the button. Click over it to a rectangle the group together. Repeat this creating caption process to the Ungroup All and Ungroup buttons.
Saving Our Custom Workspace
Once we have finished various modifications for CorelDraw workspace customization, it is essential to store it, thus we could reload it anytime or can share it with other users. Go in Tools > Customization. Our newer workspace must have a check along with it, illustrating that the workspace is in the use. Click the button Export.
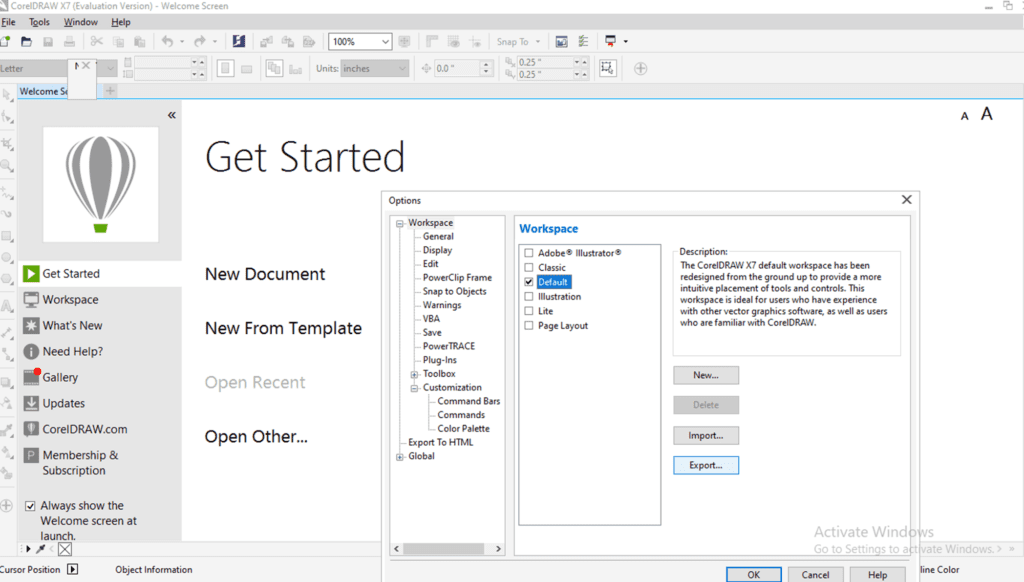
We will get an option to choose which of the workspace items we wish to export. After that select, any location on our system to store it, enter the name of the file, and click on the Save.
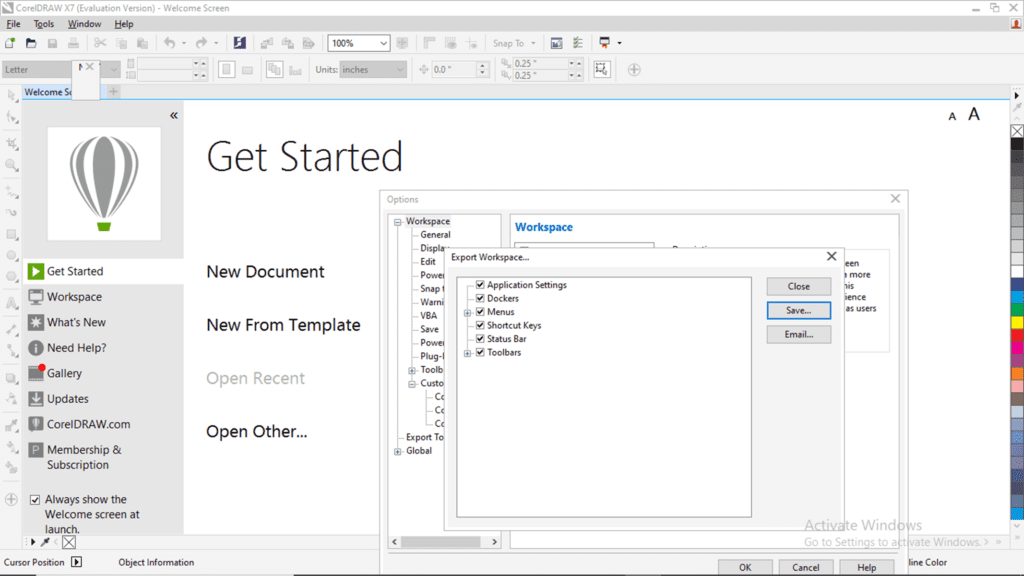
If we require to reinstall our workspace, go in tool > Customization and then click over the workspace. After that click on the button import and browser to our stored workspace, choose it, and press Open.
Select the workspace items to import. In case, if we wish to import within any current or new workspace, then press on import.
Now we are familiar with a few ways to CorelDraw workspace customization. We can make any workspace that can put our favorite tools on our fingertips and grow up our workflow efficiently.
CorelDraw: Drawing Shapes
In this chapter, we will understand the following topics:
- Creating Squares and Rectangles
- Creating pie shapes, arcs, circles, and ellipses
- Creating stars and polygons
- Creating spirals
- Creating grids
- Creating predefined shapes
- Creating by applying shape recognition
Creating Squares and Rectangles
CorelDraw enables us to draw squares and rectangles. We can create a square and rectangle by dragging with a Rectangle tool diagonally or by describing the height and width with a 3-point rectangle tool. It lets us create rectangles on an angle quickly.
Also, we can create a square and rectangle with chamfered, scalloped, and rounded corners. We can individually change every corner or use these modifications to every corner. Besides, we can describe that every corner scale relevant to an object. Also, we can describe the size of the default corner for creating squares and rectangles.
To draw the rectangle
- Within the toolbox, press the Rectangle Drag this tool inside the drawing window and draw the shape we wish.
To draw the square
- Within the toolbox, press the Rectangle Hold down the Ctrl button, and drag this tool inside the drawing window and draw the shape we wish.
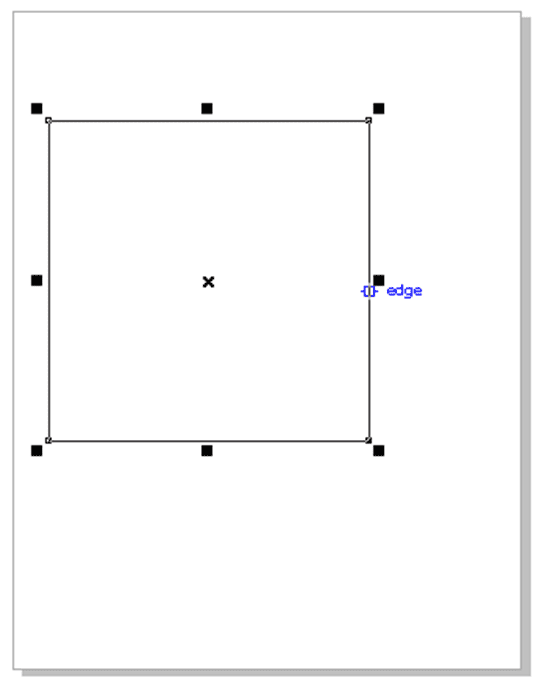
Creating pie shapes, arcs, circles, and ellipses
We can create a circle or ellipse by dragging with an ellipse tool diagonally, or we can create an ellipse with the help of a 3-point ellipse tool for specifying its height and width. A 3-point ellipse tool enables us to create the ellipse at the angle quickly, eliminating the requirement to rotate an ellipse.
To draw the circle or ellipse diagonally by dragging
- Within the toolbox, press the Ellipse Release the mouse button when we have an ellipse shape we wish.
- Within the toolbox, press the Ellipse Hold down the Ctrl button, and release the mouse button when we have a circle shape we wish.
Creating stars and polygons
CorelDraw enables us to create two essential kinds of stars and polygons: complex and perfect. Complex star generates real outcomes and intersecting sides with the fill used. Perfect star is traditional-looking and can contain a fill used to the whole star shape.
We can change the stars and polygons. For example, we can modify the side’s number on the polygon or point’s number on the star, and sharpen-up the star’s points. Also, we can apply a Shape tool for reshaping complex stars and polygons.
To draw the polygons
- Within the toolbox, press the Polygon tool, drag the mouse button inside the drawing window, and release it when we get the polygon shape we wish.
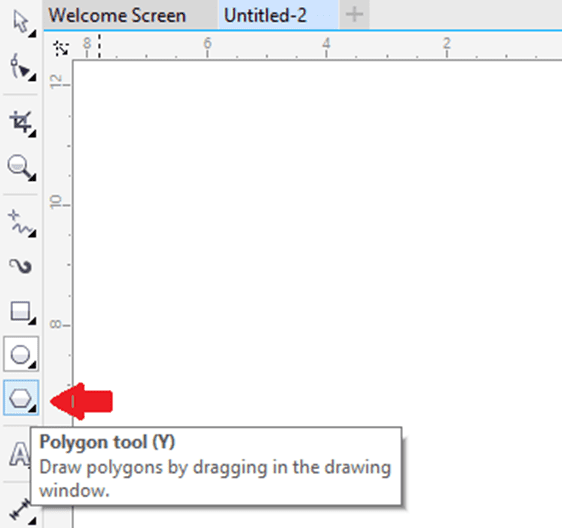
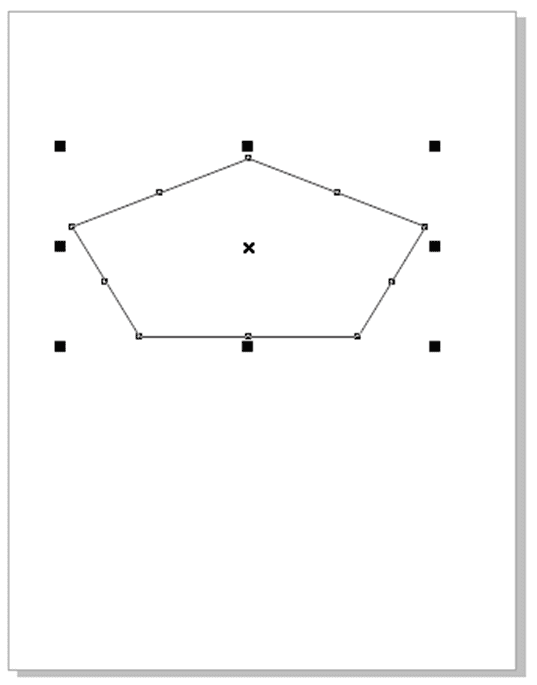
To draw the stars
- Within the toolbox, press the Star tool, drag the mouse button inside the drawing window, and release it when we get the polygon shape we wish.


Creating spirals
We can create two essential spiral types: logarithmic and symmetric. The symmetric spiral spreads evenly. Thus, the distance among every revolution will be equal. The logarithmic spiral spreads with increasingly bigger distances among the revolution. We can set-up the rate thru which the logarithmic spiral spreads outward.
To draw the spirals
1. Within the toolbox, press the Spiral
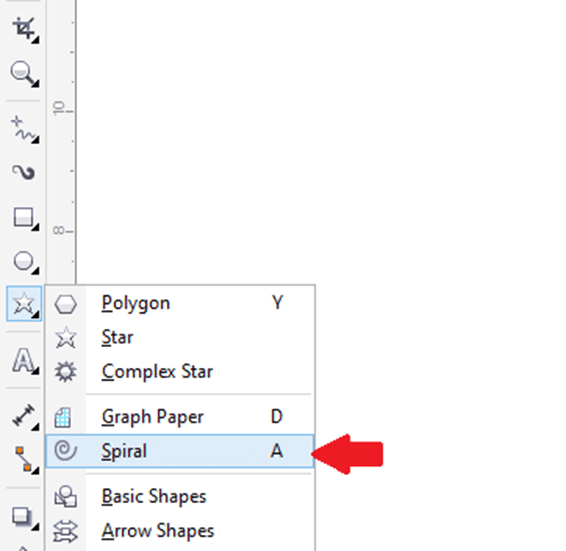

2. Fill the value inside the Spiral revolutions box over the property bar.

3. Over the property bar, press anyone button:
- Symmetrical spiral
- Logarithmic spiral
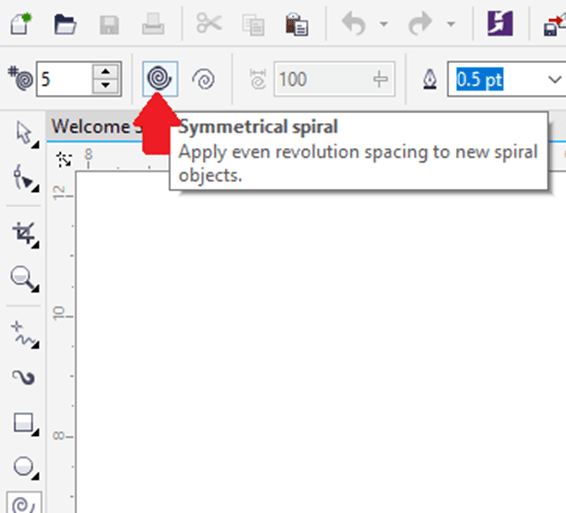
4. Drag diagonally inside the drawing window and release the button when we get required size.
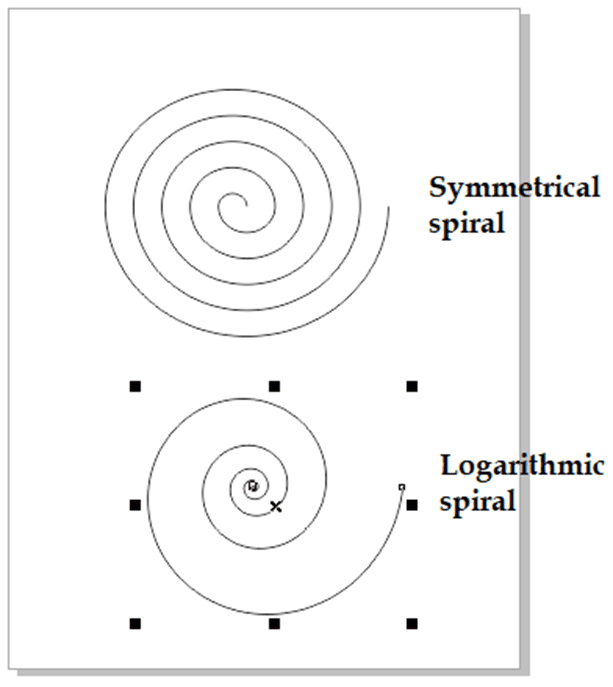
Creating grids
We can create the grid and fix the columns and rows number. The grids are the rectangle’s grouped set that we could break apart.
When we wish to create a grid from the center outward point, hold down the Shift button as we drag; if we wish to create the grid along with the square cells, we can hold down the Ctrl button as we drag.
To draw the grids
1. Within the toolbox, press the Graph paper

2. Fill the value inside the bottom and top proportions of Columns and rows box over the property bar.
3. Point to the place we wish the grid to display.
4. Draw diagonally for drawing the grid.

Creating predefined shapes
With the collection of perfect shapes, we can create predefined shapes. The certain shapes are some callout, banner, arrow, and basic shapes which include diamond-shaped that are known as glyphs. We can drag the glyph to change the representation of the shape.
We can insert the text to an outside or inside of a shape. We may wish to put the label outside or inside a callout or flowchart symbol.
To draw the predefined shapes
1. Within the toolbox, press anyone:
- Basic shapes
- Flowchart shapes
- Arrows shapes
- Callout shapes
- Banner shapes
2. Open the Perfect Shapes picker over the property bar, and press on any shape.
3. Drag inside the drawing window and release the button when we get the perfect size.
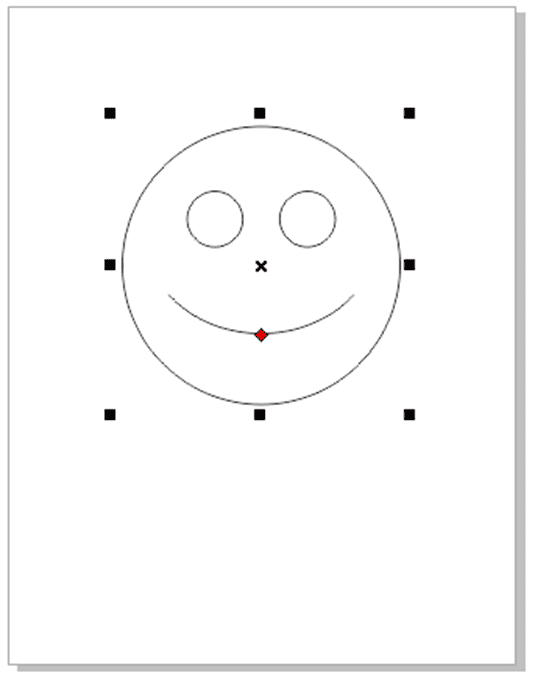
Creating by applying shape recognition
We can apply a tool Smart drawing to create freehand strokes that can be converted and recognized to some basic shapes. Ellipses and rectangles are converted to CorelDraw objects; parallelograms and trapezoids are converted to some perfect shapes object; arrows, diamonds, squares, triangles, and lines are converted to some curve objects. When the objects are not translated to any shape, it will be smoothed. Curves and objects created with shape recognition can be edited. We can set a level on which CorelDraw identifies the shapes and translates them to some objects. Also, we describe the smoothing amount used to curves.
We can set time amount to elapse among creating the pen stroke. We can create the corrections as we draw. We can also modify the shape’s line style and thickness that was created with the use of shape recognition.
To draw the lines and shapes by using the shape recognition
1. Within the toolbox, press the Smart drawing
2. Select a level of recognition through the Shape recognition level over the property bar.
3. Select a level of smoothing through the Smart smoothing level over the property bar.
4. Design a line or shape inside the drawing window.
Managing and Finding Content
CorelDraw allows us to browse, search, and access the image lists, patterns, frames, fonts, photos, clipart collection, and the content exchange. In addition, we can search for content located on our computer, website, or local network of the online provider on the content. In case, we wish to search for any content that we need, we can import that content in our document.
This chapter includes the following mentioned topics:
Disclosing Corel CONNECT
We can search and browse for any content with the help of Corel CONNECT. It is available as any docker and standalone utility. We can select whichever mode more suitable for our workflow.
The primary components of the Corel CONNECT utility are as follows:
- Libraries pane: It enables us to access the content facilitated by Corel partners and Corel.
- Folders pane: It shows the file structure representation present our computer.
- Zoom pane: It lets us adjust the thumbnail’s size inside a viewing pane.
- Tray pane: It enables us to collect the files from multiple folders.
- Viewing pane: It lets us view the content file’s thumbnail.
- Options and help button: It lets us open the command’s menu that permits us to access license information, view version, set preferences, configure the content libraries, and help.
- Cancel/refresh button: It reloads the outcomes from our last initiates or searches for any new search on the basis of criteria that we have described.
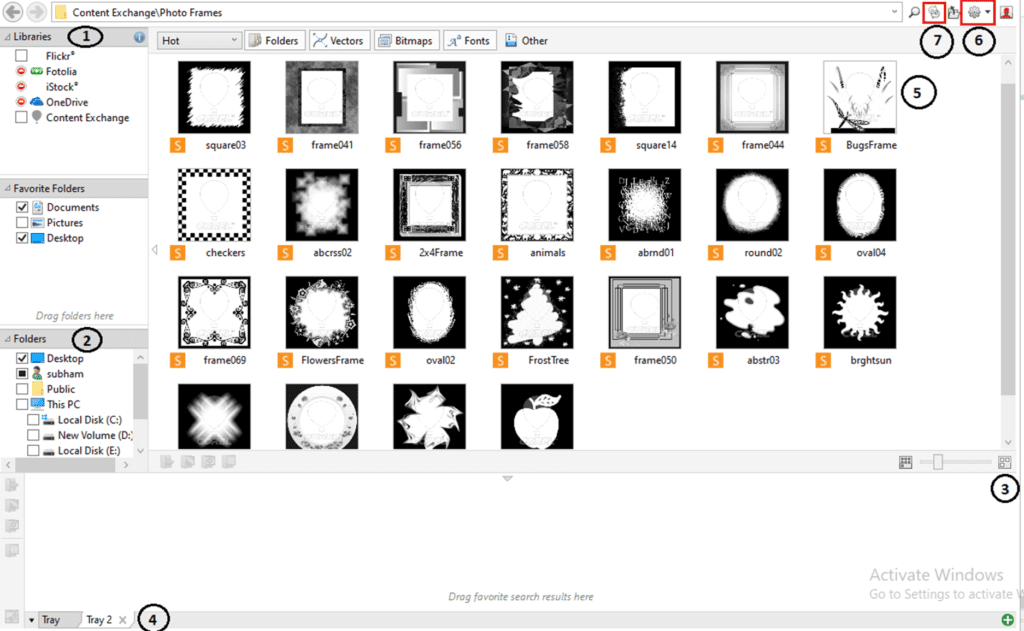
Accessing Content
We can access the content present on the content provider’s online website or o a content exchange. Also, we can access the content from the software’s previous version that is saved on a DVD or CD.
Content Exchange Usage
The content exchange facilitates ta group of image lists, bitmap and vector patterns, frames, fonts, photos, and clipart that we can access. We can search thru keywords, mark our favorites, copy the content, or we can browse available content from the content exchange into our personal folder.
To apply the content Exchange
- Within the Libraries pane, press Content Exchange.
- Double-click on the folder we wish to access the content.
Using any Content from Content Providers
We can search the content on the content provider’s websites such as iStock, Fotolia, and Flickr. An image that we search online is subject to low-resolution or watermarked and usage restrictions.
Note: Online content will be unavailable in a workplace along with access to restricted internet.
Searching and Browsing for Content
Search Content
We can search through the name, reference number (such as notes and tags), or category (such as fonts, photo images, and clipart) associated with the file. Every matching file is shown as the thumbnail image within the view pane when we type any term inside the address or search box.
Browse Content
Click on location within the following mentioned pane:
Library: It lets us browse local content and online.
Favorite Folders: It lets us browse our favorite places.
Folders: It lets us browse the structure of a folder present on our computer.
Note: We can browse any content in one folder at only a time.
Viewing Content
Fonts, photos, and clipart display inside a viewing pane like the thumbnail images. We can choose all, multiple, or individual thumbnail.
By placing our pointer on the thumbnail, we can show any larger preview. We can also show the information of files like the color mode, image resolution, file size, and file name for content. The content wasn’t given by the online content provider. Also, we can preview some fonts that we find. The thumbnail zooming creates detecting a specific file faster and easier.
Managing Content
We can arrange our content by the use of trays or including content files for unique folders on our computer.
The tray is helpful to gather the content from several folders. While the various file can be referenced inside a tray, actually they remain within their real location. We can remove and add content from a tray. A tray can be shared among CorelDraw CONNECT, CorelDraw, and Corel PHOTO-PAINT. Also, we can open the files from a tray for previewing them easily.
We can create the tray, thus we can arrange our content. A tray is saved to Tray\Corel Content\Corel\My Documents folder however we can modify any default folder for which a tray is saved.
We can rename the tray to provide them some meaningful names. Also, we can close the tray to ignore clutter temporarily when implementing various trays.
CorelDraw: Implementing with bitmaps
We can transform any vector graphics into the bitmap. In CorelDraw, we can also crop and import bitmaps. Also, we can insert special effects, watermarks, and color masks, and modify the tone and color of an image.
This chapter includes the following essential topics:
- Transforming vector graphics into bitmaps
- Cropping bitmaps
- Changing the bitmap’s resolution and dimensions
- Straightening bitmaps
- Removing scratch and dust marks from a bitmap
- Using special effects
- Bitmap colors
- Image adjustment lab usage
- Adjusting the tone and color
- Transforming tone and color
Transforming vector graphics into bitmaps
Transforming vector graphics into bitmaps allows us to use some special effects on the objects in CorelDraw. The vector graphics transforming process into bitmaps can also be referred to as “rasterizing.”
To transforming vector graphics into bitmaps
1. Choose the object.
2. Press Bitmaps > Covert to bitmap.
3. Select any resolution from the list box of Resolution.
4. Select any color mode from the list box of the Color mode.
5. Select from the below checkboxes:
- Dithered: It simulates the color’s number than those present. This option will be present for various images that use 256 or fewer colors.
- Always overprint black: It overprints black if black is any top color.
- Anti-aliasing: It smooth the bitmap’s edges.
- Transparent background: It makes the bitmap transparent background.
Cropping bitmaps
Bitmap cropping removes the bitmap’s unwanted area. To crop any bitmap into the rectangular shape, we can apply the Crop tool.
To Crop the bitmap
1. Select the Shape tool from the Toolbox.
2. Choose the bitmap.
3. After that drag any corner node for reshaping the bitmap.
4. Press Bitmaps > Crop bitmaps.
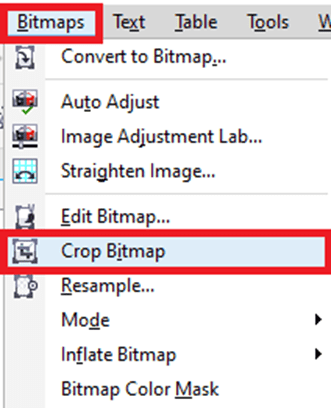
Note: We can’t crop the bitmap consists of multiple objects.
Changing the bitmap’s resolution and dimensions
After we insert the bitmap into any drawing, we can modify its resolution and dimensions.
To modify the bitmap’s dimensions
1. Choose the bitmap.
2. Press Bitmaps > Resample.
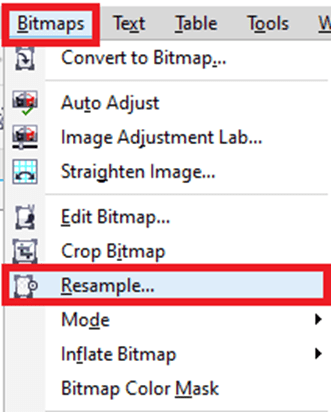
3. Select the measurement unit from the Width and Height
4. Fill the values inside the below boxes:
- Width
- Height
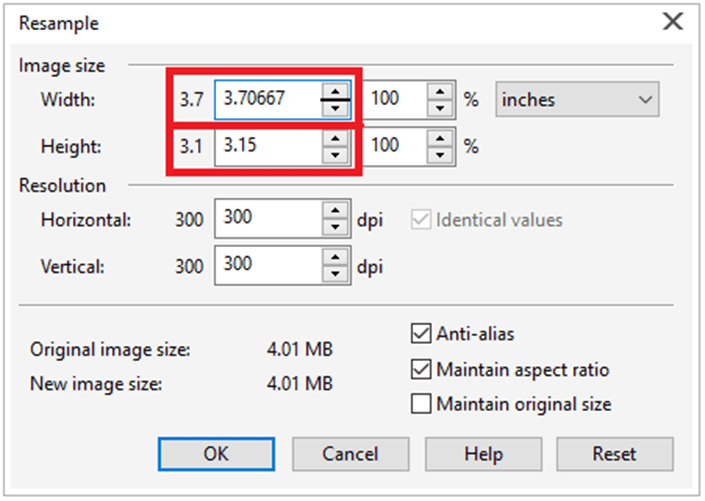
To modify the bitmap’s resolution
1. Choose the bitmap.
2. Press Bitmaps > Resample.

3. Fill the values inside the below boxes within the Resolution area:
- Horizontal
- Vertical
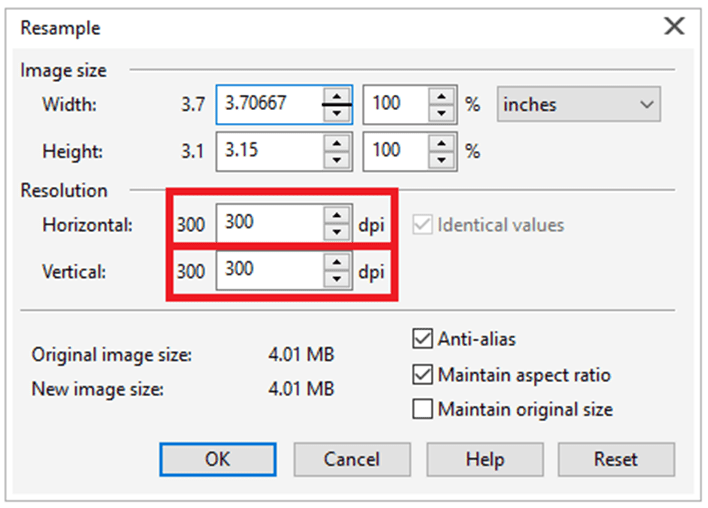
Straightening bitmaps
A dialog box, i.e., Straighten image allows us to quickly correct the bitmap straighten images and lens distortions. This aspect is very helpful to straighten images that were scanned or taken over an angle and include lens distortions.
To straighten images
1. Choose any image.
2. Press Bitmaps > Straighten image.
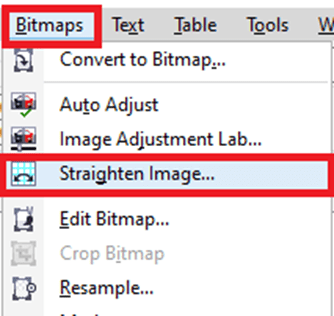
3. Move the slider, i.e., Rotate image, or fill the value among –15 and 15 inside the Rotate image
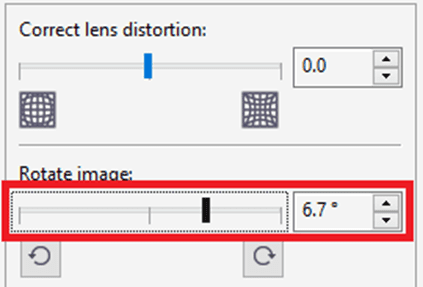
4. Move the slider, i.e., Grid to maintain the grid cell’s size if necessary.
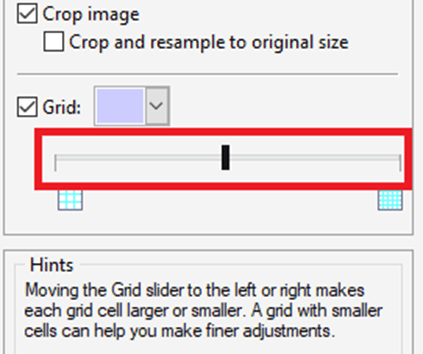
5. To straighten and crop an image, select the dialog box, i.e., Crop image.

Removing scratch and dust marks from a bitmap
We can improve the representation of the bitmap quickly by removing scratch and dust marks. The scratch and dust filter works if we eliminate the contrast among pixels that overtakes any contrast threshold we set.
To remove scratch and dust marks from a bitmap
1. Press Effects > Correction > Dust and scratch.
2. After that move from the below sliders:
- Threshold: It sets the noise reduction’s amount.
- Radius: It sets the pixel’s range applied to generate an effect.
Using special effects
We can use several kinds of special effects on the bitmaps, like artistic effects and 3D (three-dimensional).
To use any special effect
1. Choose any bitmap.
2. Select Bitmap, select any special effect we wish and then press an effect.
3. Maintain the settings of special effects.
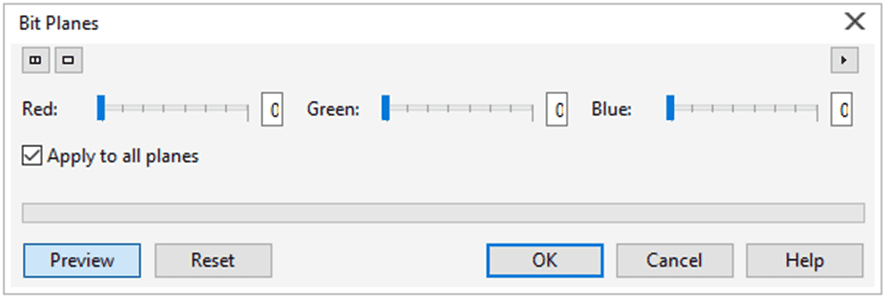
To insert any plug-in filter
1. Press Tools > Options.
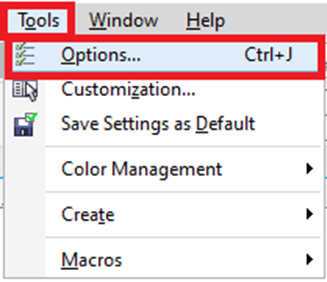
2. Double-click on the Workspace, and press Plug-ins from the list of categories.
3. Press Add.
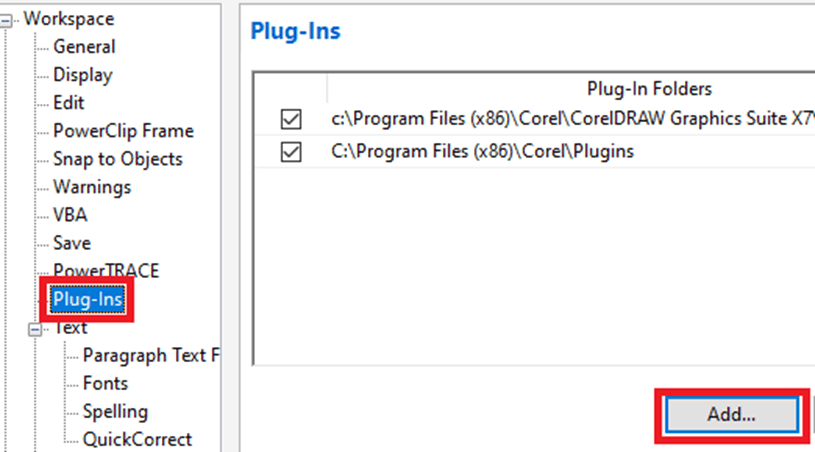
4. Select any folder including the plug-in.
Bitmap colors
CorelDraw allows us to modify colors in various monochrome images. It also allows us to use Postscript halftone screens for optimizing black-and-white and color bitmaps to print, mask colors, and show and hide colors. The monochrome bitmaps contain two colors, white and black. We can replace white and black with color over the color palette.
Also, color masking enables us to modify chosen colors without changing other colors within an image. We can save the color mask of a bitmap to any file and then open this file for further usage.
To apply the screen over the bitmap
1. Choose the bitmap with the help of the Pick
2. Select the Interactive fill button from the toolbox.
3. Click on the Uniform fill button over the property bar, and press the Edit fill
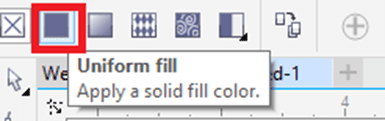
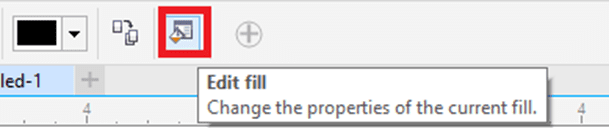
4. Press on the Palettes
5. From the list box of Palette, select the fixed palette.

6. Press Options, and press Postscript options.
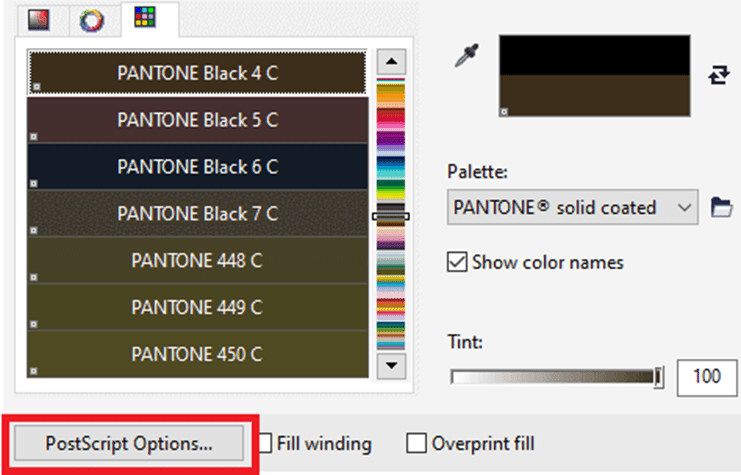
7. Select any option inside the list of Type for setting the line type or dot shape.
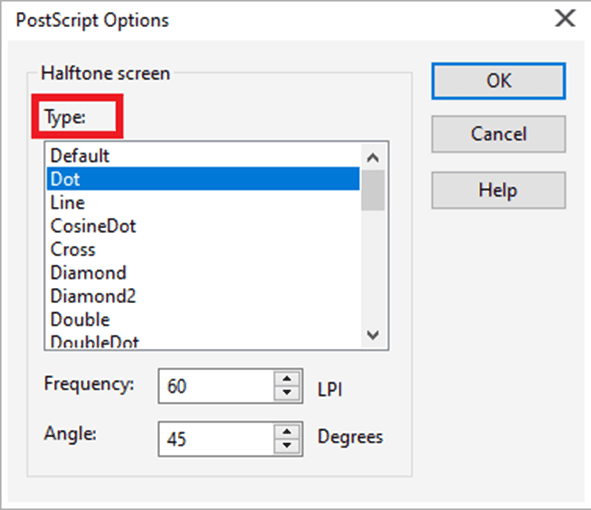
8. Type the value inside the Frequency box for settings the lines or dots number that illustrate in every screen inch.
9. Type the value inside the Angle box for setting the lines or dots that illustrate over the screen.
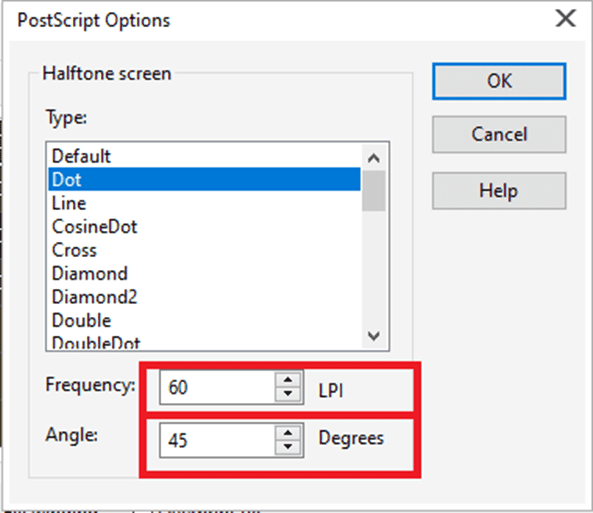
To display or hide any color in the bitmap
1. Choose the bitmap with the help of the Pick

2. Press Bitmap > Bitmap color mask.

3. Select from the below options:
- Show colors
- Hide colors
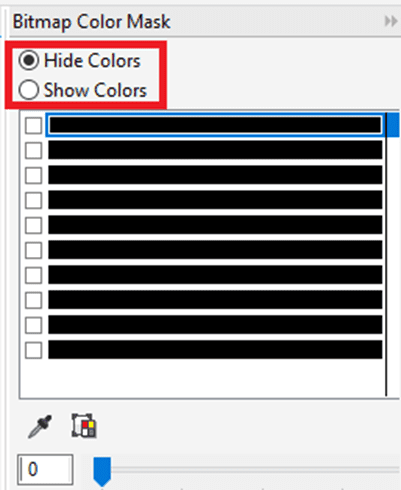
4. Select a checkbox that is near to the channel which we wish to display or hide.
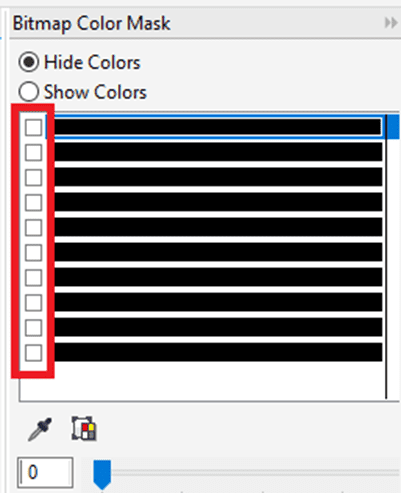
5. Move the slider, i.e., Tolerance for setting the color tolerance for any color.
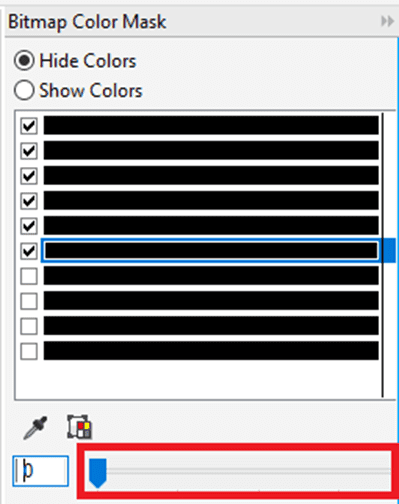
6. Press the Color selector
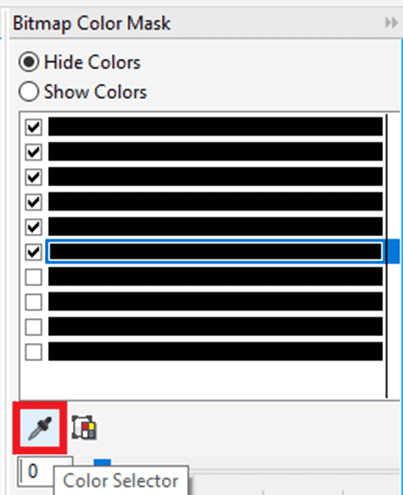
7. Press any color that we wish to display or hide.
8. Press Apply.
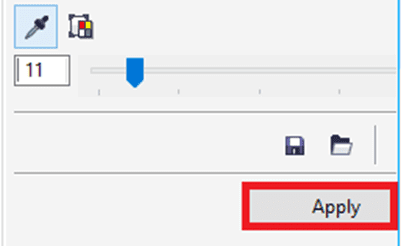
To enable the bitmap color mask
1. Press Bitmap > Bitmap color mask.

2. Press the Open mask

3. Select any folder where the file of the color mask is stored.
4. After that double-click on the file.

Image adjustment lab usage
An image adjustment lab allows us to correct the tone and color of most images easily and quickly. It consists of manual and automatic controls, which can be managed in the logical order for image correction. It is efficient to retouch or crop an image’s area before starting the tone and color correction.
To correct tone and color in an image adjustment lab
1. Press Bitmaps > Image Adjustment Lab.
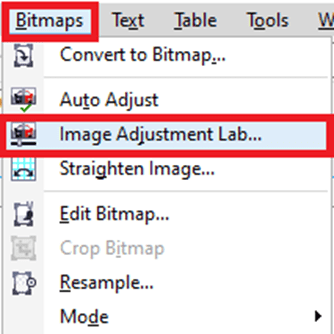
2. Press Auto adjust.
3. Implement from the below tasks:
- Adjust a slider, i.e., Temperature to cool or warm many colors, and fine-tune a color correction through adjusting the Tint slider for correcting colors inside an image.
- Move the slider, i.e., Brightness in the right direction for lightening an image and in the left direction for brightening an image.
- Move the slider, i.e., Contrast in the right direction for making light areas lighter and in the left direction for making dark areas darker.
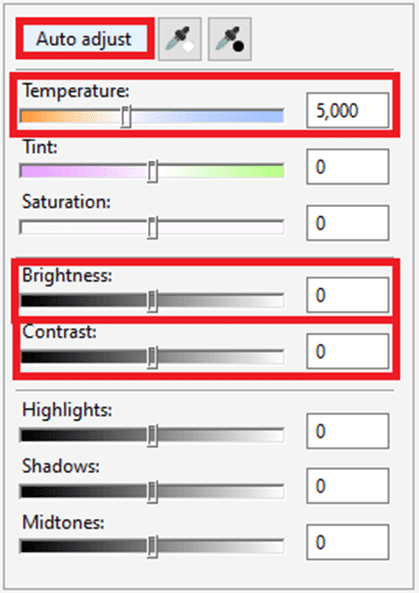
Adjusting the tone and color
CorelDraw allows us to adjust the tone and color of a bitmap. We could replace the colors and also adjust the intensity, lightness, and brightness of the colors. We can also adjust the tone and color of a bitmap automatically with the help of a command, i.e., Auto Adjust.
To adjust the tone and color automatically
1. Choose the bitmap.
2. Press Bitmaps > Auto adjust.
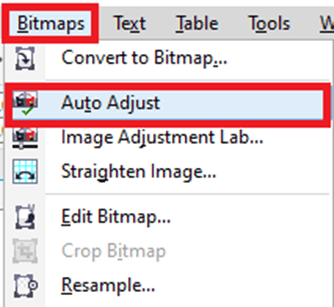
To adjust the tone and color with the adjustment filter
1. Choose the bitmap.
2. Press Effects > Adjust, and press the adjustment filter.
3. Describe the settings we wish.
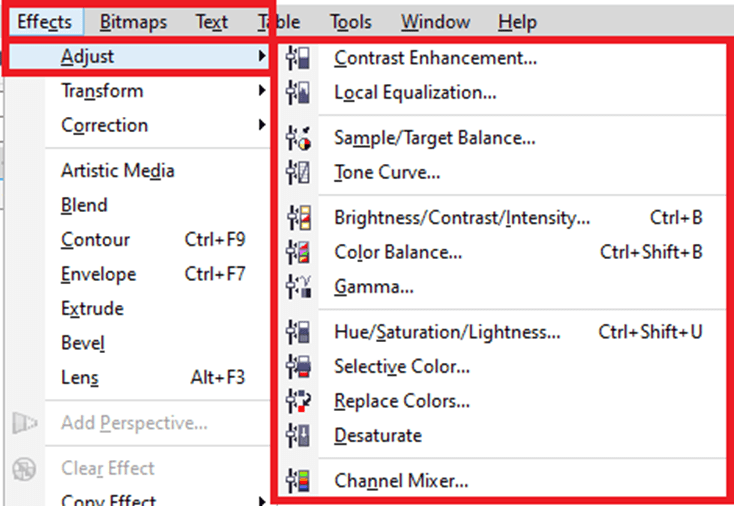
Transforming tone and color
We could transform the tone and color of any image to generate any special effect. We can create an image that appears like any photographic negative and flatten an image’s appearance. For transforming the tone and color of a picture, we can apply the below effects:
- Invert: It enables us to reverse an image’s colors.
- Posterize: It enables us to reduce an image’s tonal values.
- Deinterlace: It enables us to remove the lines from the interlaced or scanned images.
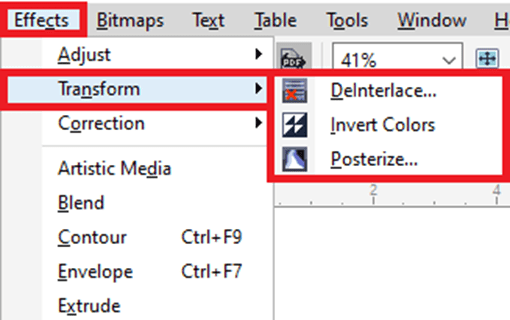
To transform tone and color
1. Choose the bitmap.
2. Press Effects > Transform, and select from the below options:
- Invert
- Posterize
- Deinterlace
Working with various Colors
CorelDraw enables us to create and chose various colors using industry-standard’s huge variety of color models, color mixers, and color palettes. We can store often applied colors for further use with the use of editing and creating color palettes, or document palette.
We can customize the representation of the color palettes on our screen by modifying the swatches size, rows number, and some other attributes.
Also, we can create various styles of color.
This chapter includes the following essential topics:
- Color models
- Color depth
- Selecting colors
- Document palette
- Editing and creating color palettes (custom)
- Displaying and organizing color palettes
Color models
The color models facilitate a precise technique to define colors, all the models describing colors by using unique color elements. There is a color model’s range to select from when designing graphics.
Color model: CMYK
The CMYK, which is applied to print, applies the elements C (cyan), M (magenta), Y (yellow), K (black) to depict color. The values of these elements represent the percentage and range from values 0 to 100.
If all the color elements (C, M, Y) value is 100, then the final color will be black. If all the color elements (C, M, Y) value is 0, no color will be inserted to a surface. Black (K) is added in a color model to print objectives because the black ink will be darker and neutral than blending yellow, magenta, and cyan’s similar amount. Black ink generates sharper outcomes, especially to printed text. Usually, colored ink is more expensive than using black ink.
Color model: RGB
This color model applies the elements R (red), G (green), B (blue) for defining the red, green, and blue light’s amount inside the facilitated color. With a 24-bit image, all the elements are expressed like any number from a range 0 to 255. With the higher rate image, like a 48-bit image, this value range will be higher. This element’s combination defined any single color.
RGB is applied on various monitors, where green, red, and blue lights are combined in several ways for reproducing the color’s wide range. If all element’s value is 0, signifies the light’s absence, the eye distinguishes a color like black.
Note: RGB color model is the most widely used because it permits a wide color range to be displayed and stored.
Color model: HSB
This color model applies H (hue), S (saturation), B (brightness) as elements to define a color. Also, it is called HSV. Hue defines the color’s pigment and can be expressed in degree for representing any location over a specific color wheel.
Saturation defines the dullness and vividness of the color. Saturation value represents percentages and ranges from values 0 to 100. Brightness defines the white’s amount in a color. Such as brightness values, saturation values represent percentages and range from values 0 to 100.
Color model: Grayscale
It describes the color with the use of lightness, one element only, which can be measured within the values which are range from values 0 to 255. All the grayscale color contains similar values of blue, green, and red elements of the color model, i.e., RGB. Changing any color picture to grayscale makes the black-white picture.
Color depth
The color depth assigns to the color’s maximum number a picture can contain. It can be determined by an image’s bit depth. For example, the pixel along with the 1-bit depth can contain two values: white and black.
Usually CMYK, grayscale, and RGB images include the data per every color channel of 8-bit. So, the RGB image can be often defined as the 24-bit RGB, and the CMYK image can be defined as the 32-bit CMYK.
Regardless of various colors, any image includes, an image shown onscreen is finite to the greater color’s number supported by a monitor over which it will be viewed. Such as, a monitor of 8-bit can be shown up to only 256 colors within the 24-bit picture.
Selecting colors
We can select an outline and fill color with the use of choosing any color from the palette, document palette, and color palette (custom) from the color blends, color views, and palette libraries. If we wish to apply any color that exists already within the document or object, we can sample color with the help of a tool, i.e., Color eyedropper to achieve the exact match.
Color palette (default)
The color palettes are any group of various color swatches. Color palette is also called “swatch palette” in a few programs.
In CorelDraw, the color palettes (default) are based on main document’s color mode. For example, when the main color mode of the document is RGB, color palettes are also called RGB. We select a color model (default) if we create any new drawing, we can use and open color palettes additionally at every time.
We can select outline and fill colors through the use of any color palette (default). The chosen outline and fill colors represents inside a color swatch over a status bar.
To select the color from the color palette
1. Choose any object.
2. Double-click on the Fill button over the status bar.

3. Within the Edit fill dialog box, press the Uniform fill
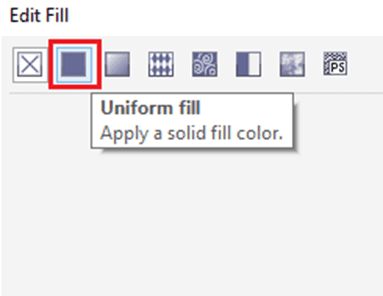
4. Press the Palettes

5. Select the color palette from the Palette list box.
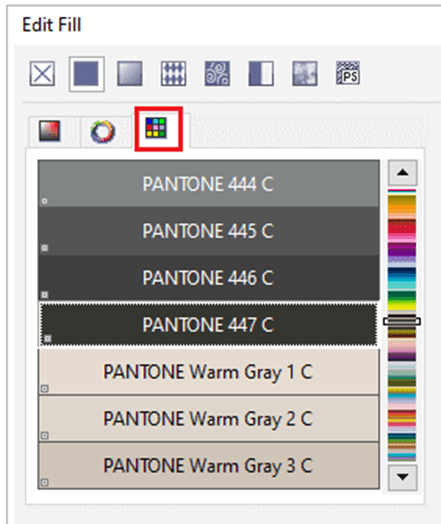
6. To set the color’s range, move the color slider shown inside the color selection area.
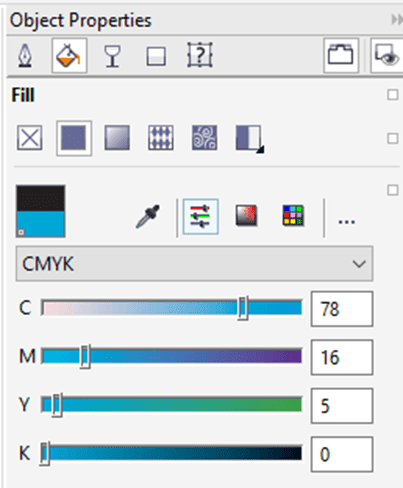
7. Press any color inside the color selection area.
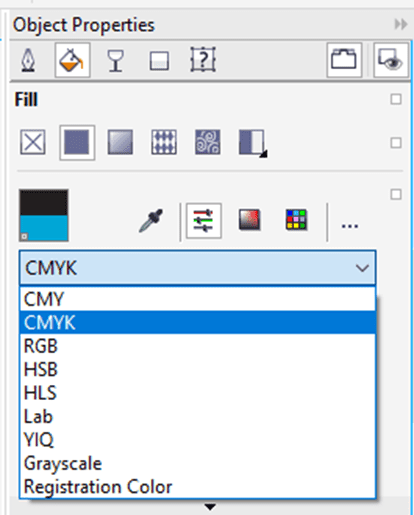
Document palette
If we create any new design, the application automatically produces the empty palette, known as Document palette. This palette supports us to get aware of various colors that we apply thru storing them along with our document for further use.
Color palettes (custom) and palette libraries
Some of the color palettes which are detected inside a palette library can’t be formatted directly. A few of them can be facilitated by manufacturer’s third-party. For example, TRUMARCH, HKS colors, and PANTONE.
Some of the palettes are detected inside a palette library- Spectra Masters, Focoltone, DIC, TOYO, HKS Colors, and PANTONE- are the spot color’s collection. When we create any color separations if we print, all the spot colors needs the isolated printing plate. If we wish to apply the color separation however would want to ignore the usage of spot colors, we can convert various spot colors into process colors if printing.
Color blends
If we select any color with the usage of color blends, we combine the base colors for producing the colors we want. A color blender shows the color’s grid that is designed from the base colors of four types we select.
To select the color from the color blends
1. Choose any object.
2. Double-click on the Fill button over the status bar.
3. Within the Edit fill dialog box, press the Uniform fill
4. Press the Mixers
5. Select the Color blends through the list box, e., Mixers.
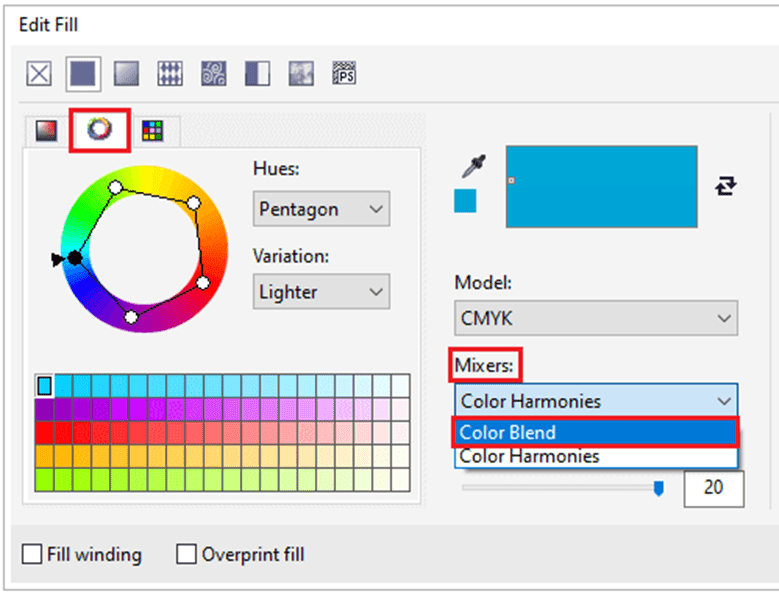
6. Open all the color pickers, and press the color.
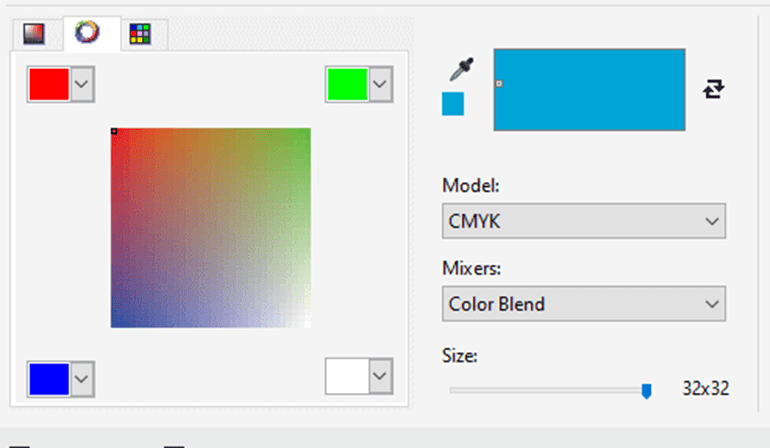
7. Press any color inside the color selection area.
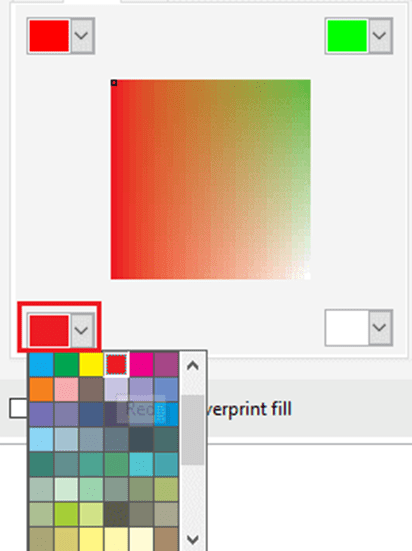
Selecting web colors
We can select various web colors if we create the documents that would be published towards the web. Using CorelDraw, we can describe the web colors with the usage of various values of RGB hexadecimal (such as, #aa003f). We can show the color values thru pointing to the swatch.
To select the color from the color blends
1. Choose any object.
2. Press Window > Dockers > Color.
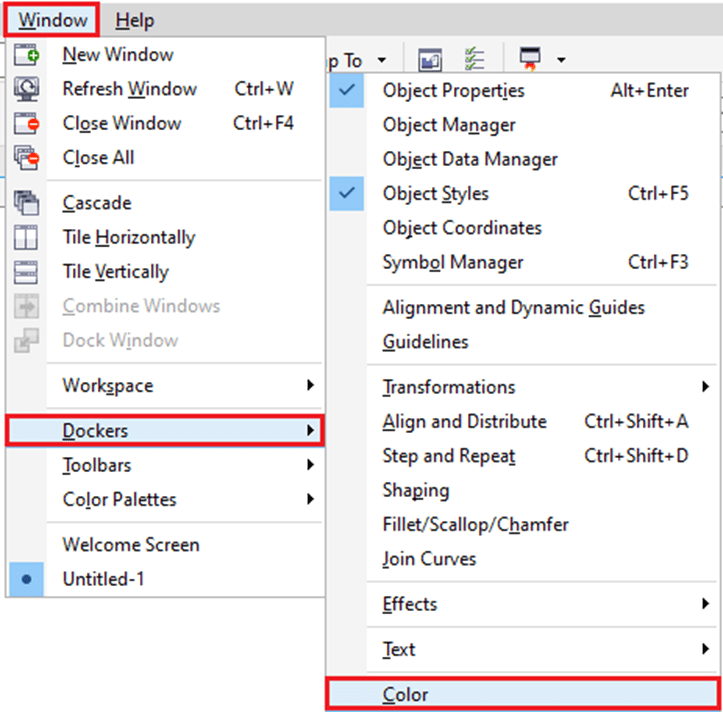
3. Within the Color docker, select RGB through the list box.
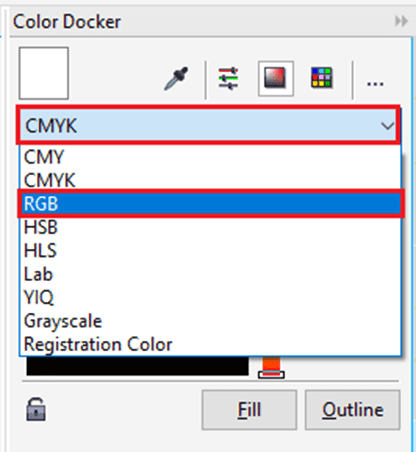
4. Paste or type the value inside the Hex value
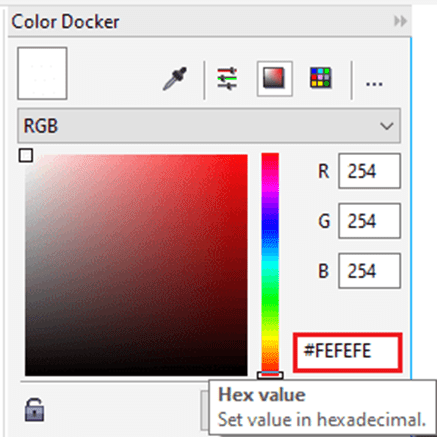
5. Press anyone from the below buttons:
- Outline: It uses a color to an outline of an object.
- Fill: It fills the chosen object along with a new color.
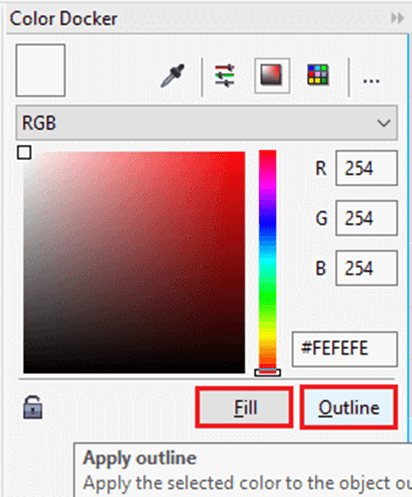
Document palette
If we start any new design, then an unfilled color palette, known as a Document palette, represents docked inside a lower-left side of a drawing window. All the time we use any color within our design, it will added to a Document palette automatically. But, if we prefer for controlling which colors can be inserted to a Document palette, we can manually add the colors and disable various automatic updates.
We can insert the colors from an outer image, color picker, color palette, or a dialog box, i.e., color-related. We can include the colors from the imported object or image.
To disable color’s addition (automatic) to the Document palette
- Over the Document palette, press the flyout button and press Automatically update.
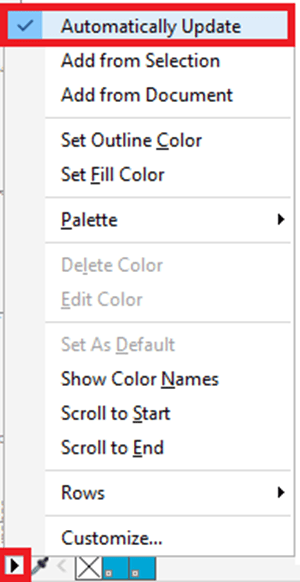
To remove any color
1. Press the color swatch over the Document palette.
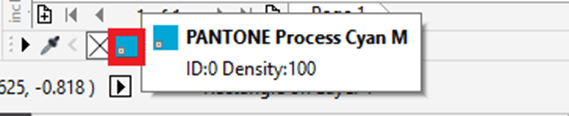
2. Over the Document palette, press the flyout button, and press Delete color.

Editing and creating color palettes (custom)
The color palettes (custom) are a group of color styles or colors that we save. They can add color styles or colors from a color model, containing spot colors, and a color palette detect inside a palette libraries. We can make the custom palette for storing all the color styles or colors that we need within the future, current project.
To create the color palette (custom) from scratch
1. Press Window > Dockers > Color palette manager.

2. Press on a button, i.e., Create a new empty color palette.

3. Fill the filename inside a box, i.e., File name.
4. Click on Save.
5. Inside a Color palette manager, select a custom palette that we need.
6. Press on a button, i.e., Opens the palette editor.
7. Inside the dialog box Palette editor, click on Add color.
8. Inside the dialog box Select color, select any color, and press Add to palette.
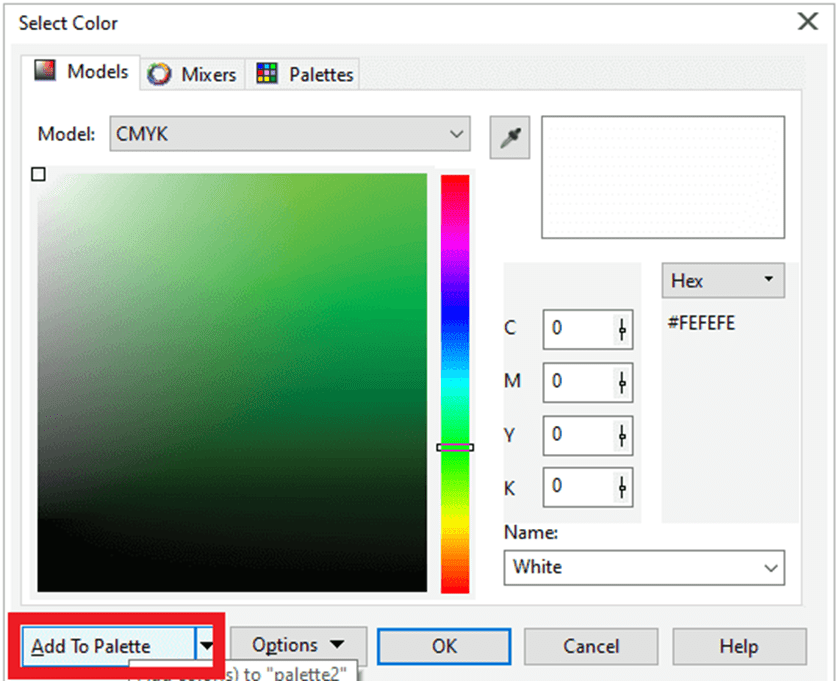
To create the color palette through an object
1. Choose the object.
2. Press Window > Color palettes > Create palette from selection.
3. Fill the filename inside a box, i.e., File name.
4. Click on Save.
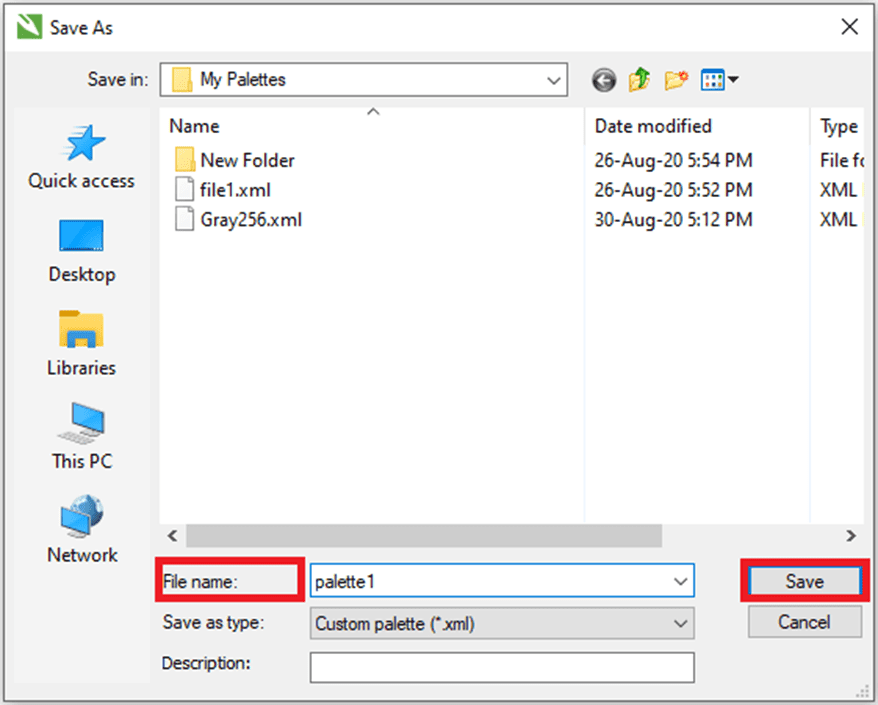
To delete the color palette (custom)
1. Press Window > Dockers > Color palette manager.
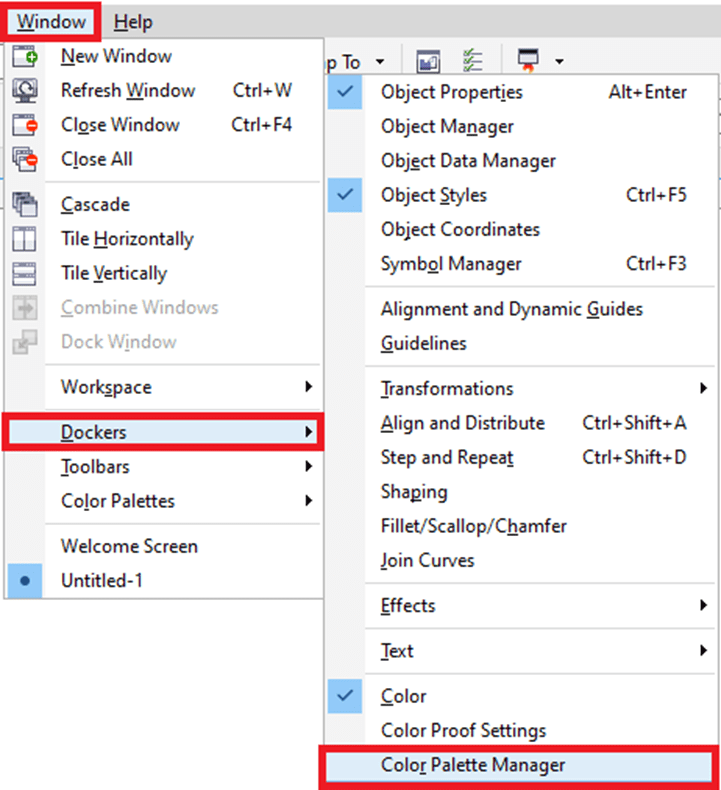
2. From a folder My palette, right-clicking the custom palette, then click on Delete.
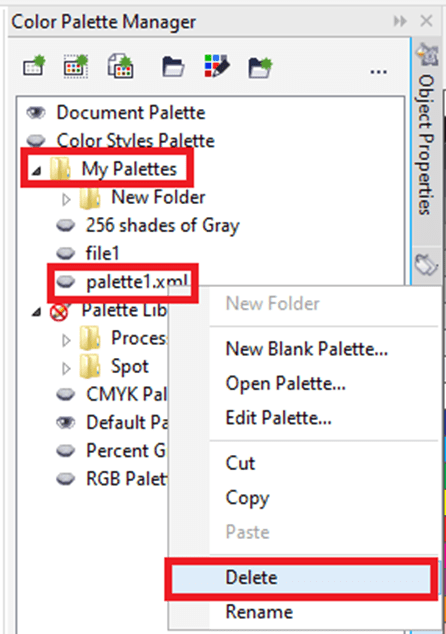
Displaying and organizing color palettes
Color palette manager enables us to access various present color palettes quickly, containing a Color style palettes, and a Document palette, and design the color palettes (custom). The color palette manager contains color palettes which are categorized into two primary folders: Palette libraries and My palettes.
To start the Color Palette Manager
- Press Window > Dockers > Color palette manager.

To open the color palette (custom)
1. Open a Color Palette Manager.

2. Press on a button, i.e., Opens a palette.
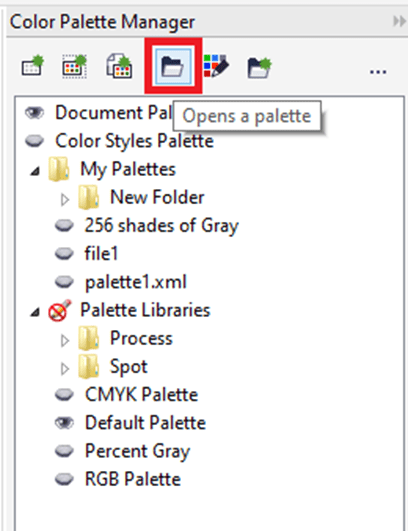
3. Select the folder and drive where a color palette (custom) is stored.
When we wish to open the color palette (expressed as .cpl file), created inside the previous CorelDRAW’s version, choose Legacy custom palette (expressed as *.cpl) from a list box, i.e., Files of type.
4. Press custom palette.
5. Press Open.

CorelDraw: Working with layout and pages tools
CorelDraw allows us to describe the background, scale’s unit, orientation, and size of any drawing page. We can display and customize page guidelines and grids to support us organize several objects and fix them where we want exactly.
This chapter includes the following essential topics:
- Describing page layout
- Selecting the page background
- Inserting, renaming, deleting, and duplicating pages
- Ruler usage
- Document grid settings
- The baseline grid settings
- Guidelines settings
- Changing the guidelines
- The drawing scale settings
Describing page layout
We can work over drawings by describing various settings for layout style, orientation, and size of a page. Various options can be selected if describing the page layout could be applied as the default for each new drawing we create. Also, we can adjust the orientation and size settings of the page for matching the paper settings to print.
Page orientation and size settings
1. Press Layout > Page setup.
Skip Ad
A dialog box will appear, i.e., Options along with the Page size page shown.

2. Implement an operation from the below tasks:
- Select the page size through the Size list box to select the size of the preset page.
- Press the Get page size from printer button to match the orientation and size of the page to any printer settings.
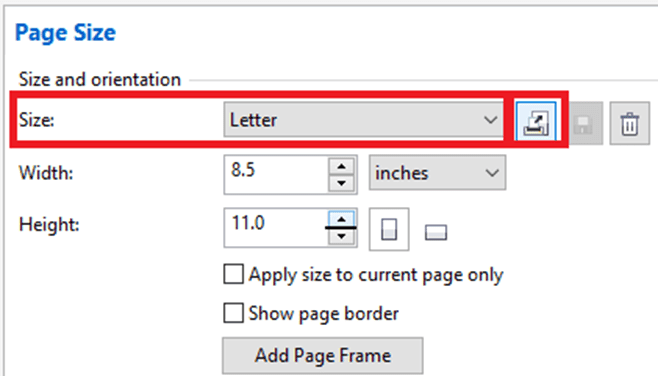
- Fill the value inside the Height and width boxes to describe the size of the custom page.
- Press the Portrait and Landscape button for setting the orientation of a page.

To select the layout style
1. Press Layout > Page layout.
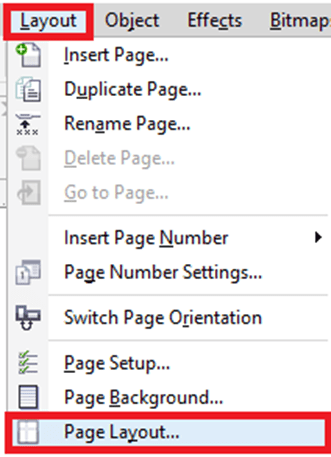
2. Select the layout style through the Layout list box within the Options dialog box.
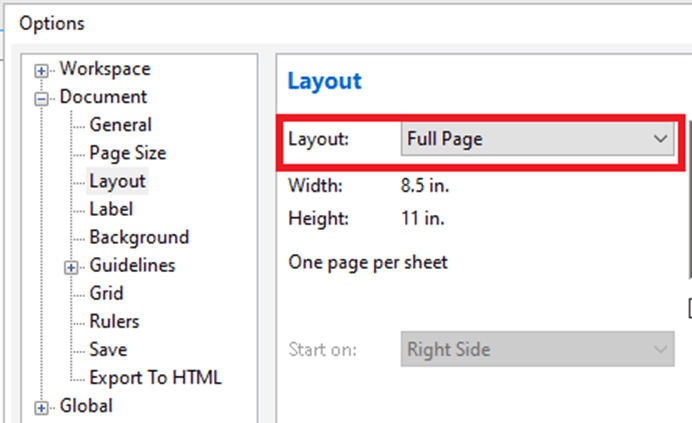
Selecting the page background
We can select the type and color of the background for any drawing. We can apply any solid color when we wish the uniform background. When we wish a dynamic or intricate background, we can apply the bitmap. A few bitmap examples contain clipart, photographs, and textured designs. If we select the bitmap as a background, it will be embedded by default inside the drawing. When we no longer require any background, we can also remove it at any time.
To apply any solid color for the background
1. Press Layout > Page background.

2. Select the Solid
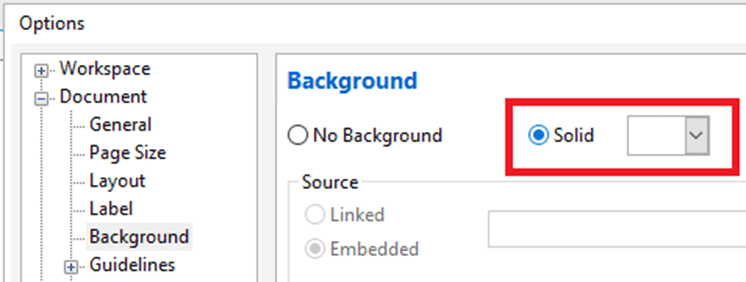
3. Press the color picker, click on any color.
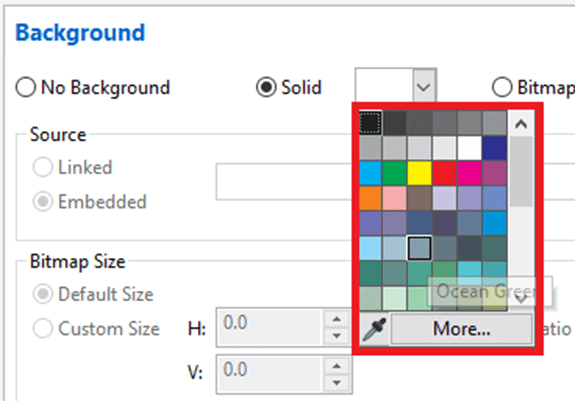
To apply a bitmap for the background
1. Press Layout > Page background.
2. Select the Bitmap
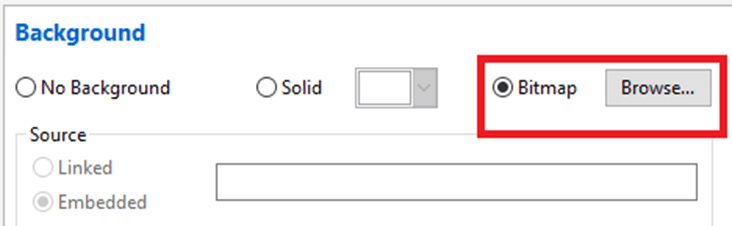
3. Press Browse.
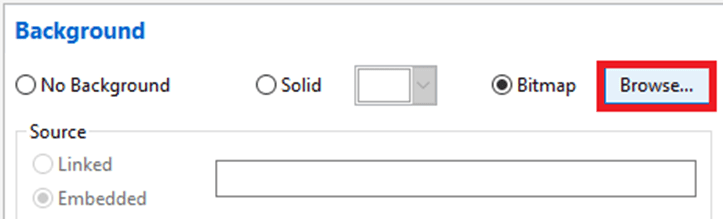
4. Place the folder where the file has been stored.
5. Double-click on the filename.

6. Enable anyone from the below options within the Options dialog box:
- Linked: It links a bitmap to a drawing.
- Embedded: It embeds a bitmap within the drawing.

7. Select anyone from the below options:
- Custom size: It allows us to describe the bitmap’s dimensions by typing the values inside the V and H boxes.
- Default size: It allows us to apply the current size of the bitmap.
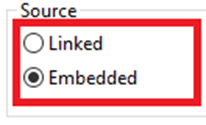
To remove the background
1. Press Layout > Page background.
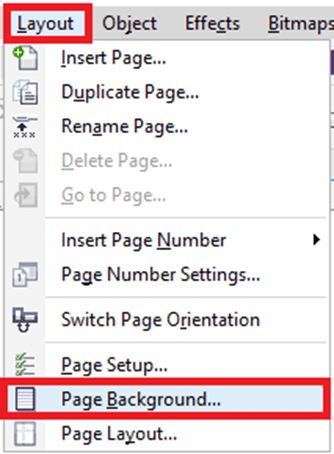
2. Select the No background
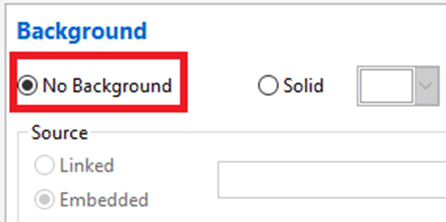
Inserting, renaming, deleting, and duplicating pages
CorelDraw allows us to insert pages into the drawings. It allows us to duplicate the existing pages. Also, we can delete all the pages or an individual page and rename pages. We can move the objects from a single page to other pages.
If we duplicate the page, we can select to copy the structure of the layer of a page only or for copying various layers and each of its objects they include.
To insert the page
1. Press Layout > Insert page.
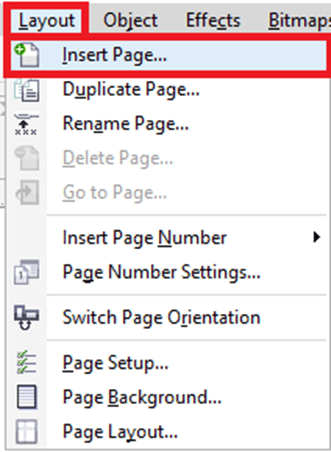
2. Fill the page’s number we wish to insert in the box, i.e., Number of pages within the Pages area.
3. Select anyone from the below options to place any new page after or before a current page:
- After
- Before
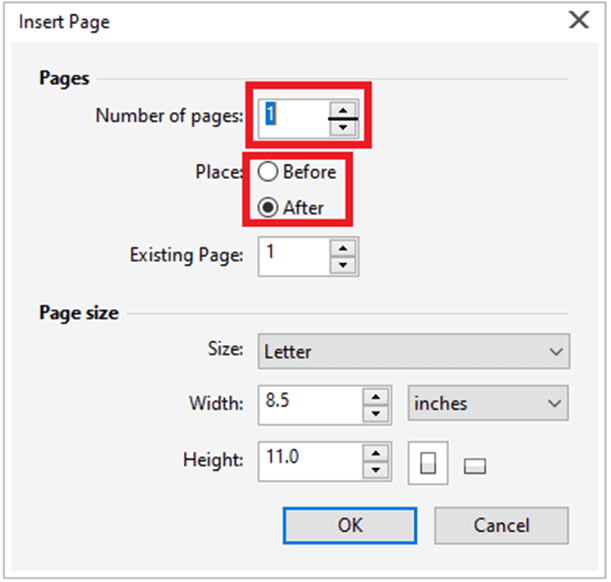
To duplicate the page
1. Press Layout > Duplicate page.

2. Select anyone from the below options within the Insert new page place of the dialog box, i.e., Duplicate
- After selected page
- Before selected page
3. Select anyone from the below options at the dialog box’s bottom area:
- Copy layers only: It allows us to duplicate the structure of the layer without copying any layer’s contents.
- Copy layers and their contents: It allows us to duplicate any of the layers and also their contents.
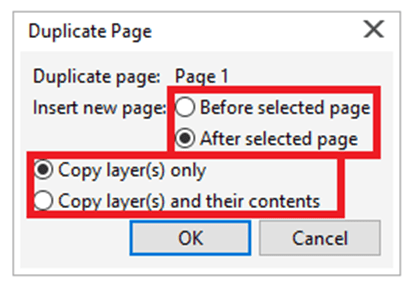
To rename the page
1. Press Layout > Rename page.
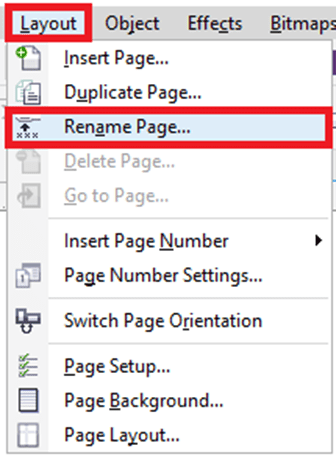
2. Fill the page’s name inside the Page name box.
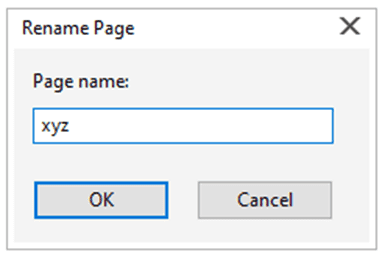
To delete the page
1. Press Layout > Delete page.

2. Fill the page’s number that we wish to delete inside the dialog box, i.e., Delete page.
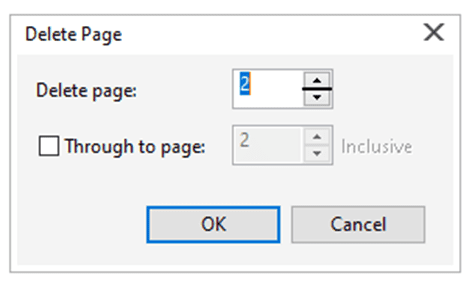
Ruler usage
We can show rulers inside the drawing window for supporting us to align, size, and draw objects precisely. We can move the rulers to other positions or hide the rulers inside the drawing window. Also, we can customize the settings f rulers to suit our requirements.
To display or hide the rulers
- Press View > Rulers.
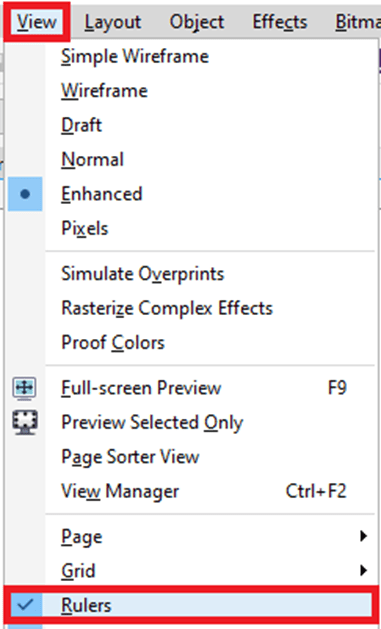
To customize the settings of the rulers
1. Press Tools > Options.
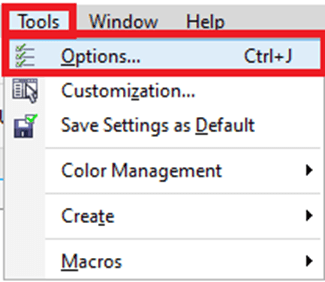
2. Within the Document list of categories, press Rulers.

3. Within the Units area, select the unit of measure through the Horizontal list box.
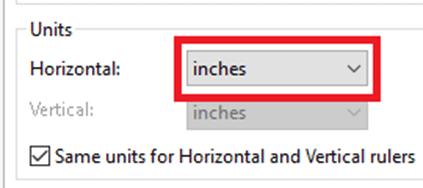
4. Within the Origin area, fill the values inside the below boxes:
- Vertical
- Horizontal
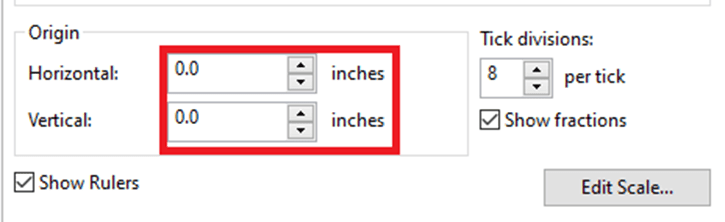
5. Fill the value inside the Tick divisions
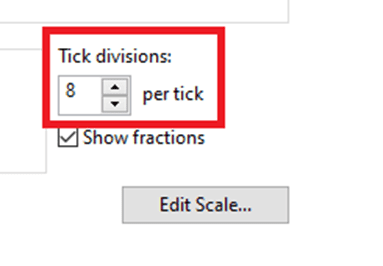
Document grid settings
The document grid can be defined as the series of various non-printing intersecting lines that we can show inside the drawing window. We can use any document grid to position and align objects precisely.
To hide or display the document grid
- Press View > Grid > Document grid.
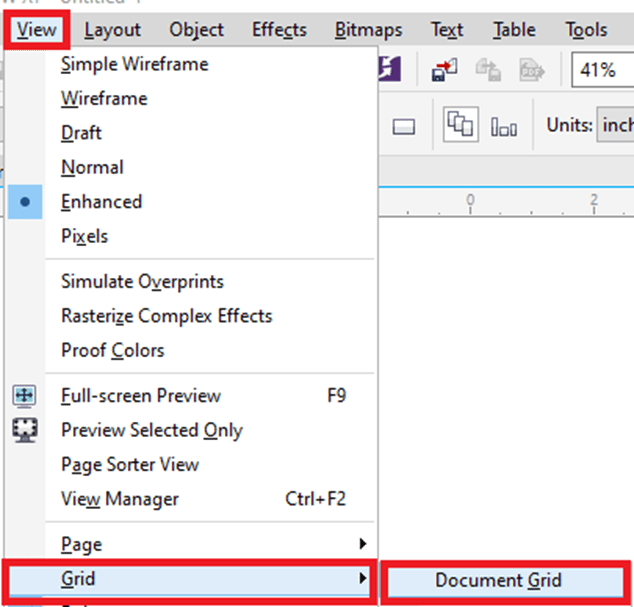
Grid display settings
1. Click on the Tools > Options.

2. Inside the Document list of categories, press Grid.
3. Select the Show Grid checkbox, and choose anyone from the below options:
- As dots
- As lines

The baseline grid settings
The baseline grid’s guides run across any drawing page. It follows the ruled notebook’s pattern. We can hide or display a baseline grid, change any grid color, line spacing setting, and turn snapping off or on. The line spacing by default is 14 pt.
To hide or display the baseline grid
- Press View > Grid > Baseline grid.
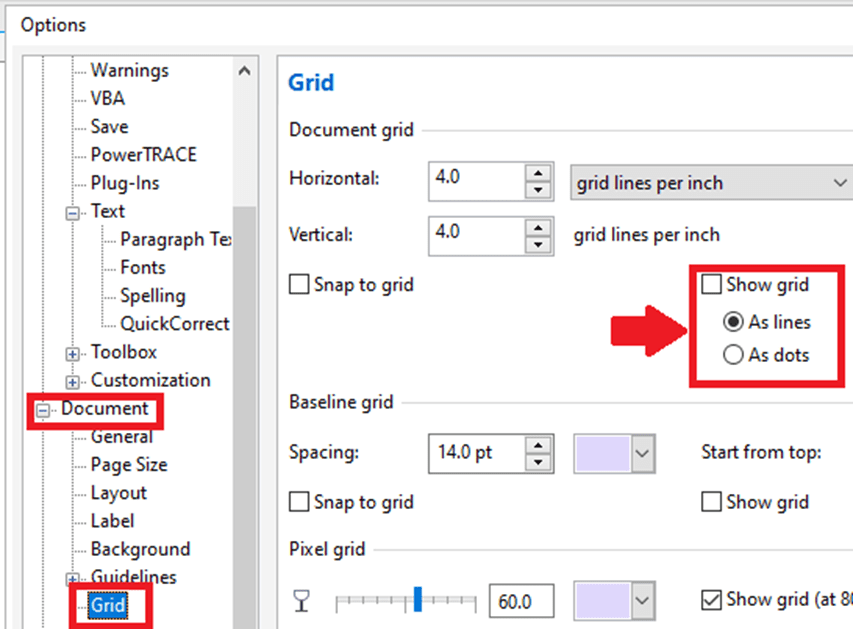
The Baseline grid color and spacing settings
1. Press Tools > Options.

2. Within the Document list of categories, press Grid.
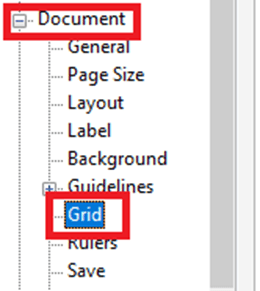
3. Implement anyone task from the below tasks:
- Inside the Baseline grid area, fill the value within the Spacing box to set the spacing.
- Fill the value inside the Start from top box to set the distance through the top.
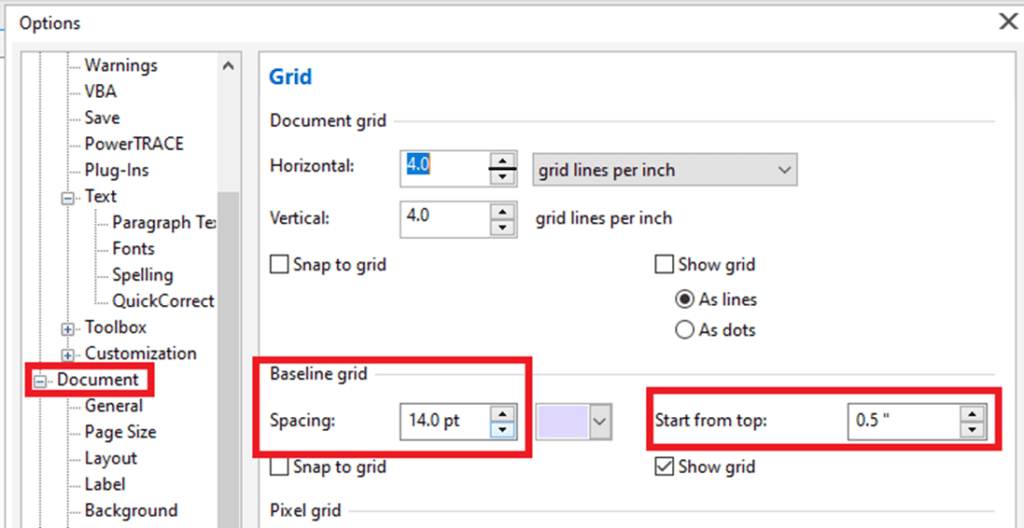
- Open a color picker, and select the color to set the color.
Guidelines settings
Guidelines are the lines that could be positioned anywhere within the drawing window. Guidelines are also called guides in a few applications. Guidelines can be categorized into three types: angled, vertical, and horizontal. Also, we can apply various objects the same as the guides.
To hide or display the guidelines
- Press View > Guidelines.
To insert a vertical or horizontal guidelines
1. Press Window > Dockers > Guidelines.

2. Within the Guidelines type list box, select anyone from the below options:
- Vertical
- Horizontal
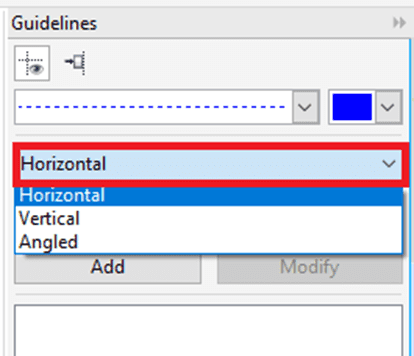
3. Describe the guideline’s location inside the y or x
4. Press Add.
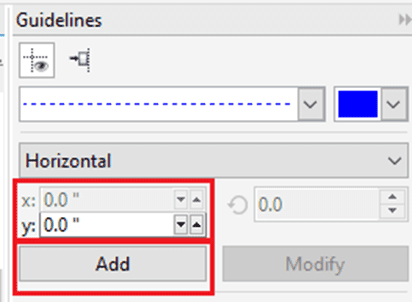
To insert any angled guidelines
1. Press Window > Dockers > Guidelines.
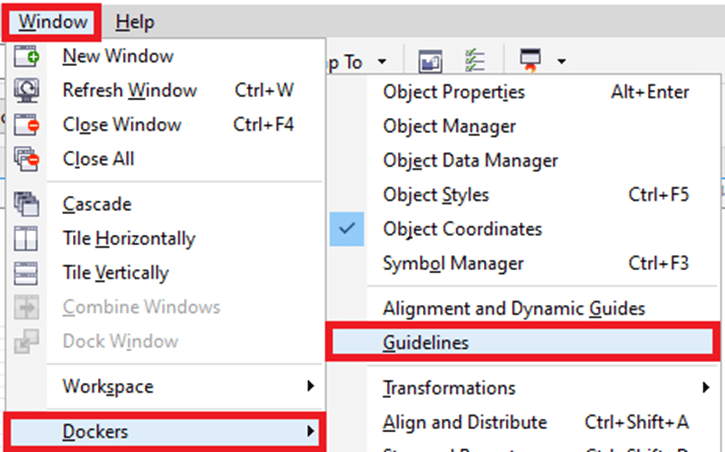
2. Within the Guidelines type list box, select Angled.
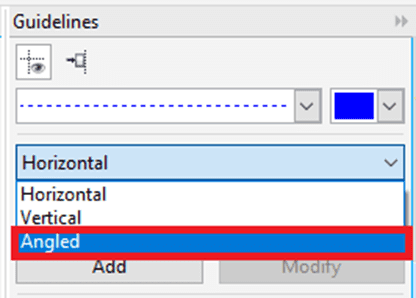
3. Describe the guideline’s location inside the y or x
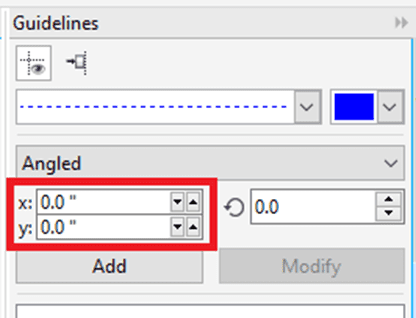
4. Fill the value inside the Angle of rotation
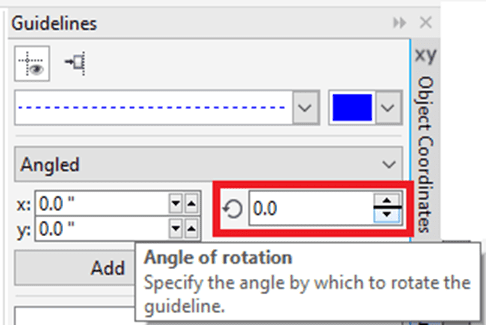
5. Press Add.
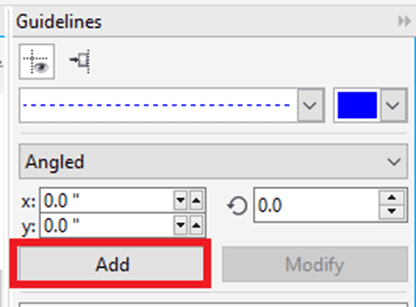
Changing the guidelines
After we insert any guideline, we can choose, rotate, lock, or move it in position. Also, we can modify the guideline’s color and line style.
To choose any guideline
- Press the guideline with the help of the Pick tool to choose only one guideline.
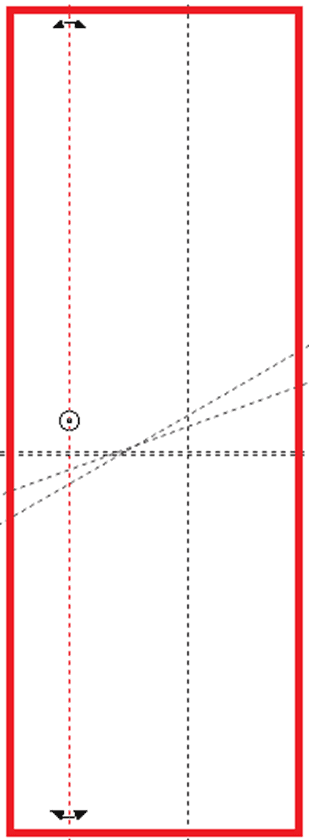
- Press Edit > Select all > Guidelines to choose all the guidelines over a page.
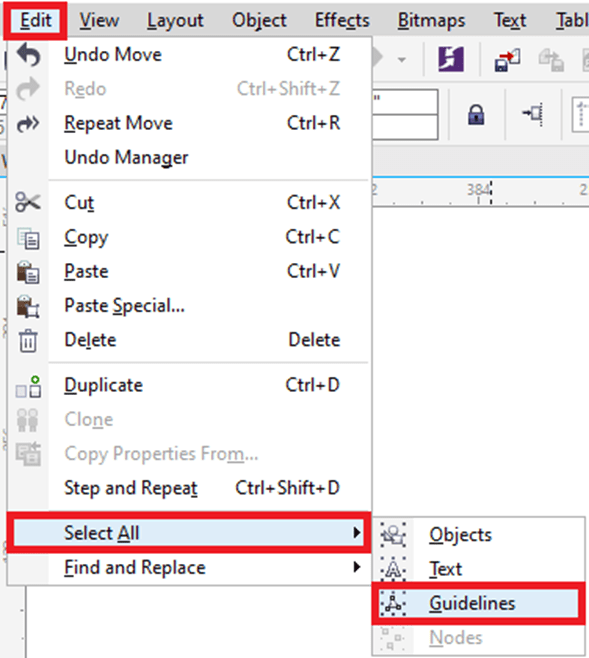
To unlock or lock any guideline
- Right-click on the guideline and press Unlock object or Lock object
Guideline color and line style setting
1. Press Window > Dockers > Guidelines.

2. Open a Guideline color picker, and select the guideline color.

3. Open a Guideline style picker, and select the line style.
The drawing scale settings
We can select the custom or preset drawing scale; hence the distances are proportionate in the real world within the drawing. The drawing scale (preset) enables us to fix any typical scale, like 1:10 or 1:2. The drawing scale (custom) enables us to fix the distance over a page to correspond in the distance of the real-world.
The drawing scale is particularly helpful when we are creating any architectural or technical drawing along with the dimension lines.
To select the drawing scale (preset)
1. Press Tools > Options.
2. Within the Document list of categories, press Rulers.
3. Press Edit scale.
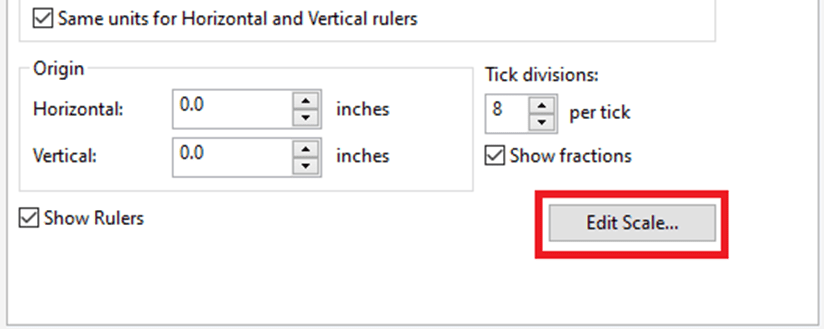
4. Select the drawing scale through the list box, e., Typical scales.

CorelDraw : Working With various layers
We can work by using various layers to support us to arrange and organize objects within some complicated illustrations.
This chapter includes the following-mentioned topics:
- Making layers
- Modifying properties of layers
- Copying and moving objects and layers
Making layers
Every CorelDraw drawings are a combination of various stacked objects. The stacking order can be defined as a vertical sequence of the objects which contributes to a drawing appearance. The effective way for organizing the objects is through the use of the invisible planes known as the layers.
For example, we can apply the layers for organizing the architectural plan to the building. We can organize various components of a building (for example, structural, electrical, and plumbing) by positioning them over separate layers.
Master and local layers
The specified content is positioned over the layer. Such contents specified for a particular page is positioned over the local layer. It is used to every page inside any document could be positioned over the master layer known as the global layer. The master layer is stored over any virtual page known as a master page.
All the new files are made along with the default page and the master page. A default page includes the following-mentioned layers:
- Guides: It can store the page-specific guidelines (local). Every object positioned over a Guide layer represents only as an outline and an outline act like the guidelines.
- Layer 1: It can represent a default local layer. If we draw the objects over a page, an object is inserted to the layer unless we select any different layer.
We can insert multiple layers to the master page for holding content like static background, footers, or headers. By default, the master page combines the following-mentioned layers:
- Guides: It includes some guidelines that can be applied for every page of a document. Every object positioned over a guide’s layer represents only the outlines, and these outlines are acting like guidelines.
- Desktop: It includes the objects which are outside a drawing shape’s borders. This layer enables us to store the objects that we wish to add to a drawing.
- Document grid: It includes a document grid and it is applied for every page of a document. These document grids are bottom layer always.
A default layer over a master page can’t be copied or deleted.
To insert content to the layer, we should first choose a layer so it becomes an active layer.
To make the layers
1. Click Object > Object manager.
2. Implement the following tasks:
- Inside the Object manager docker’s upper-right side, press the flyout button, and press New layer to make any layer.
- Inside the Object manager docker’s upper-right side, press the flyout button, and press New master layer (all pages) to make the master layer.
Modifying properties of layers
By default printing, editing, exporting, and display attributes are enabled to all the new layers that we create. We can change the properties every time. Also, we can turn the local layer into the master layer, and the master layer into the local layer.
Hiding and showing layers
We can select to hide or show the layers within the drawing. The layer hiding enables us to edit and identify objects over some other layers. Also, it decreases the time needed for our drawing for refreshing if we edit it.
Renaming layers
We can rename the layers to detect their position and content within a stacking sequence or their connection with some other layers.
Using layer color
We can modify the color of the layer so that the objects over any layer can be shown along with the color of a layer if we apply a wireframe view. Such as, when we position several architectural plan elements (structural, electrical, plumbing) over isolated layers, we can apply the color of the layer to detect quickly to which element objects belong.
To modify properties of layer
- Click Object > Object manager.
- Right-click on the layer, and then press Properties.
- Describe the settings we wish.

To hide or show the layers
- Click Object > Object manager.
- Press the Show or hide button beside a layer name.

To rename the layers
- Click Object > Object manager.
- Right-click on the layer name, and then press Rename.

To modify the color of a layer
- Double- click on a color swatch which is appeared to the layer name’s left side inside the Object manager docker, and can select any color.
Copying and moving objects and layers
We can copy or move layers over one page or among pages. Also, we can copy or move chosen objects for any new layer, adding the layers over a master page. Copying and moving layers influence the stacking sequence.
We can modify the master layer’s order relative to the local layers by showing every layer’s list for the latest page or dragging the name of the layer to any new place inside the list of the layers
- We can copy and move the objects to other layers by dragging the objects to any new layer within the docker Object properties.
- Also, we can move the objects to other layers by applying the Order command.
To move the layer
- Click Object > Object manager.
- Inside the layers list, drag the list name to the new location.

To copy the layer
- Click Object > Object manager.
- Right-click on the layer we wish to copy inside the layers list, and then click Copy.
3. Right-click on the layer upper which we wish to place any copied layer, and press Paste.
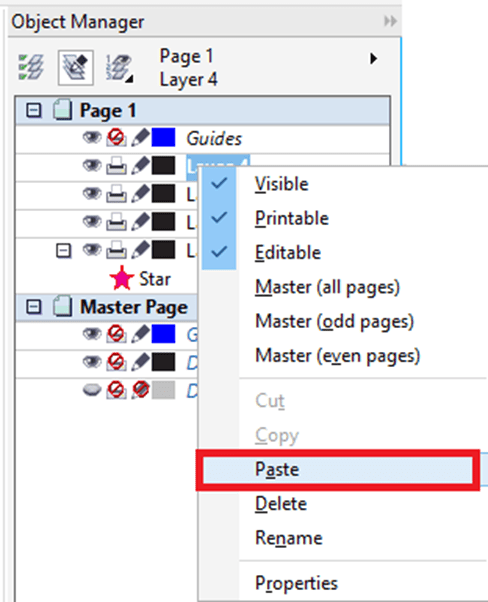
CorelDraw: Working with various symbols
CorelDraw enables us to create objects. We can save these objects as the symbols, symbols can be defined only once and could be referenced so many times within the drawing. All the time we add the symbol in the drawing, we can create the symbol’s instance. Symbol information and definitions about the instances are saved inside the symbol manager that is the CorelDraw file’s part. Using symbols to objects that represent various times within the drawing supports us to reduce the size of the file.
In this chapter, we will understand about:
- Deleting, editing, creating symbols
- Using various symbols within a drawing
- Managing libraries and collections
Deleting, editing, creating symbols
Symbols can be defined only once and could be referenced so many times within the drawing. We can have several symbol instances in the drawing along with a little impact over the size of the file. Symbols can make editing the drawing easier and quicker, as modify made for the symbols are acquired by every instance automatically.
The symbols which we create inside the drawing can be saved with a CorelDraw file. We can create various libraries of the symbols, which include symbols that could be shared among drawings.
We can edit the symbols; a change we make effects every instance within the drawing. If we add any symbol from any outer library, the symbol’s copy is inserted into an active drawing. However, it will remain connected to a source symbol.
We can delete the symbols. If we delete the symbols that are applied inside the drawing, every instance of a symbol is removed from a document. Also, we can delete every symbol that is stored within the library of the document although is not applied to a document.
To create the symbols
1. Choose multiple objects or an object.
2. Press Object > Symbol > New symbol.
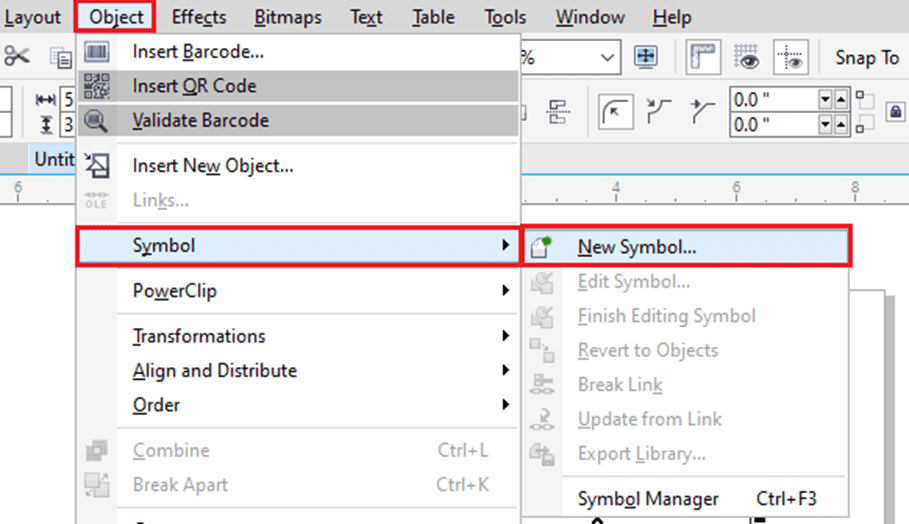
3. Fill the name to any symbol inside the Create new symbol dialog box.

To edit the symbols
1. Inside the Symbol manager docker, select the symbol from a list.
Press Object > Symbol > Symbol manager to enable the Symbol manager docker.

2. Click on the Edit symbol
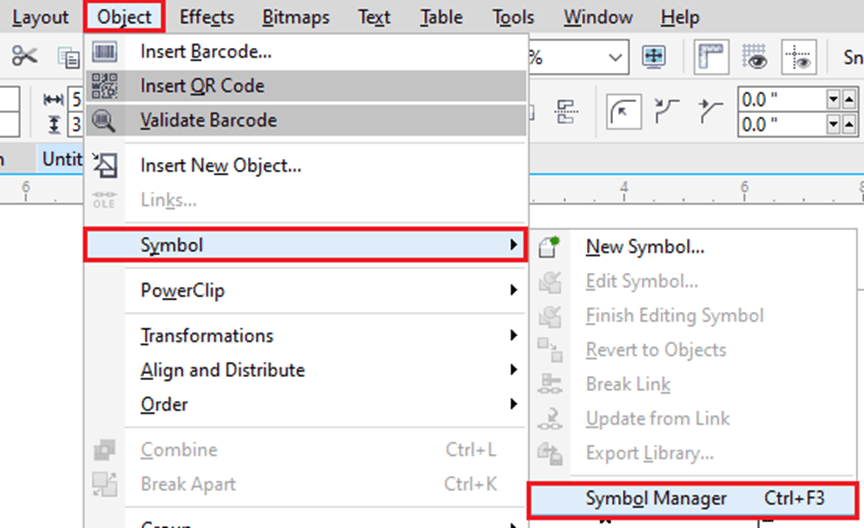
3. Change the Objects over the drawing page.
4. Press the Finish editing object tab within the drawing window’s bottom-left corner.

To delete the symbols
1. Open the Symbol manager docker, select the symbol from a list.
2. Press the Delete symbol
Using various symbols within a drawing
We can add the symbols into the drawing, which makes the symbols instance. We can change the symbol instance’s properties, like the position and size, without affecting a definition of the symbol stored inside a library. We can convert an instance of symbol back to the object at the time of preserving its essential properties.
We can share various symbols among the drawings. Copying any symbol to a Clipboard leaves an original one inside a library. Also, we can paste and copy the instances of the symbols to or from a Clipboard. Pasting the symbol instance positions the symbol within a library and positions the symbol instances inside a drawing. The symbol instances are pasted and copied in a similar way as other objects. Also, we can export the symbols to the outer library that could be shared among many drawings. We can delete any symbol instance also.
To add the symbol instance
- Inside the Symbol manager docker.
- Select any symbol from list.
- Press the Insert symbol button.
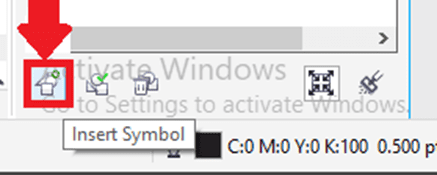
To delete the symbol instance
- Choose the symbol instance.
- Click Delete.

The symbol endures in the docker Symbol manager.
Managing libraries and collections
Various symbols that we create inside the drawings can be saved along with a CorelDraw file. When we wish to apply several symbols inside some other drawings and share them along with some other users, we can export and save them to a CSL format (Corel Symbol Library), making any symbol library. If we save any drawing to a CSL format (Corel Symbol Library), every symbol instances can be saved with a document. If we export any library, then only various symbols can be saved with a document.
The docker Symbol manager shows many libraries that reside inside the folder of local Symbols. The symbol that is used in a document represents under a document filename within the docker Symbol manager. We can insert collections (libraries group) and libraries to our drawing. Also, we can delete collections and libraries. We can insert the symbols into the existing library.
To make the symbol library
1. Make any symbol we wish.
2. Click on File > Save.

3. Select the folder and drive where we wish to store a library.
4. Select Corel Symbol Library – CSL from the list box Save as type.
5. Type the filename within the box Filename.
6. Click on Save.

All symbol instances and symbols are saved along with a document.
Also, we can click an active document’s name in the docker Symbol manager, and click on a button Export library when we export the library, the symbols can be saved with a document.
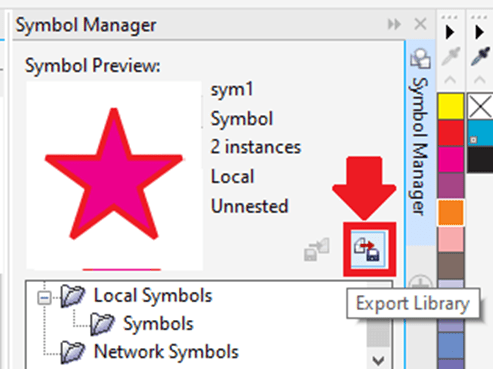
CorelDraw: Sharing and Managing Transparency and Fills
Working with bitmap patterns, vector patterns, or transparencies and fountain fills, we can apply Content Exchange for the transparency patterns, share fills, copy, search, and browse.
This chapter contains the following essential topics:
- Managing transparencies and fills
- Sharing and saving transparencies and fills
Managing transparencies and fills
CorelDraw enables us to browse fountain fills, bitmap patterns, and vector patterns that are present in our personal library or over Content Exchange. These fills may also be applied as the transparency patterns.
Content Exchange includes content facilitated by Corel or shares by various users we should sign-in to corel.com account.
We may browse the present patterns and fills, or search through keyword, vote for patterns and fills, mark patterns and fills as favorites that we like, and copy the content through the content exchange for our personal library.
To manage transparencies and fills
1. Choose the object.
2. Press Windows > Dockers > Object properties.

3. Within the Object properties docker, click on any one buttons inside the Transparency or Fill section which is as follows:
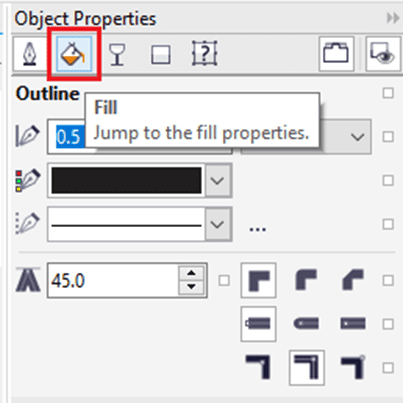

- Vector pattern transparency
- Bitmap pattern transparency
- Fountain transparency
- Fountain fill
- Vector pattern fill
- Bitmap pattern fill
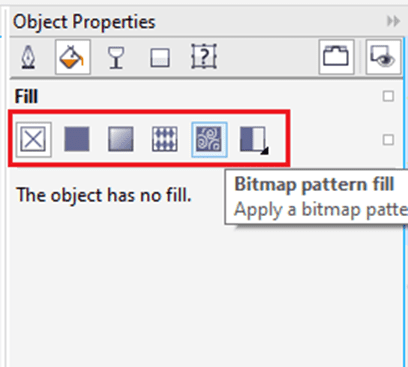
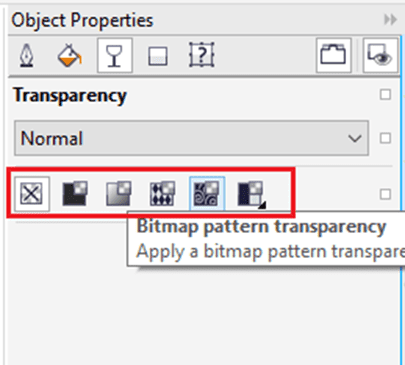
4. Open a Transparency picker or a Fill
5. Perform any action from below actions:
- Within the Transparency or Fill picker, select any category from a list, fill the keyword within a Search box, and click Enter to search the patterns and fills over Content Exchange or in our personal library.
- Open a list next to a Search box to sort search outcomes, and select anyone from the below options:
- Hot: It sorts search outcomes according to download’s number, vote’s number, and date when pattern and fill was inserted to Content Exchange.
- Top: It sorts search outcomes according to the negative and positive vote’s number.
- Recent: It sorts search outcomes according to that date when pattern and fill were inserted to Content Exchange.
- Popular: It sorts search outcomes according to download’s number of the pattern or fill.
- Click on a thumbnail, and press on the Share button to share the pattern or fill from our personal library for a Content Exchange.

- Click on a thumbnail, press on the More options button, and press on the Edit properties button to change any pattern or fill name in our personal library, over some tags connected with it.

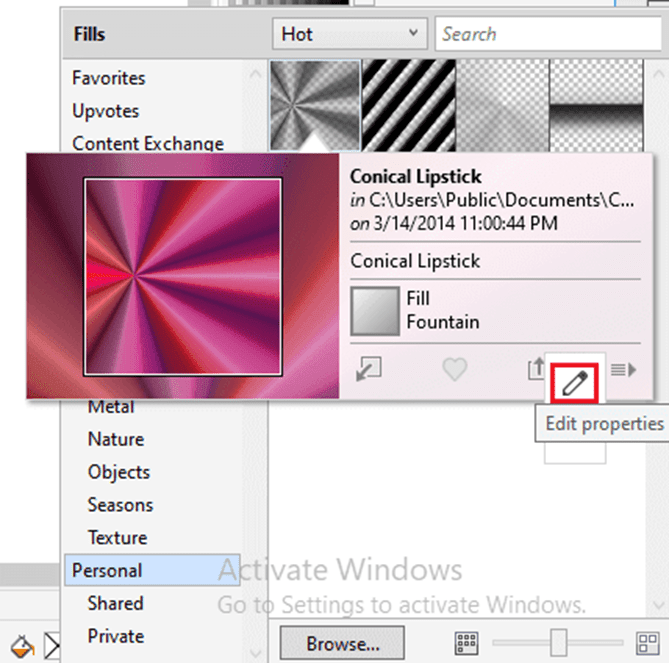
- Click on a thumbnail, press on the More options button, and press on the Delete button to delete a pattern or fill from our personal library.

- Click on a thumbnail, and press on Favorite button to mark a pattern or fill as the favorite to remove the pattern or fill from our favorites, click on the Unfavorite
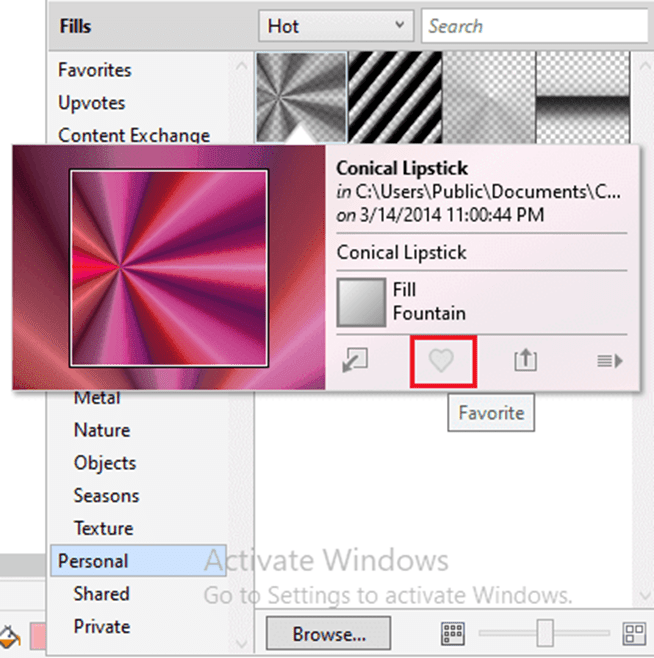
Note: This process uses only to fountain transparencies and fills, bitmap patterns, and vector patterns.
Patterns and fills in our personal library can be saved inside My Documents/Corel/Corel Content/Fills folder.
Sharing and saving transparencies and fills
After we modify or create transparency or fill pattern, we can add tags (also called “keywords“) and save it inside any language of our choice. Patterns and fills are saved within a unique file format along with the .fill extension that preserves the information of the transformations used to a pattern or fills.
To share and save transparency and fill
1. In the Transparency or Fill section of an Object properties docker, press the Save as new
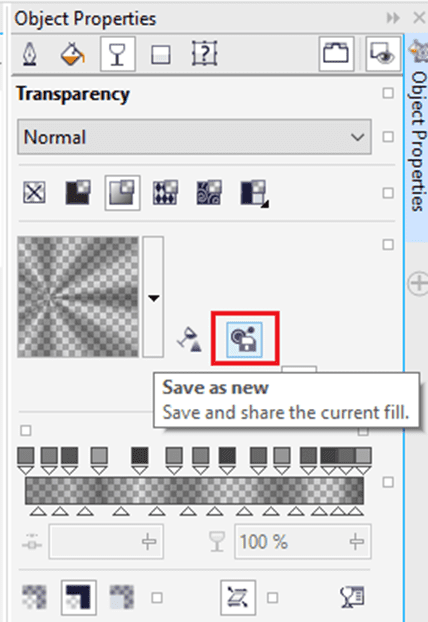
2. Within the dialog box Save pattern, select the language from a list box, fill the name for a pattern or fill, and type a tag that we wish to relate with it.
- When we wish to share a pattern or fill, enable a checkbox, i.e., Share this content, and select any category from a list.
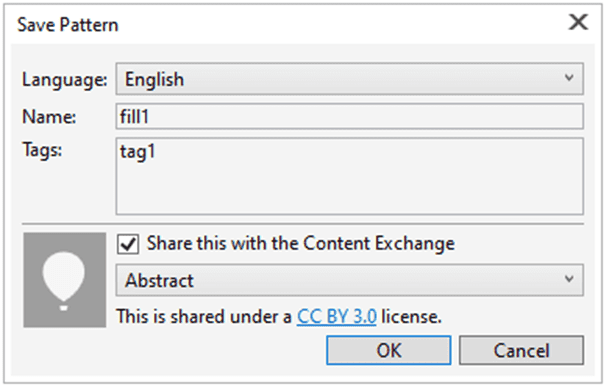
- We should sign-in to corel.com account for sharing content.
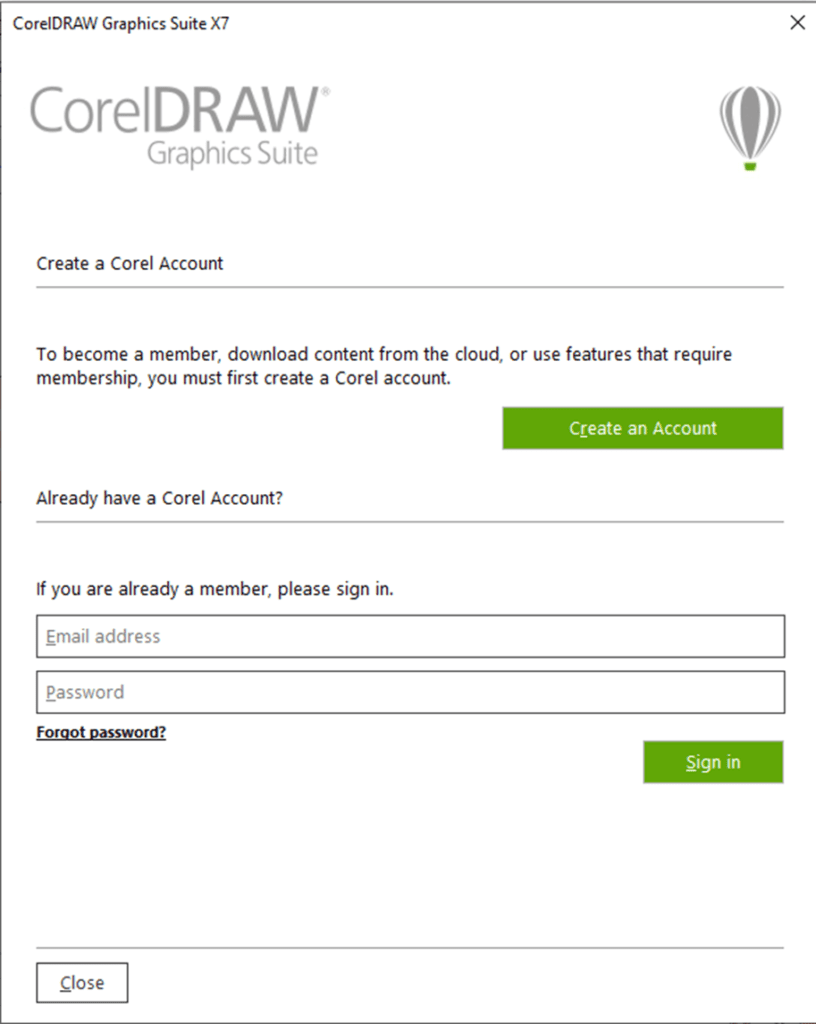
- Patterns and fills in our personal library can be saved within the My Documents/Corel/Content/Fills
- Also, we can a pattern or fill from our personal library for the Content Exchange.
CorelDraw: Working with brushstrokes, outline, and line
CorelDraw enables us to add brushstrokes and lines with the help of a wide range of tools and technologies. After we create lines or use brushstrokes on the lines, we may format them.
This chapter includes the following mentioned topics:
- Creating lines
- Drawing preset lines, pressure-sensitive, and calligraphic
- Formatting Outlines and lines
- Inserting arrowheads to curves and lines
- Removing, converting, and copying outlines
Creating lines
The lines are the path among two points. A line can combine of several segments the segment of a line can be straight and curved.
- Polyline and Freehand Tools
When we were sketching over any sketchpad, the polyline and freehand tools let us create the freehand lines. We can immediately erase an unwanted part and continue creating. To create segments or straight lines, we can constraint them for horizontal and vertical straight lines.
To draw any line with Freehand tool
- Within the toolbox, press the Freehand

To draw any line with Polyline tool
- Within the toolbox, press the Polyline
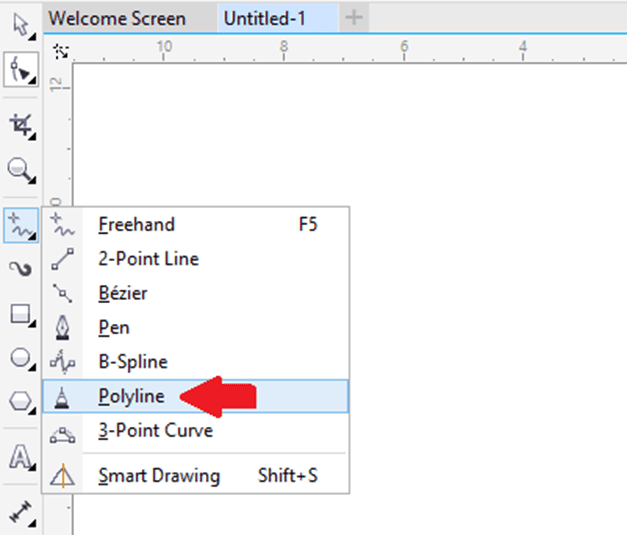
- Pen and Bezier Tools
The pen and Bezier tool lets us create the lines single segment at one time thru positioning every node along with controlling and precision every curved segment’s shape. We can preview a line segment we are creating if using any pen tool.
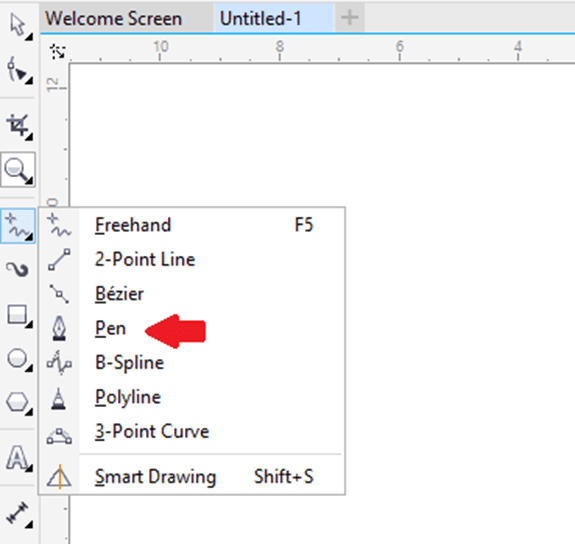
- B-spline Tool
With control points, we can shape the curved lines easily and create the B-splines. The control points do not let us to describe the points from which the curve passes if we wish to align the curve along with some other drawing components.
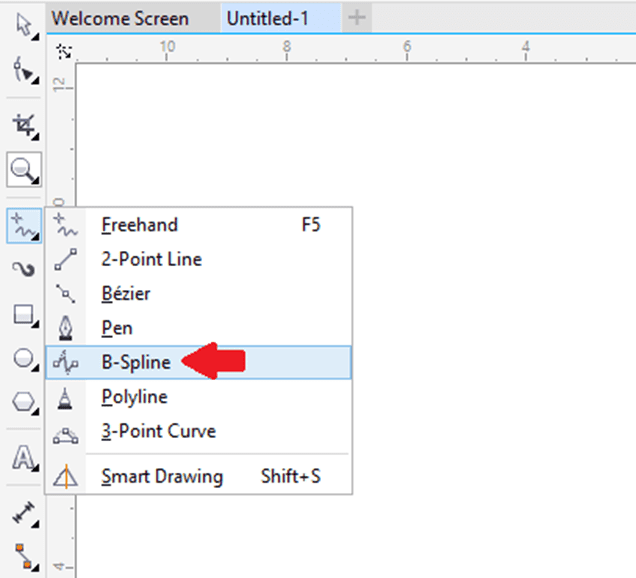
Drawing preset lines, pressure-sensitive, and calligraphic
CorelDraw enables us to simulate the calligraphic pen effect when we draw the lines. The calligraphic lines may change in thickness based on the line’s direction and pen nib’s angle. By default, the calligraphic lines represent the closed shapes along with the pencil.
CorelDraw enables us to create pressure-sensitive lines, and these lines may change in thickness. We can make this effect with the help of the graphics tablet, pressure-sensitive pen, and mouse. The outcome of both the techniques is the lines along with the curved lines, and changed widths with the path.
The preset lines let us design the thick strokes within a wide range of shapes.
To draw the calligraphic line
- Within the toolbox, press the Artistic media
- Press the Calligraphic button over the property bar.
- Type the value inside the Calligraphic angle box over the property bar.
- Move until a line is a shape we wish.
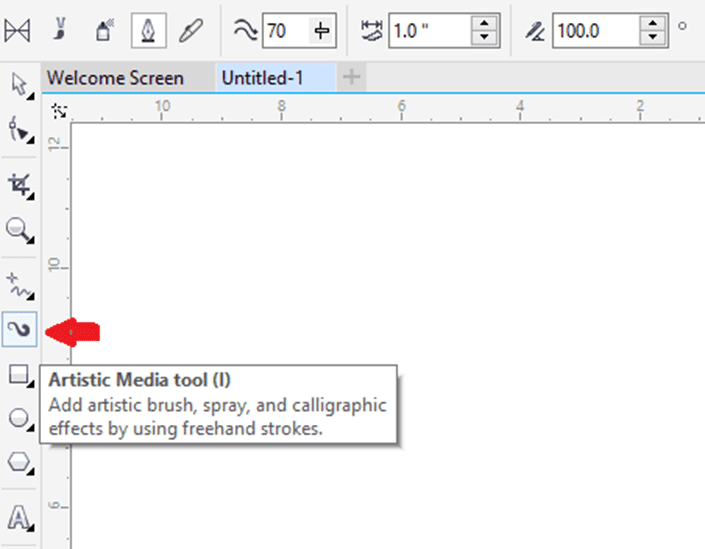
To draw the pressure-sensitive line
- Within the toolbox, press the Artistic media
- Press the Pressure button over the property bar.
When we use the mouse, click the Down arrow or Up arrow to simulate modifications in the pen pressure and modify the line’s width. - Move until a line is a shape we wish.
To draw the preset line
- Within the toolbox, press the Artistic media
- Press the Preset button over the property bar.
- Select the preset line through the Preset stroke list box.
- Move until a line is a shape we wish.
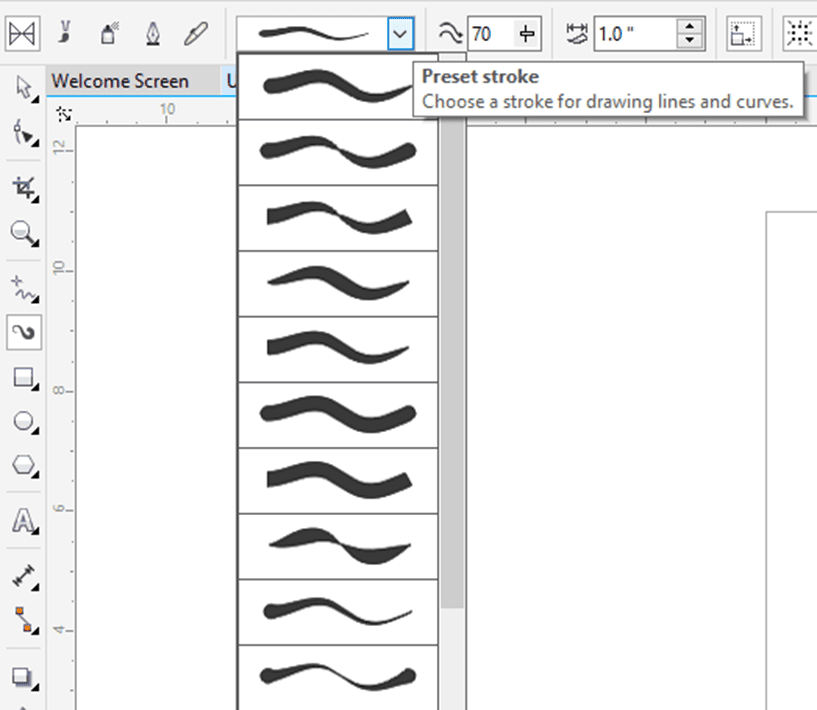
Formatting Outlines and lines
Lines can be treated as closed shape’s outline, like polygons and ellipse. Outlines are called thick lines and strokes.
We can modify the representation of both the outlines and lines with the help of some controls inside the Object property’s Outline section, a dialog box Outline pen and a property bar. Such as, we can describe the style, color, and width of an outline and line.
We can select the corner style for controlling a corner shape inside the lines and select the style of line cap to modify the representation of the endpoints of a line. Also, we can connect the thickness of a line to the size of an object so that an outline can increase the size of an object and decrease if we decrease the size of an object. In addition, we can set an outline over the underline color’s top, without erasing them at the time of printing.
The defaults outline and line properties for every newly created object that we draw are listed below:
- An outline connected to the size of an object.
- An outline used on the top of the object’s fill.
- No arrowheads used
- Centered outline
- Line cap and square corner styles
- Solid line
- Black color
- Hairline width
To describe outline and line settings
- Choose the object.
- Press Window > Dockers > Object properties.
- Within the Outline section, fill the value inside the width
When an Outline section is not shown, press Outline.
- Open color picker, and press any color.
- Select the line style through the Style
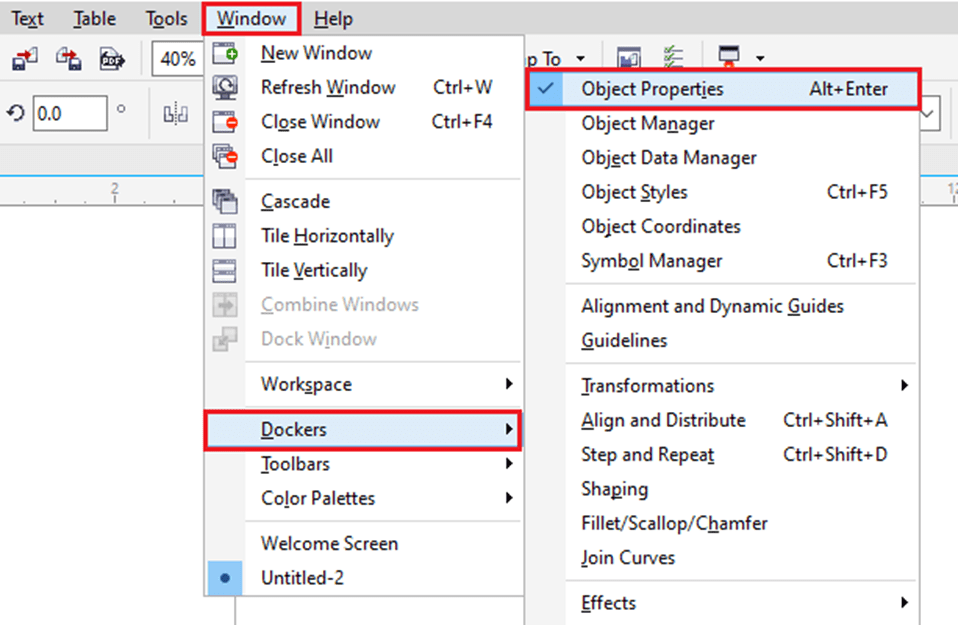
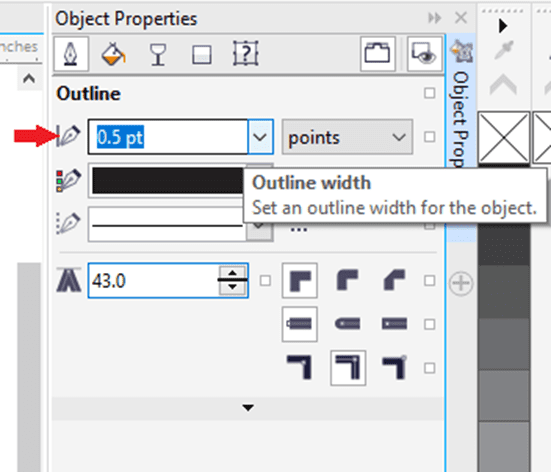
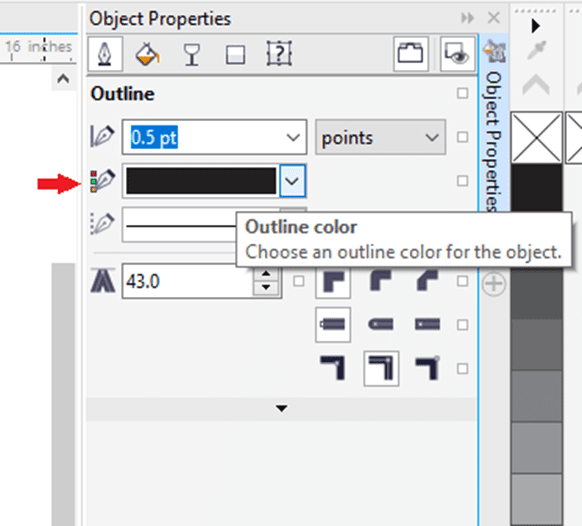
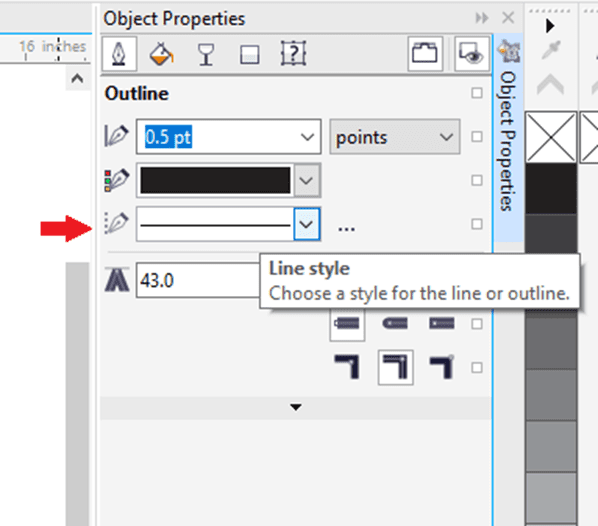
Inserting arrowheads to curves and lines
Arrowheads let us enhance the starting and endpoints of curves and lines. We can describe the arrowheads attribute’s with precision. Such as, we can specify an arrowhead’s exact size or rotate an arrowhead through any precision amount. Also, we can flip the arrowheads horizontally and vertically.
We can edit the arrowhead preset, and design the arrowhead preset on the basis of the existing one. Also, we can design the arrowhead preset on the basis on the object like the closed shape or curve. If we no longer require the arrowhead preset, we can also delete it.
To insert an arrowhead
- Choose a curve or line.
- Open the Start arrowhead picker over the property bar, and press the line-ending shape. Open the Start arrowhead picker over the property bar, and press the line-ending shape.
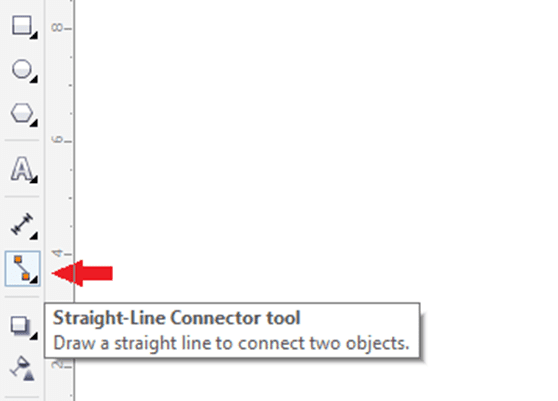
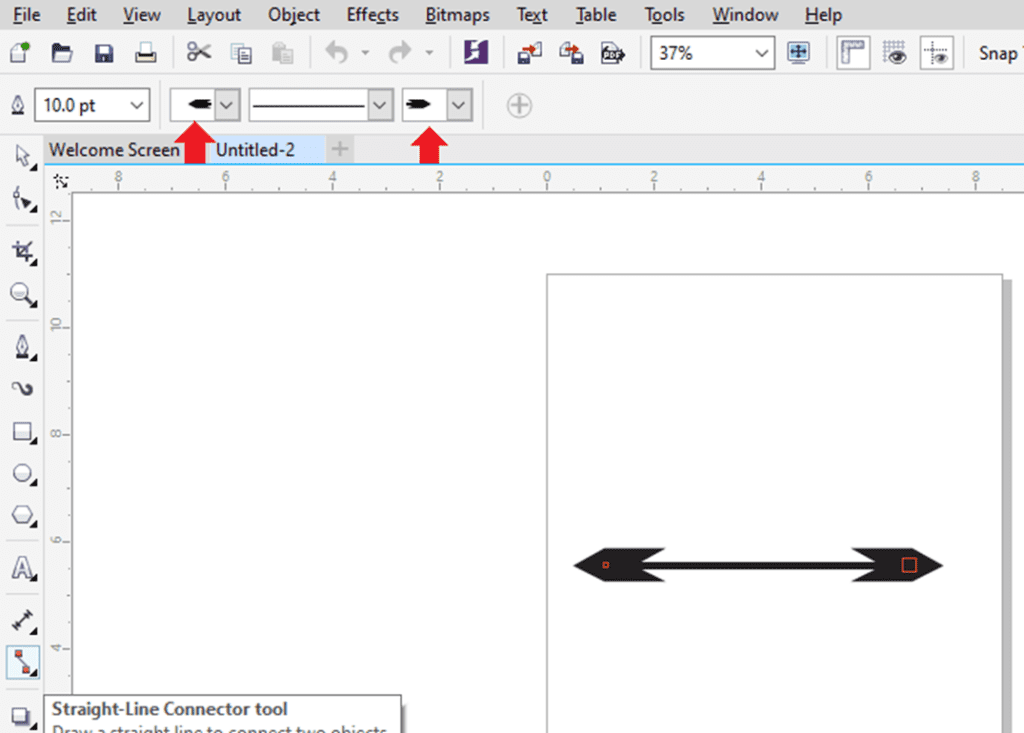
Removing, converting, and copying outlines
CorelDraw enables us to copy the properties of an outline to another object.
Also, we can convert the outline to the object, and remove the outline. Converting the outline to the object makes an empty closed object along with the shape of an outline. We can use various special effects and fills in a new object.
To copy the outline properties to other objects
- With the Pick tool, choose an object that contains an outline we wish to copy.
- Using the right button of mouse, move the source object on the target object, for we wish to use that outline.
- If the pointer modifies to the crosshair pointer, free the button of mouse, and select the Copy outline here option from the available context menu.
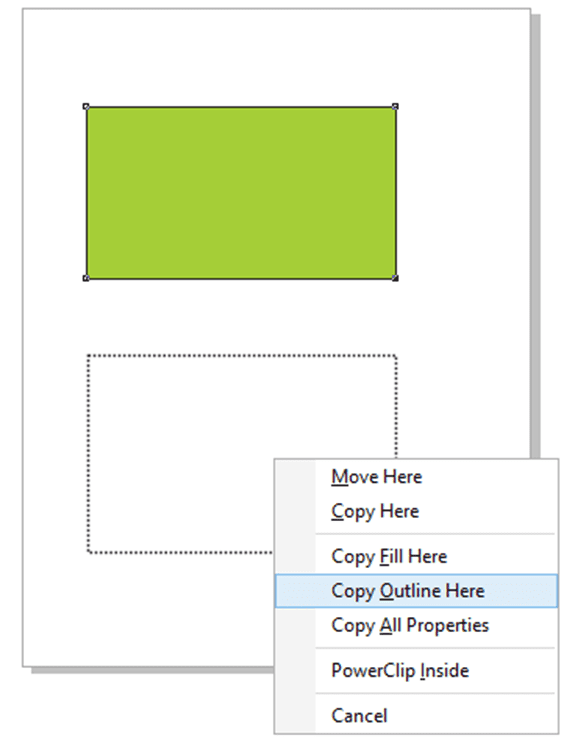
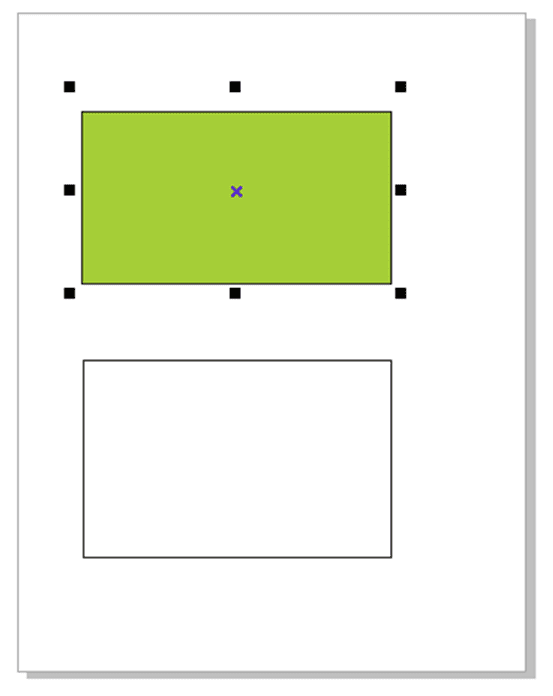
CorelDraw Workspace Tour
In this chapter, we will learn the following concepts:
- CorelDraw terminologies
- Application window
- Property bar
- Standard bar
- Dockers
- Selecting a workspace
- Status bar
CorelDraw terminologies
Before we get begun with this application, we must be understood the following concepts:
Object: Object is a component inside the drawing like a layer, symbol, curve, text, line, shape, and image.
Drawing: Drawing can be defined as any work we make inside CorelDraw; such as newsletter, posters, and custom artwork.
Vector graphics: The image produced from the mathematical descriptions and it determines the direction, length, and position in which various lines can be drawn.
Bitmap: The image combined with grids of dots and pixels.
Docker: The window that includes available settings and commands relevant to any specific task or task.
Flyout: A button that starts a menu item or related tool’s collection.
List box: An option list that can be dropped down if any user presses the downside button.
Artistic box: A text type to which we can use unique effects, like shadows.
Paragraph text: A text type to which we can use the formatting options, which may be edited within the large blocks.
Application window
If we launch CorelDraw, an application window starts including the drawing window. However, multiple drawing windows may be opened we can use the commands to a drawing window.
The part’s description of application window appears as follows:
- Toolbox: A toolbox can be defined as the docked bar along with various tools for modifying objects, filling, and creating inside a drawing.
- Title bar: A title bar can be defined as an area showing the latest selected drawing title.
- Document tab: A tab can be used to display all the open documents to permit us to move among the documents quickly.
- Menu bar: A menu bar can be defined as an area containing various menu options for pull-down.
- Drawing page: It can be represented as a rectangle area in a drawing window. The drawing page is any printable space for our workplace.
- Color palette: A color palette can be depicted as the docker bar which includes the color swatches.
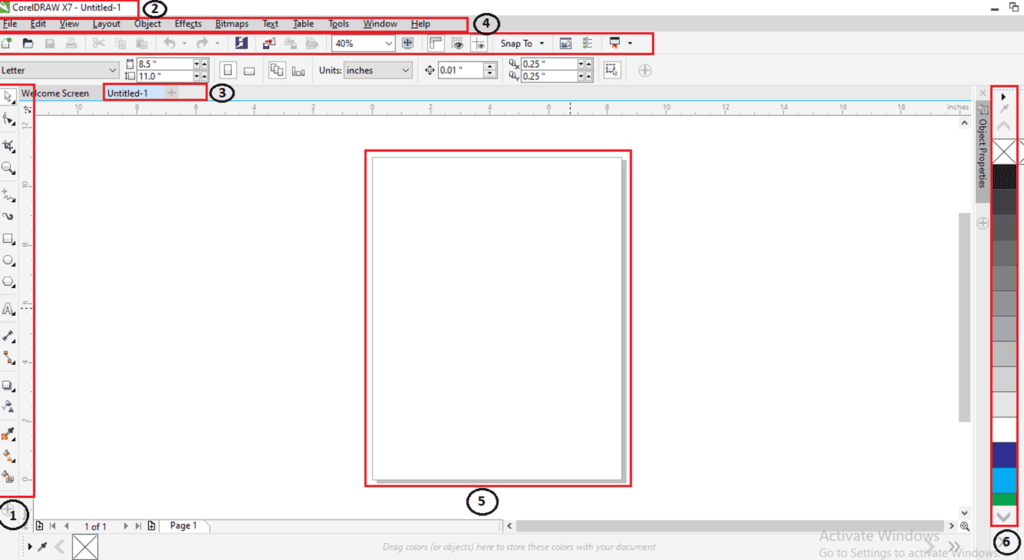
Property bar
A property bar shows the most widely used operations that are connected to an active task or tool we are performing. However, it appears like any toolbox, the content of a property bar modifies depending on any task or tool.
For example, if we click on a Text tool inside a toolbox, and a property bar shows the text relevant commands.

Standard bar
It depicts by default, includes controls and buttons that are some shortcuts to various menu commands. Besides, CorelDraw contains other toolbars for unique tasks.
There are some other essential toolbars which are discussed as follows:
Text: It contains various commands to align and format the text.
Zoom: It contains various commands to zoom out and in of the drawing page through describing the original view’s percentage, click on the Zoom tool, choose the page view.
Internet: It contains the commands for web relevant tools to create publishing and rollovers to the internet.
Print merge: It contains the commands to print the merge elements that combine the text along with the drawing like loading and creating data files, inserting fields of a print merge and making data fields to variable text.
Transform: It contains the commands for mirroring, rotating, and skewing objects.
Macros: It contains the commands for running, testing, and editing macros.

Selecting workspace
CorelDraw contains specialized workspaces collection that is created to help us increase our productivity. The essential workspaces are described as follows:
Lite: The lite workspace creates the most widely used tools of CorelDraw and aspects more accessible. When we are new for CorelDraw, this workspace is specific for get started.
Default: The default workspace was redesigned for facilitating the more intuitive tools and controls placement.
Classic: These workspaces are almost ideal for a default CorelDraw X6 workspace. The classic workspace is more suitable for an experienced user of CorelDraw who is appearing for the seamless transition for the latest environment inside CorelDraw X7. Various workspace components have been utilized for the streamlined workflow.
Status bar
A status bar shows the information about the selected objects (like cursor position, outline, fill type, color, and some other relevant commands). The status bar shows the information of document color, like color profile status and document color profile.

CorelDraw: Usage of Objects
This chapter contains the following essential topics:
- Choosing objects
- Deleting, duplicating, and copying objects
- Transforming Objects
- Making boundary around chosen objects
- Making objects from disclosing areas
- Object coordinates usage to modify and create objects
- Copying objects effects, transformations, and properties
- Cloning objects
- Positioning objects
- Distributing and aligning objects
- Using object hinting
Choosing objects
Before we modify the object, we must choose it. We can choose the objects in that sequence in which these objects were created. We can marquee choose objects by disclosing them along with the rectangle’s selection area or an irregular shape.
We can make selection collections that enable us to choose specific objects without collecting them simultaneously. Selection collections are connected with some numbers from range 0 to 9 and can be saved along with the document.
To choose the object
- Press the Pick tool, and press an object.
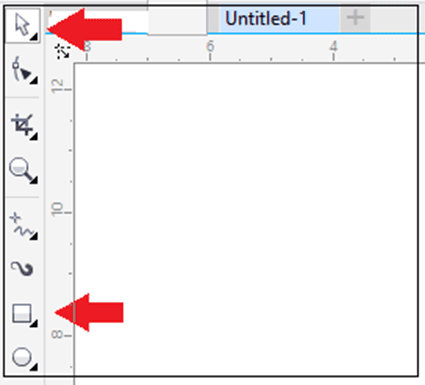
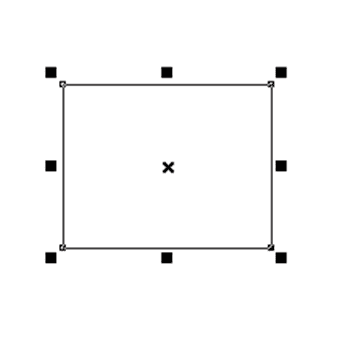
To choose multiple objects
- Press the Pick tool, keep pressing Shift, and press on all the objects that we wish to choose.
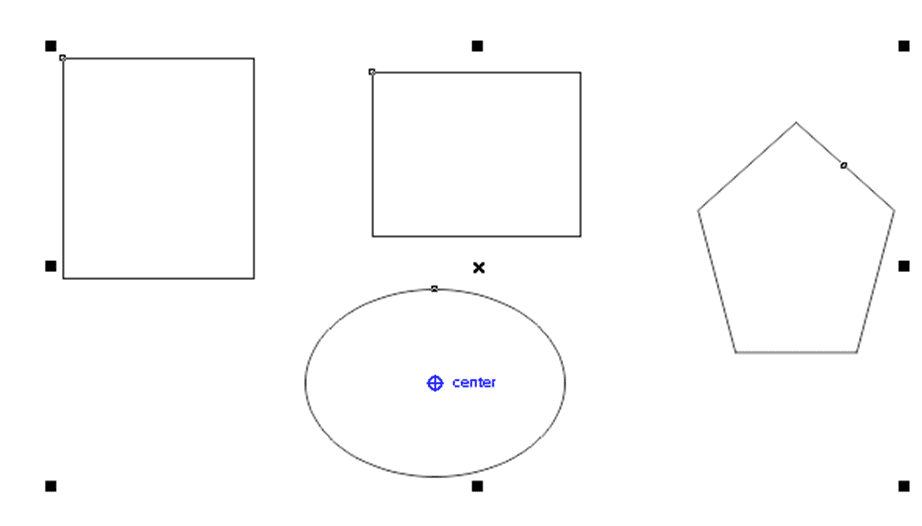
Deleting, duplicating, and copying objects
CorelDraw facilitates us with various ways ideas to copy the objects. If we no longer require the object, we can also delete it.
Pasting, copying, and cutting
We can copy and cut an object for placing it over a clipboard, paste these objects into the drawing or other applications. Cutting the objects place it over a clipboard, remove these objects from drawing. Copying the objects and place these objects over a clipboard however keep an original one within a drawing.
To copy or cut the object
1. Choose an object.
2. Press Edit, and press any one from the following:
- Copy
- Cut

To paste the object
- Press Edit > Paste.
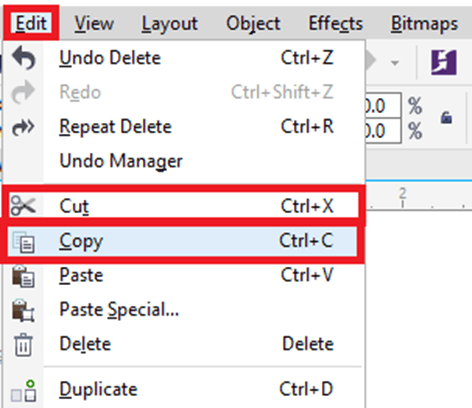
Duplicating
Pasting and copying an object is slower than duplicating. We can also describe the distance among the original and duplicate objects with the x-axis and y-axis. The distance is called offset.
To duplicate the object
- Choose an object.
- Press Edit > Duplicate.

Transforming Objects
We can modify the object’s representation inside a drawing window. Some essential key points are discussed as follows:
Sizing: It enables us to change the height and width of the object.
Scaling: It enables us to size the object to the original size’s percentage.
To scale or size an object
- Drag the handle of corner selection.
Skewing: enables us to slant the object to only one side.
To skew an object
- Press on the object for showing the skew handles, and then Drag the skew handle.
Stretching: It enables us to modify the width and height of the object non-proportionally.
To stretch an object
- Drag the handle of middle selection.
Mirroring: It enables us to create a vertical and horizontal mirror image of the object.
To mirror an object
- Keep pressing Ctrl, and then drag the selection handle in the object’s opposite side.
Rotating: It enables us to turn any object around the center point or an axis relative to the position.
To rotate an object
- Press on the object for showing the rotation handles, and then drag the rotation handle.

Making boundary around chosen objects
We can automatically make any path around chosen objects over a layer for making the boundary. It can be useful for several objectives, like to generate cut lines and keylines.
The boundary can be made by the closed path which pursues the selected object’s shape. The default outline and fill attributes use to an object made by a boundary.
To make the boundary around chosen objects
- Choose an object that we wish to surround along with the boundary.
- Click on Object > Shaping > Boundary.

Making objects from disclosing areas
We can make objects from various areas disclosed by some other objects. Such as, when we draw the freehand line and these lines cross on it for creating loops. We can make objects from a loop shape. An object can be created inside the area’s shape if an area is fully enclosed.
Object coordinates usage to modify and create objects
We can apply the docker object coordinates to modify and create lines and shapes precision. A live preview within a drawing window enables us to see our adjustment’s effects.
Creating Squares and rectangles
To create a rectangle along with precision, we can describe the origin point that can be defined as only one point of the rectangle (a center point, four midpoints, four corner points). When we rotate a rectangle, an origin point can be applied as the rotation’s center. Also, we can describe the rotation’s angle and height and width of the rectangle.
To modify or draw the rectangle with object coordinates
1. Press Window > Dockers > Object coordinates.
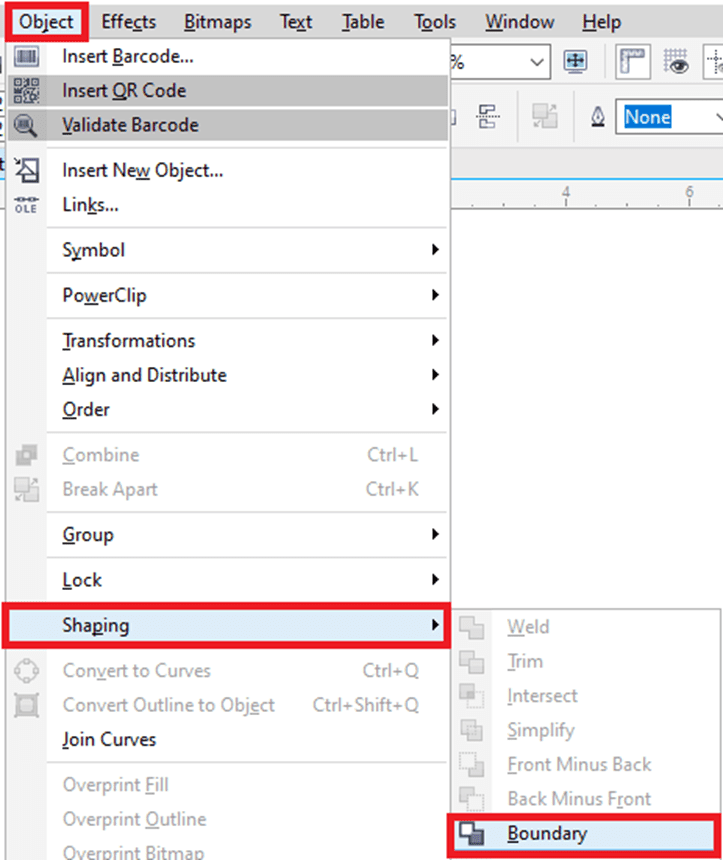
2. Press on the Rectangle
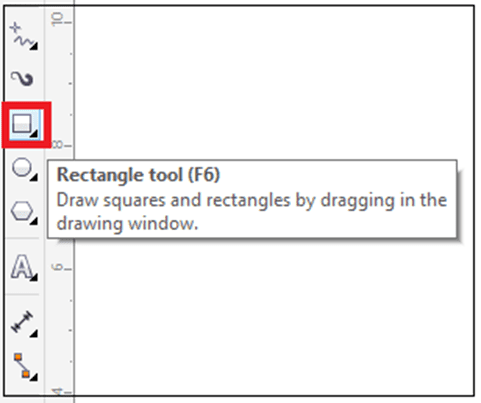
3. Select any one adjustments from the following:
- Press the point inside the Origin area to set the rectangle’s origin point.
- Fill the values inside the Object size boxes to set the rectangle’s height and width.
- 4. Press any one from the following:
- Replace object: It will add any new rectangle into the drawing window.
- Create object: It will replace the chosen rectangle along with any new one.
Creating circles and ellipses
To create an ellipse along with precision, we can describe the origin point, and these can be used to draw around an ellipse. This origin point can be applied to the rotation’s center.
To create a circle, we can define an origin point, rotation’s angle, and diameter.
To modify or draw an ellipse with object coordinates
1. Press Window > Dockers > Object coordinates.
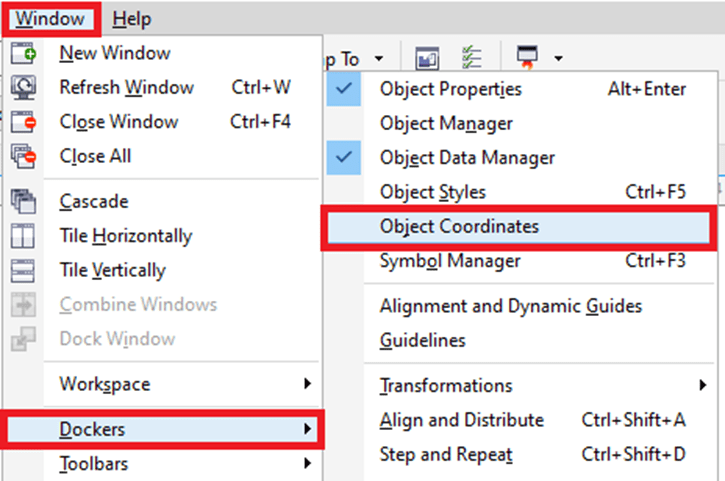
2. Press on the Ellipse

3. Select any one adjustments from the following:
- Press the point inside the Origin area to set the ellipse’s origin point.
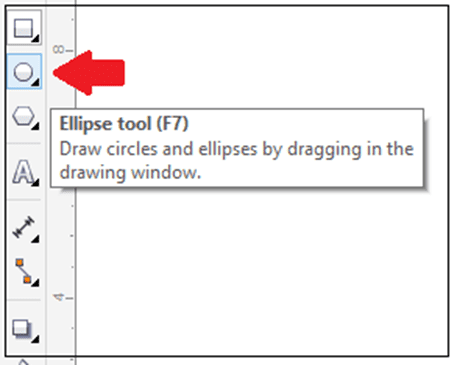
- Fill the values inside the Object size boxes to set the ellipse’s diameter (height and width).

4. Press any one from the following:
- Replace object: It will add any new ellipse into the drawing window.
- Create object: It will replace the chosen ellipse along with any new one.

Creating Polygons
To create a polygon, we can define the side’s number, rotation’s angle, or a center and boundary ellipse’s diameter that could be created around a polygon. The boundary ellipse’s center also called “polygon center“, can be applied as the rotation’s center.
To modify or draw the polygon with object coordinates
1. Press Window > Dockers > Object coordinates.
2. Press on the Polygon

3. Fill the value inside the Points or sides box within the Object size
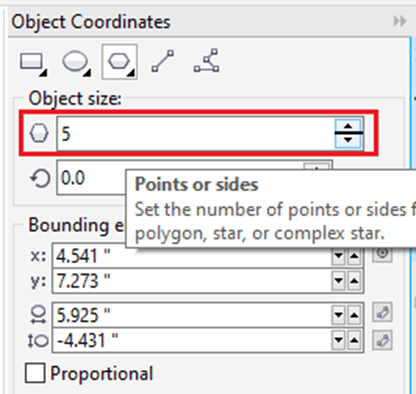
4. Select any one adjustments from the following:
- Fill the values inside the Angle of rotation box to rotate any polygon at the specified angle.
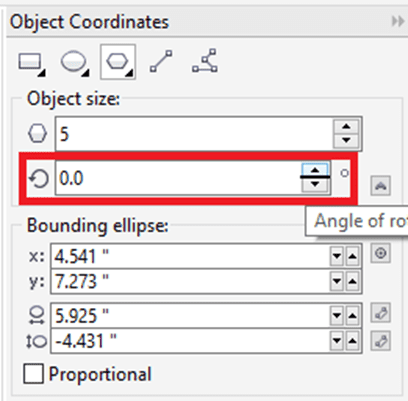
- Fill the values inside the Objects size boxes within the Bounding ellipse place to describe the bounding ellipse’s diameter around a polygon.

5. Press any one from the following:
- Replace object: It will add any new polygon into the drawing window.
- Create object: It will replace the chosen polygon along with any new one.

Creating Lines
We can create a line with the use of some methods. We define the starting and ending point of a line with this first method. We can define the length, start point, and rotation’s angle of a line with this second method.
By specifying multiple points’ coordinates, we can make various complex lines.
To modify or draw the polygon with object coordinates
1. Press Window > Dockers > Object coordinates.
2. Press on the 2-point line

3. Fill the value inside the y and x box within the Points area to describe the endpoint and start point with y and x rulers.
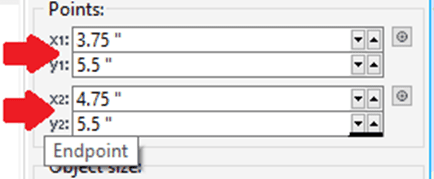
4. Press any one from the following:
- Replace object: It will add any new line into the drawing window.
- Create object: It will replace the chosen line along with any new one.
Copying objects effects, transformations, and properties
CorelDraw enables us to copy properties from a single object to other objects. We can copy the object properties like text properties, fill, and outline. We can copy the object transformations like positioning, rotation, and sizing. Also, we can copy the effects used to the objects.
To copy the object properties like text properties, fill, and outline from a single object to other objects
1. Inside a toolbox, click on Attribute eyedropper.

2. Click on Properties flyout over a property bar enable one of the below essential checkboxes:
- Text
- Fill
- Outline
3. Click on the object whose attributes we wish to copy.
Attribute eyedropper automatically switches into the mode Apply object attributes.
4. Click on the object for which we wish to use copied properties.

The options are enabled within the Effects and Transformations flyout over a property bar is also used if we copy properties.
To copy the effects from a single object to other objects
1. Inside a toolbox, click on Attributes eyedropper.
2. Click on Effects flyout over a property bar enable one of the below essential checkboxes:
- Distortion
- Drop shadow
- Power Clip
- Lens
- Contour
- Extrude
- Blend
- Envelope
- Perspective
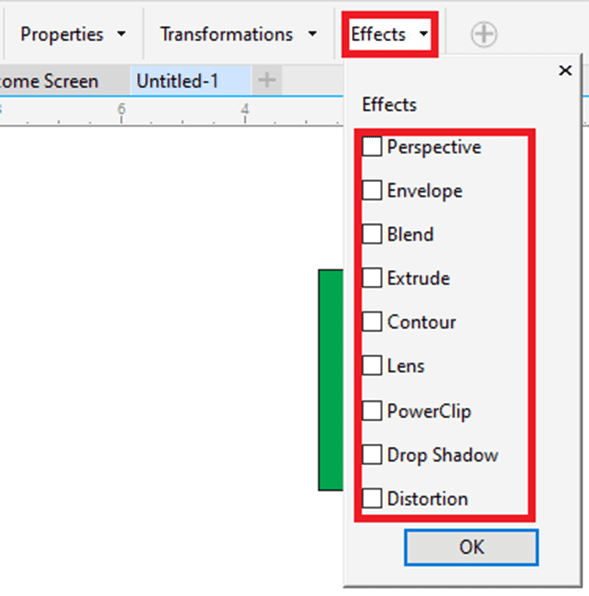
3. Click on the object whose attributes we wish to copy.
Attribute eyedropper automatically switches into the mode Apply object attributes.
4. Click on the object for which we wish to use copied properties.

Cloning objects
If we clone the objects, we create the object’s copy that is connected to an original one. Any modification we make to an original object is reflected inside a clone automatically. The modification we make to a clone is not reflected inside the original one automatically. We can remove the modifications made to a clone thru reverting to an original one.
Cloning enables us to change the object’s copies simultaneously by modifying a master object. These types of changes are especially helpful when we wish to master objects and clone to differ by various properties, like outline color and fill, however wish a master object for controlling some other properties, like the shape.
We can apply the same object several times, rather than using the clones for keeping the size of the file manageable.
To clone the objects
1. Choose the object.
2. Click on Edit > Clone.

We can’t clone the clone but we can clone the master objects.
Positioning objects
We can position an object by dragging them into the new location, by describing, or by nudging their vertical and horizontal coordinates.
Nudging enables us to move the objects within the increments through pressing an Arrow key. An increment value can be called “nudge distance“. Also, we can change the super-nudge and micro-nudge values.
To position the objects, we can set vertical and horizontal coordinates which are connected to a center anchor point, and another anchor point, of an object.
To position the object by y and x coordinates
1. Choose the object.
2. Fill the values inside the below boxes:
- y: It enables us to position an object over the y-axis.
- x: It enables us to position an object over the x-axis.
3. Click Enter.
Distributing and aligning objects
CorelDraw enables us to distribute and precisely align the objects within the drawing. We can align the objects along with one another and with various drawing page’s parts like the grid, edge, and center. If we align the objects along with some objects, we can also line-up them with their edges and center.
We can align several objects vertically and horizontally along with the drawing shape’s center. Also, we can align the objects along with the reference point through describing its x coordinates and y coordinates.
Distribute the objects automatically inserts s space among them on the basis of their center points, width, and height. We can also distribute the objects. Hence, the selected edges and center points (such as right or top) represent at an equal interval. We can distribute the objects on an extent of a boundary box around them or on the whole drawing page.
Note: We can align each object along with a page center, horizontally and vertically, by clicking P.
To align the objects
1. Choose the objects.
2. Press Object > Align and distribute > Align and distribute.

3. Within the docker’s Align area, press anyone from the below options:
- Align left: It aligns the object’s left edges.
- Align center horizontally: It aligns the center of an object with the vertical axis.
- Align right: It aligns the object’s right edges.
- Align top: It aligns the object’s top edges.
- Align center vertically: It aligns the center of an object with the horizontal axis.
- Align bottom: It aligns the object’s bottom edges.
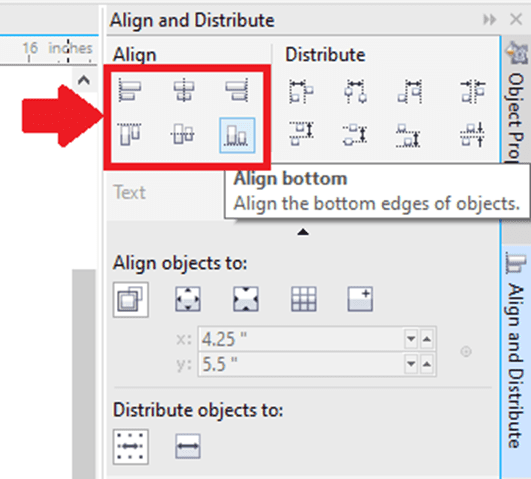
4. Within the Align objects to area, implement from the below tasks:
- Press the Active objects button to align the object along with the specific object.
- Press the Page edge button to align the object along with a page edge.
- Press the Page center button to align the object along with a page center.
- Press Grid button to align the object along with a closest grid line.
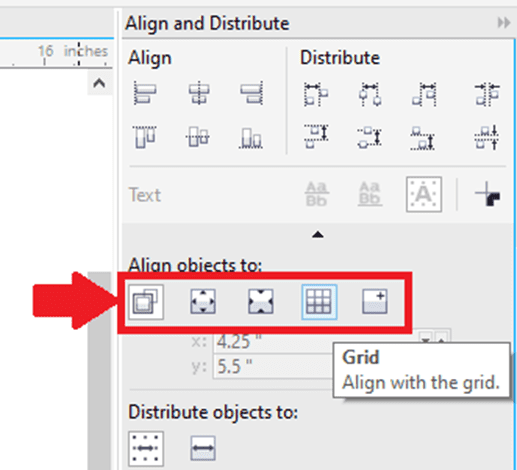
To distribute the objects
1. Choose the objects.
2. Press Object > Align and distribute > Align and distribute.
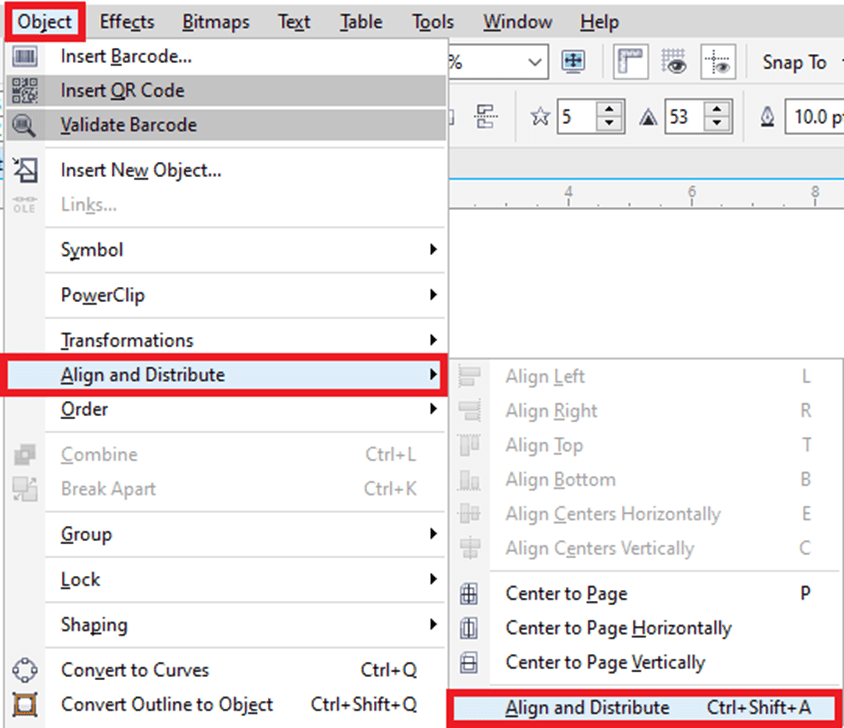
3. Press the below options to distribute the objects horizontally:
- Distribute left: It spaces the object’s left edges evenly.
- Distribute center horizontally: It spaces the object’s center point evenly along with the horizontal axis.
- Distribute right: It spaces the object’s right edges evenly.
- Distribute space horizontally: It places the same interval among the objects along with the horizontal axis.
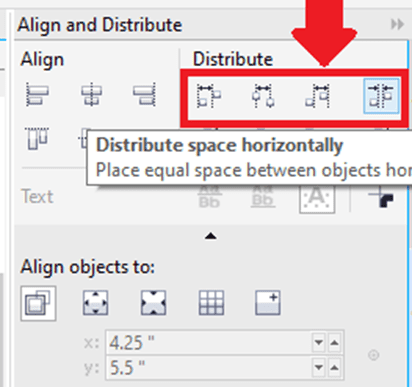
4. Press the below options to distribute the objects vertically:
- Distribute top: It spaces the object’s top edges evenly.
- Distribute center vertically: It spaces the object’s center point evenly along with the vertical axis.
- Distribute bottom: It spaces the object’s bottom edges evenly.
- Distribute space vertically: It places the same interval among the objects along with the vertical axis.
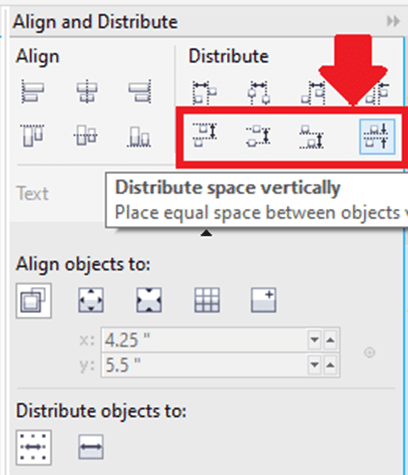
5. Press the below buttons inside the Distribute objects to area to select an area for which various objects have been distributed:
- Extent of selection: It distributes various objects over the bounding box’s area surrounding them.
- Extent of page: It distributes various objects on the drawing page.
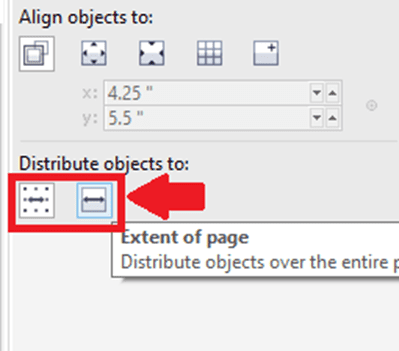
Using object hinting
The object hinting allows us to enhance the object rendering through adjusting an object’s display. Hence, it lines-up along with a pixel-grid. Such as, when we are making the button to web, we can enable the object hinting for ensuring an object represents sharp and clean if export it as the bitmap.
To use the object hinting
- Choose the object.
- Click on Object > Object hinting.

Photoshop CS6

What is Photoshop?
What is this photoshop after all? This image has been photoshopped, you might have heard such sentences among your friends or in schools, colleges many times. But perhaps those who are not from technical background may not have understood its meaning. And out of shame, you might not even have asked anyone, but there is no need to panic because today in this article we are going to know about some important tools of what is Photoshop, how it is used.
By the way, this Photoshop is made by Adobe company to edit images, with this you can easily manipulate the image, create new art, retouch the photo product, etc. .
If you are a computer user and you are very fond of photography then this Photoshop software must have been installed in your system. I believe that this Photoshop now comes under the category of a multimedia application, for its many uses. If you are a creative person and want to give a shape to your ideas then this Adobe Photoshop is the best weapon for you.
It is used so much for image editing all over the world that you can also use Photoshop in place of image editing, just say that Photoshop is a byword for image editing. That’s why on the request of many people, today I thought of writing about what is Photoshop, in this article I have tried to give complete information about Photoshop, hope you will like it. So without delay let’s start and know what is Photoshop?
Adobe Photoshop is a software that is mostly used for image editing, graphic design and digital art. It uses layering techniques that allow it to gain depth and flexibility in design and also for all editing processes. They provide very powerful editing tools to the users, which if used properly then you can do anything with it.
This software was created by two brothers who are Thomas and John Knoll in 1988. And in 1989, John sold this program completely to Adobe Systems, and which was later marketed as “Photoshop”. Since then, this program has become famous as an editing standard in the entire graphics industry. It was later made for both macOS and Windows, but not for Linux.
What do you understand by PSD file?
The default file extension of Photoshop is .PSD (Photoshop Document). A PSD file has a maximum width and height of 30,000 pixels. Together the length limit of a file is 2 gigabytes. The second type of Photoshop file is called .PSB (Photoshop Big) – it is used for larger document formats and it also extends the maximum height and width limit of PSD’s. Which is about 300,000 pixels and the length limit can be extended to about 4 exabytes.
History of photoshop
Adobe Photoshop was originally developed in the year 1987 by two brothers Thomas and John Knoll, and then it was acquired by Adobe Systems Inc. Bought a license to distribute in 1988.
Thomas was then doing his PhD at the University of Michigan, and he wrote a program in Macintosh Plus that basically displayed images on the screen and named it Display. His brother John, who used to be an employee of the Industrial Light & Magic company at that time, convinced him to make it a full program. The two of them then collaborated together and named it Photoshop, since the name ImagePro was already taken.
After that he signed a short-term deal with Barneyscan, which used to be a scanner manufacturer, so that he started selling his program with a slide scanner, so Photoshop had shipped about 200 copies at that time.
To enlarge this program, John presented it to Apple and Russell Brown, who was then the art director at Adobe, on the sidelines of a demonstration. Which Adobe bought their license in 1988. Photoshop 1.0 was first released on February 19, 1990 and was exclusively for Macintosh only. After that, in each Photoshop release, he added many new features than before and it became a standard of digital photo editing in a very short time.
What are the versions of Photoshop?
In the year 1990, the first version of Photoshop, Photoshop 1.0 was launched for the use of people. After that many versions like 1.0, 2.0, 2.5, 3.0, 4.0, 5.0, 5.5, 6.0, 7.0 were released.
Since then many new versions of Photoshop also came such as Photoshop CS, CS3, CS6, CC, CC 2017, CC 2018, CC 2019, CC 2020, CC 2021 etc. Talking about now, Photoshop CC 2021 is its latest version which has been launched on 18 October 2017.
What can you do after learning Adobe Photoshop?
If you have learned Adobe Photoshop and now you must be wondering what are you going to do with this knowledge after this. So don’t worry because I will tell you people about some such things where you can earn a lot by using your expertise.
How To Use Photoshop (Tools)?
Whenever you load Photoshop, you will see a sidebar containing a variety of tools and multiple image-editing functions in the left side of the screen.
These tools typically fall under certain categories such as drawing; painting; measuring and navigation; selection; typing; and retouching. At the same time, a small triangle is visible under some tools, this means that it can be expanded further and in which there are many similar tools. New tools and features are added with each new version of this software. So let’s know about some such important tools.
Pen tool
There are many versions of the pen tool in Photoshop. With the help of this pen tool, users can create precise paths which can be manipulated later by using anchor points. Where with the free form pen tool, users can easily draw paths freehand, while with the magnetic pen tool, the drawn path is very easily attached to the outlines of different objects in the image, which helps to isolate it from the background. Is.
Clone Stamp Tool
The Clone Stamp tool is used to duplicate part of the images. It can be part or full according to the duplication mode.
Shape Tools
In this software, many shape tools are provided to the users which include rectangles, rounded rectangles, ellipses, polygons and lines.
Measuring and Navigation
Using the Eyedropper tool, you can select the color of an area and in future use it according to the sample. Whereas the hand tool is used to navigate the image in which the image can be moved in any direction, and the zoom tool is used to enlarge the image for a closer view.
Selection Tools
Using selection tools, cutting, copy, edit, and retouching operations can be performed on the parts of the images by selecting them.
Cropping
Using the Crop tool, a particular area is selected and the rest of the respectable things are discarded. Cropping can increase the photo composition and also reduce the file size.
Slicing
It is used to isolate images just like “slice” and slice select tools, crop tool. With the slice tool, the image can be sliced or cut into many parts according to the need.
Moving
This move tool is used to move the image from one screen to another.
Marquee
This is a tool that can do certain types of selections such as single row, single column, rectangular and elliptical. Only the area that is selected can be edited without affecting the rest of the part.
Lasso
These lasso tools are very similar to the “marquee” tool, but users can easily make custom selections for drawing in freehand. There are three main types of options in the Lasso tool – regular, polygonal, and magnetic. Where with the help of regular “lasso” tool, users can make drawing as per their wish.
Whereas in the “polygonal lasso” tool, the user can create only straight lines, so it is ideal for such images where only straight lines are needed. And finally the “Magnetic lasso” tool is considered a smart tool. This is because it can easily do the work of both the earlier tools itself.
Magic wand
The Magic wand tool can select areas that are based on pixels of similar values. There are many settings in this tool, so the user should choose those settings properly and at the same time the user should also choose the right image for the use of this tool.
Eraser
This Eraser tool can be used to erase the contents of the active layer. Along with the Straight eraser tool, two more options are available in it – background eraser and magic eraser. Where the job of background eraser is to delete the part of any image which is located in the edge of the object. This tool is used to extract objects from the background.
Whereas the magic eraser tool is used to delete similar colored pixels. This is similar to the magic wand tool. This tool is used to delete those places which are of the same color or whose tone is in contrast with the rest of the image.
Video Editing
In Adobe’s CS5 Extended edition, the option of video editing was also provided to the users, which supports many video file formats such as MOV, AVI and MPEG-4 formats. Its use is also as easy as image editing.
3D Printing Tools
Using this tool, users can now create and edit the designs of 3D printing.
Color Replacement Tool
Using this Color Replacement Tool, users can change any color, without affecting the highlights and shadows of the original image.
how to do photoshop in computer
You must know how to run Photoshop? By now you must have come to know about the tools of Photoshop. Let us know how we can create and open work files.
How to create a new document:
- First of all locate the systems bar
- Then Select “File” > “New..”
- Now name the document
- After that choose a preset or input custom dimensions and also choose color types
How to open a document: - In this also first locate the systems bar
- Then select “File” > “Open” (Command + O in Mac, Ctrl + O in Windows)
- Then try to find the file you want to open
- Then select “Open”
Why should we learn Adobe Photoshop?
There are many high-quality graphics designing options in Adobe Photoshop. Let us know about some such skills whose demand is always there.
Photo Restoration - Product Retouch
- Adding and Removing Watermarks
- Photo Masking
- Clipping Path
- Photo Editing
- Logo Design
- Enhancing
- Photo Composition
- Color Correction
- Banner Design
- T-Shirt Design
- UI Design
- iPhone Apps Design
- Box design and 3D Views
- Flyer Design
- Website Header Design
- Website Mockup
- Business Card Design
- Image background removal
- eBook cover page design
These are some of the skills and practices that you can do through Adobe Photoshop. In today’s time, there are many such editing software available but this one is different. To learn Adobe Photoshop, you just need to have a little creativity. Adobe Photoshop skills are one of the best basic computer skills that can help you in your career and business.
- If you want, you can provide Photo Editing Services Offline: Photo editing is the best way in which you can earn a lot by using your technical skills. First you have to understand your city and can provide services to the people according to their needs. For this, you will have to do your promotion offline as well as online, only then people can know about you. You can start your Youtube Channel: Since people do not like to learn about Photoshop for free and if you take advantage of this and people start learning some skills about Photoshop then people will definitely follow you and you Using Google Adsense, you can monetize your videos from which you can also earn.
- You can sell your designs on your website: You can also start your own business by creating an e-commerce website according to the demands of your clients like product images, business cards, flyers, brochures, web designs. You can make things and sell them.
- You can apply for Online Jobs and Projects: Many online platforms require a lot of skilled Photoshop expert, if you want, you can use such platform to work for clients and in return. You can do well. Do check some websites like Up work, SEO Clerk, Freelancers etc.
- You can also apply for the job offline: Most of the big cities have big printing press, photo studio, newspaper agency, marketing agency, web designing company which require such Photoshop experts from time to time. In such a situation, you can impress them for the job by showing your portfolio and designs.
- You can sell your designs in online marketplaces: If you do not want to work under anyone, or do not want to sell your designs through websites, then you can find online marketplaces for designers on Google. Where you can sell your ideas and designs to other people.
- You can design for Social Media Marketing: Most of the companies hire people as web designers, graphic designers to desing their marketing materials so that they can promote their business, one of such places is Knowing Photoshop can be of great use to them.
- You can teach people about Photoshop fundamentals if you have knowledge worth sharing.
- You can create creative images for your blog.
- You can also tell your children about this and can also learn together which will be of great use to them later.
Where to buy Adobe Photoshop?
If you want to buy Adobe Photoshop offline then you can buy by going to your nearest computer software or hardware shop, or contact with your city dealers and ask them for the latest version.
Whereas online you can buy from any e-commerce site or official site.
How to download photoshop?
If you want to download trial version of Adobe Photoshop then: Adobe Photoshop Trail Version
There are many websites that provide cracked version of Adobe Photoshop to download for free and from here you can also download them but according to me it is not right to do so because they are often pirated versions with which The chances of getting a virus are high.
That’s why it is good for everyone to buy the original.
How to learn Photoshop?
If you really want to learn Adobe Photoshop, then I have given some such tips here, using which you can do Adobe Photoshop.
• You can join any computer institute in your city to learn Adobe Photoshop. Note that they teach you Adobe Photoshop and graphics designing practically on the latest applications only.
• If you want, you can also watch YouTube videos to learn Photoshop skills for free. Yes, but after this, to increase your skills, you have to practice those skills yourself in your computer.
• If you want, you can also take admission in any online courses which are related to Adobe Photoshop. By the way, there are many such paid online courses on the internet that can teach you from beginners level to expert level.
• You can learn it even in your home by installing Adobe Photoshop in your computer by doing daily practice.
• You can also learn it part-time in a photo studio or printing press or graphics designing studio if they allow you.
• If you want, you can also hire an Adobe Photoshop expert who will teach you this at home.
• Together you can contact Adobe Photoshop teachers online who can train you at a particular time.
Photoshop Exercise
PHOTOSHOP EXCERCISE on CS6
Tools & Interface
Introduction – Photo size, Canvas size, Layers, Rectangle & Elliptical selection, Single – Add – Subtract – intersect selection, Normal – Fix ratio & Size, Lesso, Polygonal Lesso, Magnetic Lasso, Quick Selectin, Magic Wand, Selections & Moving, Resize, Crop, Perspective, Slice, Slice Select tool, Blending, Saving photos.
Practical Practice on photos with tools
Changing in Photos, Moving parts from one photo to another photo (BG), Moving Photos to another photo.
Changing background & color
Single color, Gradients, Other backgrounds, Making PNG transparent photos.
Accessories on photos
Gogols, Hat, Muskets, Hair, Ornaments etc. Passport size photos, PIP, Small to Big photos, Photo (Small to Larg), Photo (Larg to Small), Team Photos, Collage,
Text Tool
Creating text on photos, Styling text, Effects on text, Masked text & styling, Effects on masked text.
Making GIF photos
Photos, Color changing, Objects changing, Moving body parts, Signing indication, Emoji, Text GIFs, Masked text GIFs, Chaser text, Color flowing etc.
Blending & Effects
Blending & Other effects on selected objects.
Filters
Liquify, Blinking Effect etc.
Slicing Photos
Slice photos and linking with other photos.
Slice photos and linking with other online photos.
Internet
Internet, a system architecture that has revolutionized communications and methods of commerce by allowing various computer networks around the world to interconnect. Sometimes referred to as a “network of networks,” the Internet emerged in the United States in the 1970s but did not become visible to the general public until the early 1990s. By 2020, approximately 4.5 billion people, or more than half of the world’s population, were estimated to have access to the Internet.
The Internet provides a capability so powerful and general that it can be used for almost any purpose that depends on information, and it is accessible by every individual who connects to one of its constituent networks. It supports human communication via social media, electronic mail (e-mail), “chat rooms,” newsgroups, and audio and video transmission and allows people to work collaboratively at many different locations. It supports access to digital information by many applications, including the World Wide Web. The Internet has proved to be a spawning ground for a large and growing number of “e-businesses” (including subsidiaries of traditional “brick-and-mortar” companies) that carry out most of their sales and services over the Internet. (See electronic commerce.)
Internet Firsts: Fact or Fiction?
You may fancy yourself a denizen of the internet, but how much do you know about its history?
Early networks
How does the Internet really work? This video lets you ride shotgun with a packet of data—one of trillions involved in the trillions of Internet interactions that happen every second.
The first computer networks were dedicated special-purpose systems such as SABRE (an airline reservation system) and AUTODIN I (a defense command-and-control system), both designed and implemented in the late 1950s and early 1960s. By the early 1960s computer manufacturers had begun to use semiconductor technology in commercial products, and both conventional batch-processing and time-sharing systems were in place in many large, technologically advanced companies. Time-sharing systems allowed a computer’s resources to be shared in rapid succession with multiple users, cycling through the queue of users so quickly that the computer appeared dedicated to each user’s tasks despite the existence of many others accessing the system “simultaneously.” This led to the notion of sharing computer resources (called host computers or simply hosts) over an entire network. Host-to-host interactions were envisioned, along with access to specialized resources (such as supercomputers and mass storage systems) and interactive access by remote users to the computational powers of time-sharing systems located elsewhere. These ideas were first realized in ARPANET, which established the first host-to-host network connection on October 29, 1969. It was created by the Advanced Research Projects Agency (ARPA) of the U.S. Department of Defense. ARPANET was one of the first general-purpose computer networks. It connected time-sharing computers at government-supported research sites, principally universities in the United States, and it soon became a critical piece of infrastructure for the computer science research community in the United States. Tools and applications—such as the simple mail transfer protocol (SMTP, commonly referred to as e-mail), for sending short messages, and the file transfer protocol (FTP), for longer transmissions—quickly emerged. In order to achieve cost-effective interactive communications between computers, which typically communicate in short bursts of data, ARPANET employed the new technology of packet switching. Packet switching takes large messages (or chunks of computer data) and breaks them into smaller, manageable pieces (known as packets) that can travel independently over any available circuit to the target destination, where the pieces are reassembled. Thus, unlike traditional voice communications, packet switching does not require a single dedicated circuit between each pair of users.
Commercial packet networks were introduced in the 1970s, but these were designed principally to provide efficient access to remote computers by dedicated terminals. Briefly, they replaced long-distance modem connections by less-expensive “virtual” circuits over packet networks. In the United States, Telenet and Tymnet were two such packet networks. Neither supported host-to-host communications; in the 1970s this was still the province of the research networks, and it would remain so for many years.
DARPA (Defense Advanced Research Projects Agency; formerly ARPA) supported initiatives for ground-based and satellite-based packet networks. The ground-based packet radio system provided mobile access to computing resources, while the packet satellite network connected the United States with several European countries and enabled connections with widely dispersed and remote regions. With the introduction of packet radio, connecting a mobile terminal to a computer network became feasible. However, time-sharing systems were then still too large, unwieldy, and costly to be mobile or even to exist outside a climate-controlled computing environment. A strong motivation thus existed to connect the packet radio network to ARPANET in order to allow mobile users with simple terminals to access the time-sharing systems for which they had authorization. Similarly, the packet satellite network was used by DARPA to link the United States with satellite terminals serving the United Kingdom, Norway, Germany, and Italy. These terminals, however, had to be connected to other networks in European countries in order to reach the end users. Thus arose the need to connect the packet satellite net, as well as the packet radio net, with other networks.
Foundation of the Internet
The Internet resulted from the effort to connect various research networks in the United States and Europe. First, DARPA established a program to investigate the interconnection of “heterogeneous networks.” This program, called Internetting, was based on the newly introduced concept of open architecture networking, in which networks with defined standard interfaces would be interconnected by “gateways.” A working demonstration of the concept was planned. In order for the concept to work, a new protocol had to be designed and developed; indeed, a system architecture was also required.
In 1974 Vinton Cerf, then at Stanford University in California, and this author, then at DARPA, collaborated on a paper that first described such a protocol and system architecture—namely, the transmission control protocol (TCP), which enabled different types of machines on networks all over the world to route and assemble data packets. TCP, which originally included the Internet protocol (IP), a global addressing mechanism that allowed routers to get data packets to their ultimate destination, formed the TCP/IP standard, which was adopted by the U.S. Department of Defense in 1980. By the early 1980s the “open architecture” of the TCP/IP approach was adopted and endorsed by many other researchers and eventually by technologists and businessmen around the world.
By the 1980s other U.S. governmental bodies were heavily involved with networking, including the National Science Foundation (NSF), the Department of Energy, and the National Aeronautics and Space Administration (NASA). While DARPA had played a seminal role in creating a small-scale version of the Internet among its researchers, NSF worked with DARPA to expand access to the entire scientific and academic community and to make TCP/IP the standard in all federally supported research networks. In 1985–86 NSF funded the first five supercomputing centres—at Princeton University, the University of Pittsburgh, the University of California, San Diego, the University of Illinois, and Cornell University. In the 1980s NSF also funded the development and operation of the NSFNET, a national “backbone” network to connect these centres. By the late 1980s the network was operating at millions of bits per second. NSF also funded various nonprofit local and regional networks to connect other users to the NSFNET. A few commercial networks also began in the late 1980s; these were soon joined by others, and the Commercial Internet Exchange (CIX) was formed to allow transit traffic between commercial networks that otherwise would not have been allowed on the NSFNET backbone. In 1995, after extensive review of the situation, NSF decided that support of the NSFNET infrastructure was no longer required, since many commercial providers were now willing and able to meet the needs of the research community, and its support was withdrawn. Meanwhile, NSF had fostered a competitive collection of commercial Internet backbones connected to one another through so-called network access points (NAPs).
From the Internet’s origin in the early 1970s, control of it steadily devolved from government stewardship to private-sector participation and finally to private custody with government oversight and forbearance. Today a loosely structured group of several thousand interested individuals known as the Internet Engineering Task Force participates in a grassroots development process for Internet standards. Internet standards are maintained by the non-profit Internet Society, an international body with headquarters in Reston, Virginia. The Internet Corporation for Assigned Names and Numbers (ICANN), another non-profit, private organization, oversees various aspects of policy regarding Internet domain names and numbers.
Commercial expansion
The rise of commercial Internet services and applications helped to fuel a rapid commercialization of the Internet. This phenomenon was the result of several other factors as well. One important factor was the introduction of the personal computer and the workstation in the early 1980s—a development that in turn was fuelled by unprecedented progress in integrated circuit technology and an attendant rapid decline in computer prices. Another factor, which took on increasing importance, was the emergence of Ethernet and other “local area networks” to link personal computers. But other forces were at work too. Following the restructuring of AT&T in 1984, NSF took advantage of various new options for national-level digital backbone services for the NSFNET. In 1988 the Corporation for National Research Initiatives received approval to conduct an experiment linking a commercial e-mail service (MCI Mail) to the Internet. This application was the first Internet connection to a commercial provider that was not also part of the research community. Approval quickly followed to allow other e-mail providers access, and the Internet began its first explosion in traffic.
In 1993 federal legislation allowed NSF to open the NSFNET backbone to commercial users. Prior to that time, use of the backbone was subject to an “acceptable use” policy, established and administered by NSF, under which commercial use was limited to those applications that served the research community. NSF recognized that commercially supplied network services, now that they were available, would ultimately be far less expensive than continued funding of special-purpose network services.
Also in 1993 the University of Illinois made widely available Mosaic, a new type of computer program, known as a browser, that ran on most types of computers and, through its “point-and-click” interface, simplified access, retrieval, and display of files through the Internet. Mosaic incorporated a set of access protocols and display standards originally developed at the European Organization for Nuclear Research (CERN) by Tim Berners-Lee for a new Internet application called the World Wide Web (WWW). In 1994 Netscape Communications Corporation (originally called Mosaic Communications Corporation) was formed to further develop the Mosaic browser and server software for commercial use. Shortly thereafter, the software giant Microsoft Corporation became interested in supporting Internet applications on personal computers (PCs) and developed its Internet Explorer Web browser (based initially on Mosaic) and other programs. These new commercial capabilities accelerated the growth of the Internet, which as early as 1988 had already been growing at the rate of 100 percent per year.
By the late 1990s there were approximately 10,000 Internet service providers (ISPs) around the world, more than half located in the United States. However, most of these ISPs provided only local service and relied on access to regional and national ISPs for wider connectivity. Consolidation began at the end of the decade, with many small to medium-size providers merging or being acquired by larger ISPs. Among these larger providers were groups such as America Online, Inc. (AOL), which started as a dial-up information service with no Internet connectivity but made a transition in the late 1990s to become the leading provider of Internet services in the world—with more than 25 million subscribers by 2000 and with branches in Australia, Europe, South America, and Asia. Widely used Internet “portals” such as AOL, Yahoo!, Excite, and others were able to command advertising fees owing to the number of “eyeballs” that visited their sites. Indeed, during the late 1990s advertising revenue became the main quest of many Internet sites, some of which began to speculate by offering free or low-cost services of various kinds that were visually augmented with advertisements. By 2001 this speculative bubble had burst.
The 21st century and future directions
After the collapse of the Internet bubble came the emergence of what was called “Web 2.0,” an Internet with emphasis on social networking and content generated by users, and cloud computing. Social media services such as Facebook, Twitter, and Instagram became some of the most popular Internet sites through allowing users to share their own content with their friends and the wider world. Mobile phones became able to access the Web, and, with the introduction of smartphones like Apple’s iPhone (introduced in 2007), the number of Internet users worldwide exploded from about one sixth of the world population in 2005 to more than half in 2020.
The increased availability of wireless access enabled applications that were previously uneconomical. For example, global positioning systems (GPS) combined with wireless Internet access help mobile users to locate alternate routes, generate precise accident reports and initiate recovery services, and improve traffic management and congestion control. In addition to smartphones, wireless laptop computers, and personal digital assistants (PDAs), wearable devices with voice input and special display glasses were developed.
While the precise structure of the future Internet is not yet clear, many directions of growth seem apparent. One is toward higher backbone and network access speeds. Backbone data rates of 100 billion bits (100 gigabits) per second are readily available today, but data rates of 1 trillion bits (1 terabit) per second or higher will eventually become commercially feasible. If the development of computer hardware, software, applications, and local access keeps pace, it may be possible for users to access networks at speeds of 100 gigabits per second. At such data rates, high-resolution video—indeed, multiple video streams—would occupy only a small fraction of available bandwidth. Remaining bandwidth could be used to transmit auxiliary information about the data being sent, which in turn would enable rapid customization of displays and prompt resolution of certain local queries. Much research, both public and private, has gone into integrated broadband systems that can simultaneously carry multiple signals—data, voice, and video. In particular, the U.S. government has funded research to create new high-speed network capabilities dedicated to the scientific-research community.
It is clear that communications connectivity will be an important function of a future Internet as more machines and devices are interconnected. In 1998, after four years of study, the Internet Engineering Task Force published a new 128-bit IP address standard intended to replace the conventional 32-bit standard. By allowing a vast increase in the number of available addresses (2128, as opposed to 232), this standard makes it possible to assign unique addresses to almost every electronic device imaginable. Thus, through the “Internet of things,” in which all machines and devices could be connected to the Internet, the expressions “wired” office, home, and car may all take on new meanings, even if the access is really wireless.
The dissemination of digitized text, pictures, and audio and video recordings over the Internet, primarily available today through the World Wide Web, has resulted in an information explosion. Clearly, powerful tools are needed to manage network-based information. Information available on the Internet today may not be available tomorrow without careful attention’s being paid to preservation and archiving techniques. The key to making information persistently available is infrastructure and the management of that infrastructure. Repositories of information, stored as digital objects, will soon populate the Internet. At first these repositories may be dominated by digital objects specifically created and formatted for the World Wide Web, but in time they will contain objects of all kinds in formats that will be dynamically resolvable by users’ computers in real time. Movement of digital objects from one repository to another will still leave them available to users who are authorized to access them, while replicated instances of objects in multiple repositories will provide alternatives to users who are better able to interact with certain parts of the Internet than with others. Information will have its own identity and, indeed, become a “first-class citizen” on the Internet.
Society and the Internet
What began as a largely technical and limited universe of designers and users became one of the most important mediums of the late 20th and early 21st centuries. As the Pew Charitable Trust observed in 2004, it took 46 years to wire 30 percent of the United States for electricity; it took only 7 years for the Internet to reach that same level of connection to American homes. By 2005, 68 percent of American adults and 90 percent of American teenagers had used the Internet. Europe and Asia were at least as well connected as the United States. Nearly half of the citizens of the European Union are online, and even higher rates are found in the Scandinavian countries. There is a wide variance in Asian countries; for example, by 2005 Taiwan, Hong Kong, and Japan had at least half of their populations online, whereas India, Pakistan, and Vietnam had less than 10 percent. South Korea was the world leader in connecting its population to the Internet through high-speed broadband connections.
Such statistics can chart the Internet’s growth, but they offer few insights into the changes wrought as users—individuals, groups, corporations, and governments—have embedded the technology into everyday life. The Internet is now as much a lived experience as a tool for performing particular tasks, offering the possibility of creating an environment or virtual reality in which individuals might work, socially interact with others, and perhaps even live out their lives.
What Do You Actually Know About the Internet?
You’re using it right now. But you have to take this quiz to find out what you actually know about the Internet.
History, community, and communications
Two agendas
The Internet has evolved from the integration of two very different technological agendas—the Cold War networking of the U.S. military and the personal computer (PC) revolution. The first agenda can be dated to 1973, when the Defense Advanced Research Projects Agency (DARPA) sought to create a communications network that would support the transfer of large data files between government and government-sponsored academic-research laboratories. The result was the ARPANET, a robust decentralized network that supported a vast array of computer hardware. Initially, ARPANET was the preserve of academics and corporate researchers with access to time-sharing mainframe computer systems. Computers were large and expensive; most computer professionals could not imagine anyone needing, let alone owning, his own “personal” computer. And yet Joseph Licklider, one of the driving forces at DARPA for computer networking, stated that online communication would “change the nature and value of communication even more profoundly than did the printing press and the picture tube.”
The second agenda began to emerge in 1977 with the introduction of the Apple II, the first affordable computer for individuals and small businesses. Created by Apple Computer, Inc. (now Apple Inc.), the Apple II was popular in schools by 1979, but in the corporate market it was stigmatized as a game machine. The task of cracking the business market fell to IBM. In 1981 the IBM PC was released and immediately standardized the PC’s basic hardware and operating system—so much so that first PC-compatible and then simply PC came to mean any personal computer built along the lines of the IBM PC. A major centre of the PC revolution was the San Francisco Bay area, where several major research institutions funded by DARPA—Stanford University, the University of California, Berkeley, and Xerox PARC—provided much of the technical foundation for Silicon Valley. It was no small coincidence that Apple’s two young founders—Steven Jobs and Stephen Wozniak—worked as interns in the Stanford University Artificial Intelligence Laboratory and at the nearby Hewlett-Packard Company. The Bay Area’s counterculture also figured prominently in the PC’s history. Electronic hobbyists saw themselves in open revolt against the “priesthood” of the mainframe computer and worked together in computer-enthusiast groups to spread computing to the masses.
The WELL
Why does this matter? The military played an essential role in shaping the Internet’s architecture, but it was through the counterculture that many of the practices of contemporary online life emerged. A telling example is the early electronic bulletin board system (BBS), such as the WELL (Whole Earth ’Lectronic Link). Established in 1985 by American publisher Stewart Brand, who viewed the BBS as an extension of his Whole Earth Catalog, the WELL was one of the first electronic communities organized around forums dedicated to particular subjects such as parenting and Grateful Dead concerts. The latter were an especially popular topic of online conversation, but it was in the parenting forum where a profound sense of community and belonging initially appeared. For example, when one participant’s child was diagnosed with leukaemia, members of the forum went out of their way either to find health resources or to comfort the distressed parents. In this one instance, several features still prevalent in the online world can be seen. First, geography was irrelevant. WELL members in California and New York could bring their knowledge together within the confines of a forum—and could do so collectively, often exceeding the experience available to any local physician or medical centre. This marshalling of shared resources persists to this day as many individuals use the Internet to learn more about their ailments, find others who suffer from the same disease, and learn about drugs, physicians, and alternative therapies.
Another feature that distinguished the WELL forums was the use of moderators who could interrupt and focus discussion while also disciplining users who broke the rather loose rules. “Flame wars” (crass, offensive, or insulting exchanges) were possible, but anyone dissatisfied in one forum was free to organize another. In addition, the WELL was intensely democratic. WELL forums were the original chat rooms—online spaces where individuals possessing similar interests might congregate, converse, and even share their physical locations to facilitate meeting in person. Finally, the WELL served as a template for other online communities dedicated to subjects as diverse as Roman Catholicism, liberal politics, gardening, and automobile modification.
Instant broadcast communication
For the individual, the Internet opened up new communication possibilities. E-mail led to a substantial decline in traditional “snail mail.” Instant messaging (IM), or text messaging, expanded, especially among youth, with the convergence of the Internet and cellular telephone access to the Web. Indeed, IM became a particular problem in classrooms, with students often surreptitiously exchanging notes via wireless communication devices. More than 50 million American adults, including 11 million at work, use IM.
From mailing lists to “buddy lists,” e-mail and IM have been used to create “smart mobs” that converge in the physical world. Examples include protest organizing, spontaneous performance art, and shopping. Obviously, people congregated before the Internet existed, but the change wrought by mass e-mailings was in the speed of assembling such events. In February 1999, for example, activists began planning protests against the November 1999 World Trade Organization (WTO) meetings in Seattle, Washington. Using the Internet, organizers mobilized more than 50,000 individuals from around the world to engage in demonstrations—at times violent—that effectively altered the WTO’s agenda.
More than a decade later, in June 2010 Egyptian computer engineer Wael Ghonim anonymously created a page titled “We Are All Khaled Said” on the social media site Facebook to publicize the death of a 28-year-old Egyptian man beaten to death by police. The page garnered hundreds of thousands of members, becoming an online forum for the discussion of police brutality in Egypt. After a popular uprising in Tunisia in January 2011, Ghonim and several other Internet democracy activists posted messages to their sites calling for similar action in Egypt. Their social media campaign helped spur mass demonstrations that forced Egyptian Pres. Hosni Mubarak from power.
(The convergence of mobs is not without some techno-silliness. “Flash mobs”—groups of strangers who are mobilized on short notice via Web sites, online discussion groups, or e-mail distribution lists—often take part in bizarre though usually harmless activities in public places, such as engaging in mass free-for-alls around the world on Pillow Fight Day.)
In the wake of catastrophic disasters, citizens have used the Internet to donate to charities in an unprecedented fashion. Others have used the Internet to reunite family members or to match lost pets with their owners. The role of the Internet in responding to disasters, both natural and deliberate, remains the topic of much discussion, as it is unclear whether the Internet actually can function in a disaster area when much of the infrastructure is destroyed. Certainly during the September 11, 2001, attacks, people found it easier to communicate with loved ones in New York City via e-mail than through the overwhelmed telephone network.
Following the earthquake that struck Haiti in January 2010, electronic media emerged as a useful mode for connecting those separated by the quake and for coordinating relief efforts. Survivors who were able to access the Internet—and friends and relatives abroad—took to social networking sites such as Facebook in search of information on those missing in the wake of the catastrophe. Feeds from those sites also assisted aid organizations in constructing maps of the areas affected and in determining where to channel resources. The many Haitians lacking Internet access were able to contribute updates via text messaging on mobile phones.
Social gaming and social networking
One-to-one or even one-to-many communication is only the most elementary form of Internet social life. The very nature of the Internet makes spatial distances largely irrelevant for social interactions. Online gaming moved from simply playing a game with friends to a rather complex form of social life in which the game’s virtual reality spills over into the physical world. The case of World of Warcraft, a popular electronic game with several million players, is one example. Property acquired in the game can be sold online, although such secondary economies are discouraged by Blizzard Entertainment, the publisher of World of Warcraft, as a violation of the game’s terms of service. In any case, what does it mean that one can own virtual property and that someone is willing to pay for this property with real money? Economists have begun studying such virtual economies, some of which now exceed the gross national product of countries in Africa and Asia. In fact, virtual economies have given economists a means of running controlled experiments.
Millions of people have created online game characters for entertainment purposes. Gaming creates an online community, but it also allows for a blurring of the boundaries between the real world and the virtual one. In Shanghai one gamer stabbed and killed another one in the real world over a virtual sword used in Legend of Mir 3. Although attempts were made to involve the authorities in the original dispute, the police found themselves at a loss prior to the murder because the law did not acknowledge the existence of virtual property. In South Korea violence surrounding online gaming happens often enough that police refer to such murders as “off-line PK,” a reference to player killing (PK), or player-versus-player lethal contests, which are allowed or encouraged in some games. By 2001 crime related to Lineage had forced South Korean police to create special cybercrime units to patrol both within the game and off-line. Potential problems from such games are not limited to crime. Virtual life can be addictive. Reports of players neglecting family, school, work, and even their health to the point of death have become more common.
Social networking sites (SNSs) emerged as a significant online phenomenon since the bursting of the “Internet bubble” in the early 2000s. SNSs use software to facilitate online communities where members with shared interests swap files, photographs, videos, and music, send messages and chat, set up blogs (Web diaries) and discussion groups, and share opinions. Early social networking services included Classmates.com, which connected former schoolmates, and Yahoo! 360° and Six Degrees, which built networks of connections via friends of friends. In the postbubble era the leading social networking services were Myspace, Facebook, Friendster, Orkut, and LinkedIn. LinkedIn became an effective tool for business staff recruiting. Businesses have begun to exploit these networks, drawing on social networking research and theory, which suggests that finding key “influential” members of existing networks of individuals can give those businesses access to and credibility with the whole network.
Love and sex
By the start of the 21st century, approximately 20 percent of the Internet population had used it at some time to meet others, with Internet dating services collecting nearly half a billion dollars per year in matchmaking fees. Dating sites capture an important aspect of the Web economy—the ability to appeal to particular niche groups. Of the myriads of dating Web sites, many cater to individuals of particular ethnic or national identities and thereby preselect people along some well-defined axes of interest. Because of the low costs involved in setting up a Web site, the possibilities for “nichification” are nearly endless.
Pornography is another domain in which nichification is prevalent. By the 21st century there were some four million Web sites devoted to pornography, containing more than a quarter of a billion pages—in other words, more than 10 percent of the Web. Forty million American adults regularly visit pornographic sites, which generate billions of dollars in yearly revenues. All of society’s vices, as well as its virtues, have manifested themselves on the Internet.
Advertising and e-commerce
Nichification allows for consumers to find what they want, but it also provides opportunities for advertisers to find consumers. For example, most search engines generate revenue by matching ads to an individual’s particular search query. Among the greatest challenges facing the Internet’s continued development is the task of reconciling advertising and commercial needs with the right of Internet users not to be bombarded by “pop-up” Web pages and spam (unsolicited e-mail).
Nichification also opens up important e-commerce opportunities. A bookstore can carry only so much inventory on its shelves, which thereby limits its collection to books with broad appeal. An online bookstore can “display” nearly everything ever published. Although traditional bookstores often have a special-order department, consumers have taken to searching and ordering from online stores from the convenience of their homes and offices.
What’s the Difference Between the Deep Web and the Dark Web?
The Internet may be less scary than you think.
Although books can be made into purely digital artifacts, “e-books” have not sold nearly as well as digital music. In part, this disparity is due to the need for an e-book reader to have a large, bright screen, which adds to the display’s cost and weight and leads to more-frequent battery replacement. Also, it is difficult to match the handy design and low cost of an old-fashioned paperback book. Interestingly, it turns out that listeners download from online music vendors as many obscure songs as big record company hits. Just a few people interested in some obscure song are enough to make it worthwhile for a vendor to store it electronically for sale over the Internet. What makes the Internet special here is not only its ability to match buyers and sellers quickly and relatively inexpensively but also that the Internet and the digital economy in general allow for a flowering of multiple tastes—in games, people, and music.
Information and copyright
Education
Commerce and industry are certainly arenas in which the Internet has had a profound effect, but what of the foundational institutions of any society—namely, those related to education and the production of knowledge? Here the Internet has had a variety of effects, some of which are quite disturbing. There are more computers in the classroom than ever before, but there is scant evidence that they enhance the learning of basic skills in reading, writing, and arithmetic. And while access to vast amounts of digital information is convenient, it has also become apparent that most students now see libraries as antiquated institutions better used for their computer terminals than for their book collections. As teachers at all education levels can attest, students typically prefer to research their papers by reading online rather than wandering through a library’s stacks.
In a related effect the Internet has brought plagiarism into the computer era in two distinct senses. First, electronic texts have made it simple for students to “cut and paste” published sources (e.g., encyclopaedia articles) into their own papers. Second, although students could always get someone to write their papers for them, it is now much easier to find and purchase anonymous papers at Web sites and to even commission original term papers for a fixed fee. Ironically, what the Internet gives, it also takes away. Teachers now have access to databases of electronically submitted papers and can easily compare their own students’ papers against a vast archive of sources. Even a simple online search can sometimes find where one particularly well-turned phrase originally appeared.
File sharing
College students have been at the leading edge of the growing awareness of the centrality of intellectual property in a digital age. When American college student Shawn Fanning invented Napster in 1999, he set in motion an ongoing legal battle over digital rights. Napster was a file-sharing system that allowed users to share electronic copies of music online. The problem was obvious: recording companies were losing revenues as one legal copy of a song was shared among many people. Although the record companies succeeded in shutting down Napster, they found themselves having to contend with a new form of file sharing, P2P (“person-to-person”). In P2P there is no central administrator to shut down as there had been with Napster. Initially, the recording industry sued the makers of P2P software and a few of the most prolific users—often students located on university campuses with access to high-speed connections for serving music and, later, movie files—in an attempt to discourage the millions of people who regularly used the software. Still, even while some P2P software makers have been held liable for losses that the copyright owners have incurred, more-devious schemes for circumventing apprehension have been invented.
The inability to prevent file sharing has led the recording and movie industries to devise sophisticated copy protection on their CDs and DVDs. In a particularly controversial incident, Sony Corporation introduced CDs into the market in 2005 with copy protection that involved a special viruslike code that hid on a user’s computer. This code, however, also was open to being exploited by virus writers to gain control of users’ machines.
Electronic publishing
The Internet has become an invaluable and discipline-transforming environment for scientists and scholars. In 2004 Google began digitizing public-domain and out-of-print materials from several cooperating libraries in North America and Europe, such as the University of Michigan library, which made some seven million volumes available. Although some authors and publishers challenged the project for fear of losing control of copyrighted material, similar digitization projects were launched by Microsoft Corporation and the online book vendor Amazon.com, although the latter company proposed that each electronic page would be retrieved for a small fee shared with the copyright holders.
The majority of academic journals are now online and searchable. This has created a revolution in scholarly publishing, especially in the sciences and engineering. For example, arXiv.org has transformed the rate at which scientists publish and react to new theories and experimental data. Begun in 1991, arXiv.org is an online archive in which physicists, mathematicians, computer scientists, and computational biologists upload research papers long before they will appear in a print journal. The articles are then open to the scrutiny of the entire scientific community, rather than to one or two referees selected by a journal editor. In this way scientists around the world can receive an abstract of a paper as soon as it has been uploaded into the depository. If the abstract piques a reader’s interest, the entire paper can be downloaded for study. Cornell University in Ithaca, New York, and the U.S. National Science Foundation support arXiv.org as an international resource.
While arXiv.org deals with articles that might ultimately appear in print, it is also part of a larger shift in the nature of scientific publishing. In the print world a handful of companies control the publication of the most scientific journals, and the price of institutional subscriptions is frequently exorbitant. This has led to a growing movement to create online-only journals that are accessible for free to the entire public—a public that often supports the original research with its taxes. For example, the Public Library of Science publishes online journals of biology and medicine that compete with traditional print journals. There is no difference in how their articles are vetted for publication; the difference is that the material is made available for free. Unlike other creators of content, academics are not paid for what they publish in scholarly journals, nor are those who review the articles. Journal publishers, on the other hand, have long received subsidies from the scientific community, even while charging that community high prices for its own work. Although some commercial journals have reputations that can advance the careers of those who publish in them, the U.S. government has taken the side of the “open source” publishers and demanded that government-financed research be made available to taxpayers as soon as it has been published.
In addition to serving as a medium for the exchange of articles, the Internet can facilitate the discussion of scientific work long before it appears in print. Scientific blogs—online journals kept by individuals or groups of researchers—have flourished as a form of online salon for the discussion of ongoing research. There are pitfalls to such practices, though. Astronomers who in 2005 posted abstracts detailing the discovery of a potential 10th planet found that other researchers had used their abstracts to find the new astronomical body themselves. In order to claim priority of discovery, the original group rushed to hold a news conference rather than waiting to announce their work at an academic conference or in a peer-reviewed journal.
Politics and culture
Free speech
The Internet has broadened political participation by ordinary citizens, especially through the phenomenon of blogs. Many blogs are simply online diaries or journals, but others have become sources of information and opinion that challenge official government pronouncements or the mainstream news media. By 2005 there were approximately 15 million blogs, a number that was doubling roughly every six months. The United States dominates the blog universe, or “blogosphere,” with English as the lingua franca, but blogs in other languages are proliferating. In one striking development, the Iranian national language, Farsi, has become the commonest Middle Eastern language in the blogosphere. Despite the Iranian government’s attempts to limit access to the Internet, some 60,000 active Farsi blogs are hosted at a single service provider,
The Internet poses a particular problem for autocratic regimes that restrict access to independent sources of information. The Chinese government has been particularly successful at policing the public’s access to the Internet, beginning with its “Great Firewall of China” that automatically blocks access to undesirable Web sites. The state also actively monitors Chinese Web sites to ensure that they adhere to government limits on acceptable discourse and tolerable dissent. In 2000 the Chinese government banned nine types of information, including postings that might “harm the dignity and interests of the state” or “disturb social order.” Users must enter their national identification number in order to access the Internet at cybercafés. Also, Internet service providers are responsible for the content on their servers. Hence, providers engage in a significant amount of self-censorship in order to avoid problems with the law, which may result in losing access to the Internet or even serving jail time. Finally, the authorities are willing to shut Web sites quickly and with no discussion. Of course, the state’s efforts are not completely effective. Information can be smuggled into China on DVDs, and creative Chinese users can circumvent the national firewall with proxy servers—Web sites that allow users to move through the firewall to an ostensibly acceptable Web site where they can connect to the rest of the Internet.
Others have taken advantage of the Internet’s openness to spread a variety of political messages. The Ukrainian Orange Revolution of 2004 had a significant Internet component. More troubling is the use of the Internet by terrorist groups such as al-Qaeda to recruit members, pass along instructions to sleeper cells, and celebrate their own horrific activities. The Iraq War was fought not only on the ground but also online as al-Qaeda operatives used specific Web sites to call their followers to jihad. Al-Qaeda used password-protected chat rooms as key recruitment centres, as well as Web sites to test potential recruits before granting them access to the group’s actual network. On the other hand, posting material online is also a potential vulnerability. Gaining access to the group’s “Jihad Encyclopaedia” has enabled security analysts to learn about potential tactics, and Arabic-speaking investigators have learned to infiltrate chat rooms and gain access to otherwise hidden materials.
Political campaigns and muckraking
During the 2004 U.S. presidential campaign, blogs became a locus for often heated exchanges about the candidates. In fact, the candidates themselves used blogs and Web sites for fund-raising and networking. One of the first innovators was Howard Dean, an early front-runner in the Democratic primaries, whose campaign used a Web site for fund-raising and organizing local meetings. In particular, Dean demonstrated that a modern presidential campaign could use the Internet to galvanize volunteer campaign workers and to raise significant sums from many small donations. In a particularly astute move, Dean’s campaign set up a blog for comments from his supporters, and it generated immediate feedback on certain proposals such as refusing to accept public campaign funding. Both the George W. Bush and the John Kerry presidential campaigns, as well as the Democratic and Republican parties, came to copy the practices pioneered by Dean and his advisers. In addition, changes in U.S. campaign finance laws allowed for the creation of “527s,” independent action groups such as Moveon.org that used the Internet to raise funds and rally support for particular issues and candidates.
By 2005 it was widely agreed that politicians would have to deal not only with the mainstream media (i.e., newspapers, magazines, radio, and television) but also with a new phenomenon—the blogosphere. Although blogs do not have editors or fact checkers, they have benefited from scandals in the mainstream media, which have made many readers more sceptical of all sources of information. Also, bloggers have forced mainstream media to confront topics they might otherwise ignore. Some pundits have gone so far as to predict that blogs and online news sources will replace the mainstream media, but it is far more likely that these diverse sources of information will complement each other. Indeed, falling subscription rates have led many newspaper publishers to branch into electronic editions and to incorporate editorial blogs and forums for reader feedback; thus, some of the distinctions between the media have already been blurred.
Privacy and the Internet
Concerns about privacy in cyberspace are an issue of international debate. As reading and writing, health care and shopping, and sex and gossip increasingly take place in cyberspace, citizens around the world are concerned that the most intimate details of their daily lives are being monitored, searched, recorded, stored, and often misinterpreted when taken out of context. For many, the greatest threats to privacy come not from state agents but from the architecture of e-commerce itself, which is based, in unprecedented ways, on the recording and exchange of intimate personal information.
“Getting over it”
The threats to privacy in the new Internet age were crystallized in 2000 by the case of DoubleClick, Inc. For a few years DoubleClick, the Internet’s largest advertising company, had been compiling detailed information on the browsing habits of millions of World Wide Web users by placing “cookie” files on computer hard drives. Cookies are electronic footprints that allow Web sites and advertising networks to monitor people’s online movements with telescopic precision—including the search terms people enter as well as the articles they skim and how long they spend skimming them. As long as users were confident that their virtual identities were not being linked to their actual identities, many were happy to accept DoubleClick cookies in exchange for the convenience of navigating the Web more efficiently. Then in November 1999 DoubleClick bought Abacus Direct, which held a database of names, addresses, and information about the off-line buying habits of 90 million households compiled from the largest direct-mail catalogs and retailers in the nation. Two months later DoubleClick began compiling profiles linking individuals’ actual names and addresses to Abacus’s detailed records of their online and off-line purchases. Suddenly, shopping that once seemed anonymous was being archived in personally identifiable dossiers.
Under pressure from privacy advocates and dot-com investors, DoubleClick announced in 2000 that it would postpone its profiling scheme until the U.S. government and the e-commerce industry had agreed on privacy standards. Two years later it settled consolidated class-action lawsuits from several states, agreeing to pay legal expenses of up to $1.8 million, to tell consumers about its data-collection activities in its online privacy policy, and to get permission before combining a consumer’s personally identifiable data with his or her Web-surfing history. DoubleClick also agreed to pay hundreds of thousands of dollars to settle differences with attorneys general from 10 states who were investigating its information gathering.
The retreat of DoubleClick might have seemed like a victory for privacy, but it was only an early battle in a much larger war—one in which many observers still worry that privacy may be vanquished. “You already have zero privacy—get over it,” Scott McNealy, the CEO of Sun Microsystems, memorably remarked in 1999 in response to a question at a product show at which Sun introduced a new interactive technology called Jini. Sun’s cheerful Web site promised to usher in the “networked home” of the future, in which the company’s “gateway” software would operate “like a congenial party host inside the home to help consumer appliances communicate intelligently with each other and with outside networks.” In this chatty new world of electronic networking, a household’s refrigerator and coffeemaker could talk to a television, and all three could be monitored from the office computer. The incessant information exchanged by these gossiping appliances might, of course, generate detailed records of the most intimate details of their owners’ daily lives.
New evidence seemed to emerge every day to support McNealy’s grim verdict about the triumph of online surveillance technology over privacy. A survey of nearly a thousand large companies conducted by the American Management Association in 2000 found that more than half of the large American firms surveyed monitored the Internet connections of their employees. Two-thirds of the firms monitored e-mail messages, computer files, or telephone conversations, up from only one-third three years earlier. Some companies used Orwellian computer software with names like Spector, Assentor, or Investigator that could monitor and record every keystroke on the computer with video-like precision. These virtual snoops could also be programmed to screen all incoming and outgoing e-mail for forbidden words and phrases—such as those involving racism, body parts, or the name of the boss—and then forward suspicious messages to a supervisor for review.
Issues in new media
Changes in the delivery of books, music, and television extended the technologies of surveillance beyond the office, blurring the boundaries between work and home. The same technologies that make it possible to download digitally stored books, songs, and movies directly onto computer hard drives or mobile devices could make it possible for publishers and entertainment companies to record and monitor each individual’s browsing habits with unsettling specificity. Television too is being redesigned to create precise records of viewing habits. For instance, digital video recorders make it possible to store hours of television programs and enable viewers to skip commercials and to create their own program lineups. The data generated by such actions could create viewer profiles, which could then be used to make viewing suggestions and to record future shows.
Privacy of cell phone communication also has become an issue, as in 2010 when BlackBerry smartphone maker RIM reacted to demands from the United Arab Emirates (U.A.E.), Saudi Arabia, and India that security forces from those countries be given the ability to intercept communications such as e-mail and instant messages from BlackBerry users within their borders. The U.A.E. later cancelled a planned ban on the BlackBerry service, saying that it had reached an agreement with RIM, which declined to reveal its discussions with the governments of other countries. The demands were part of a rising tide of security demands from national governments that cited the need to monitor criminals and terrorists who used wireless communications.
The United States is not immune to these controversies. In 2010 Pres. Barack Obama’s administration said that in order to prevent terrorism and identify criminals, it wanted Congress to require that all Internet services be capable of complying with wiretap orders. The broad requirement would include Internet phone services, social networking services, and other types of Internet communication, and it would enable even encrypted messages to be decoded and read—something that required considerable time and effort. Critics complained that the monitoring proposal challenged the ideals of privacy and the lack of centralized authority for which the Internet had long been known.
Photos and videos also emerged as unexpected threats to personal privacy. “Geotags” are created when photos or videos are embedded with geographic location data from GPS chips inside cameras, including those in cell phones. When images are uploaded to the Internet, the geotags allow homes or other personal locations within the images to be precisely located by those who view the photos online. The security risk is not widely understood by the public, however, and in some cases disabling the geotag feature in certain models of digital cameras and camera-equipped smartphones is complicated.
Google’s Street View photo-mapping service caused privacy concerns when the company disclosed that it had been recording locations and some data from unprotected household wireless networks as it took pictures. The company said that the data had been gathered inadvertently. German officials objected to Google’s actions on the basis of Germany’s strict privacy laws, and, although German courts decided against the objections, Google did not expand its Street View service in Germany beyond the handful of urban centres that it had already photo-mapped. The controversy led to other investigations of the Street View service by several U.S. states and the governments of several countries (including the Czech Republic, which eventually refused to grant Google permission to offer the Street View service there).
The social network Facebook has been a particular focus of privacy concerns on the Internet. Over the lifetime of the site, the default privacy settings for a Facebook user’s information evolved from most content being accessible only to a user’s friends or friends of friends to being accessible to everyone. In December 2009 Facebook rolled out a new privacy settings update that allowed users to exercise more “granular” control over what personal information was shared or displayed. However, the labyrinthine nature of the various privacy-control menus discouraged use of the new privacy settings. Users tended to fall back on Facebook’s default settings, which, because of the expansion of Facebook’s “opt-out” policy, were at the loosest level of security, forcing users to “opt-in” to make information private. Responding to criticism, Facebook revised its privacy policy again in May 2010, with a simplified system that consolidated privacy settings onto a single page.
Browsers
Web Browser is a common term which is frequently used by people while discussing the Internet. However, the exact definition of a web browser is known by few only.
Web Browser Definition: A software application used to access information on the World Wide Web is called a Web Browser. When a user requests some information, the web browser fetches the data from a web server and then displays the webpage on the user’s screen.
It is also important to know in detail about what a web browser is for candidates preparing for Government exams. This is because Computer Knowledge is a common topic for many competitive exams and questions based on web browsers may be asked.
In this article, we shall discuss in detail the different types of web browsers and their development over the years. Also, web browser functions have been given along with some sample questions from the competitive exam perspective.
To learn more about the other Computer Awareness related topics, candidates can check the links given below:
History of Web Browser
Today web browsers are easily accessible and can be used on devices like computer, laptops, mobile phones, etc. but this evolution of making browsers available for easy use took many years.
Given below are some salient points which one must know with regard to the history of web browsers:
- “WorldWideWeb” was the first web browser created by Tim Berners Lee in 1990. This is completely different from the World Wide Web we use today
- In 1993, the “Mosaic” web browser was released. It had the feature of adding images and an innovative graphical interface. It was the “the world’s first popular browser”
- After this, in 1994, Marc Andreessen (leader of Mosaic Team) started working on a new web browser, which was released and was named “Netscape Navigator”
- In 1995, “Internet Explorer” was launched by Microsoft. It soon overtook as the most popular web browser
- In 2002, “Mozilla Firefox” was introduced which was equally as competent as Internet Explorer
- Apple too launched a web browser in the year 2003 and named it “Safari”. This browser is commonly used in Apple devices only and not popular with other devices
- Finally, in the year 2008, Google released “Chrome” and within a time span of 3 years it took over all the other existing browsers and is one of the most commonly used web browsers across the world
For those who are willing to know more about the Internet, can visit the linked article.
Functions of Web Browser
Our dependency on the Internet has massively increased. Stated below are functions of web browsers and how are they useful:
- The main function is to retrieve information from the World Wide Web and making it available for users
- Visiting any website can be done using a web browser. When a URL is entered in a browser, the web server takes us to that website
- To run Java applets and flash content, plugins are available on the web browser
- It makes Internet surfing easy as once we reach a website we can easily check the hyperlinks and get more and more useful data online
- Browsers user internal cache which gets stored and the user can open the same webpage time and again without losing extra data
- Multiple webpages can be opened at the same time on a web browser
- Options like back, forward, reload, stop reload, home, etc. are available on these web browsers, which make using them easy and convenient
Given below are a few difference between articles for candidates to learn more about the different computer features:
Types of Web Browser
The functions of all web browsers are the same. Thus, more than the different types there are different web browsers which have been used over the years.
Discussed below are different web browser examples and their specific features:
1. WorldWideWeb
- The first web browser ever
- Launched in 1990
- It was later named “Nexus” to avoid any confusion with the World Wide Web
- Had the very basic features and less interactive in terms of graphical interface
- Did not have the feature of bookmark
2. Mosaic
- It was launched in 1993
- The second web browser which was launched
- Had a better graphical interface. Images, text and graphics could all be integrated
- It was developed at the National Canter for Supercomputing Applications
- The team which was responsible for creating Mosaic was lead by Marc Andreessen
- It was named “the world’s first popular browser”
3. Netscape Navigator
- It was released in 1994
- In the 1990s, it was the dominant browser in terms of usage share
- More versions of this browser were launched by Netscape
- It had an advanced licensing scheme and allowed free usage for non-commercial purposes
4. Internet Explorer
- It was launched in 1995 by Microsoft
- By 2003, it has attained almost 95% of usage share and had become the most popular browsers of all
- Close to 10 versions of Internet Explorer were released by Microsoft and were updated gradually
- It was included in the Microsoft Windows operating system
- In 2015, it was replaced with “Microsoft Edge”, as it became the default browser on Windows 10
5. Firefox
- It was introduced in 2002 and was developed by Mozilla Foundation
- Firefox overtook the usage share from Internet Explorer and became the dominant browser during 2003-04
- Location-aware browsing was made available with Firefox
- This browser was also made available for mobile phones, tablets, etc.
6. Google Chrome
- It was launched in 2008 by Google
- It is a cross-platform web browser
- Multiple features from old browsers were amalgamated to form better and newer features
- To save computers from malware, Google developed the ad-blocking feature to keep the user data safe and secure
- Incognito mode is provided where private searching is available where no cookies or history is saved
- Till date, it has the best user interface
Apart from these, Opera Mini web browser was introduced in 2005 which was specially designed for mobile users. Before the mobile version, the computer version “Opera” was also released in 1995. It supported a decent user interface and was developed by Opera Software.
Using a web browser
A web browser is a type of software that allows you to find and view websites on the Internet. Even if you didn’t know it, you’re using a web browser right now to read this page! There are many different web browsers, but some of the most common ones include Google Chrome, Internet Explorer, Safari, Microsoft Edge, and Mozilla Firefox.
No matter which web browser you use, you’ll want to learn the basics of browsing the Web. In this lesson, we’ll talk about navigating to different websites, using tabbed browsing, creating bookmarks, and more.
Watch the video below to learn the basics of using a web browser.
https://www.youtube.com/embed/FxirRVJWUTs?rel=0&showinfo=0 We’ll be using the Google Chrome web browser throughout this lesson, but you can use any browser you want. Keep in mind that your browser may look and act a bit differently, but all web browsers work in basically the same way.
URLs and the address bar
Each website has a unique address, called a URL (short for Uniform Resource Locator). It’s like a street address that tells your browser where to go on the Internet. When you type a URL into the browser’s address bar and press Enter on your keyboard, the browser will load the page associated with that URL.
In the example below, we’ve typed www.rr-academy.in into the address bar.
Links
Whenever you see a word or phrase on a website that’s blue or underlined in blue, it’s probably a hyperlink, or link for short. You might already know how links work, even if you’ve never thought about them much before. For example, try clicking the link below.
Links are used to navigate the Web. When you click a link, it will usually take you to a different webpage. You may also notice that your cursor changes into a hand icon whenever you hover over a link.

If you see this icon, it means you’ve found a link. You’ll find other types of links this way too. For example, many websites actually use images as links, so you can just click the image to navigate to another page.
Navigation buttons
The Back and Forward buttons allow you to move through websites you’ve recently viewed. You can also click and hold either button to see your recent history.

The Refresh button will reload the current page. If a website stops working, try using the Refresh button.

Tabbed browsing
Many browsers allow you to open links in a new tab. You can open as many links as you want, and they’ll stay in the same browser window instead of cluttering your screen with multiple windows.
To open a link in a new tab, right-click the link and select Open link in new tab (the exact wording may vary from browser to browser).
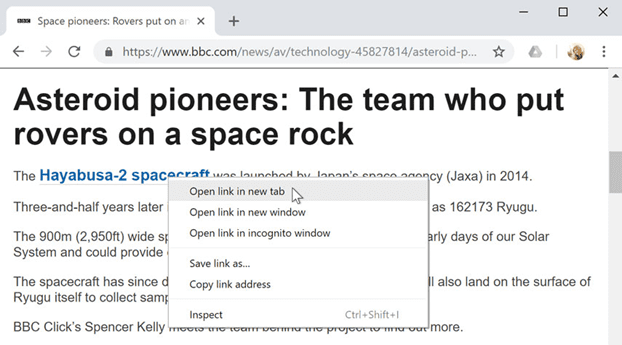
To close a tab, click the X.

To create a new blank tab, click the button to the right of any open tabs.

Bookmarks and history
If you find a website you want to view later, it can be hard to memorize the exact web address. Bookmarks, also known as favourites, are a great way to save and organize specific websites so you can revisit them again and again. Simply locate and select the Star icon to bookmark the current website.
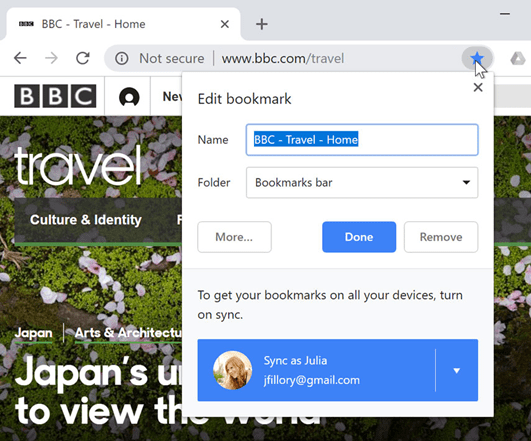
Your browser will also keep a history of every site you visit. This is another good way to find a site you visited previously. To view your history, open your browser settings—usually by clicking the icon in the upper-right corner—and select History.
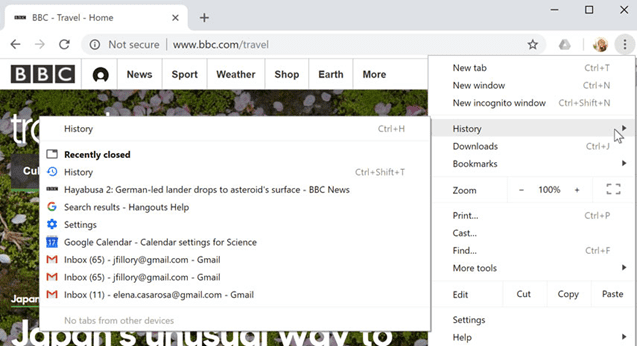
Downloading files
Links don’t always go to another website. In some cases, they point to a file that can be downloaded, or saved, to your computer.
If you click a link to a file, it may download automatically, but sometimes it just opens within your browser instead of downloading. To prevent it from opening in the browser, you can right-click the link and select Save link as (different browsers may use slightly different wording, like Save target as).
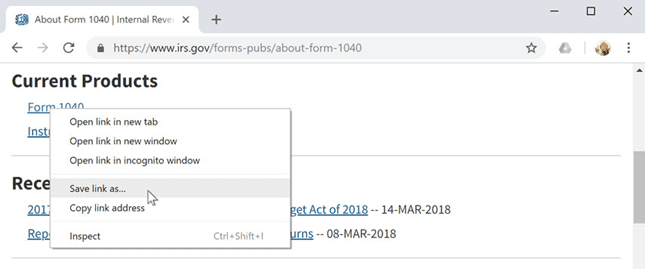
Saving images
Sometimes you may want to save an image from a website to your computer. To do this, right-click the image and select Save image as (or Save picture as).
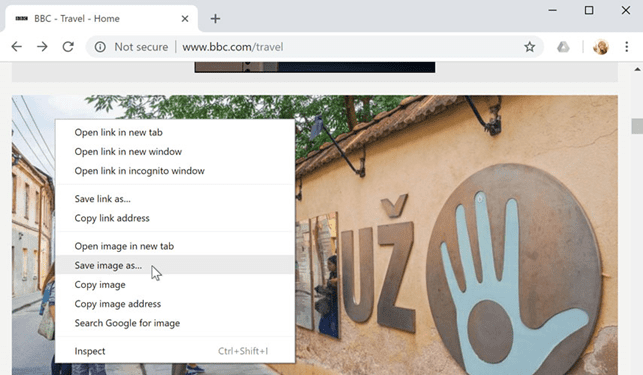
Plug-ins
Plug-ins are small applications that allow you to view certain types of content within your web browser. For example, Adobe Flash and Microsoft Silverlight are sometimes used to play videos, while Adobe Reader is used to view PDF files.
If you don’t have the correct plug-in for a website, your browser will usually provide a link to download it. There may also be times when you need to update your plug-ins.

E-mailing
What is Electronic Mail?
Electronic mail (e-mail) is a computer-based application for the exchange of messages between users. A worldwide e-mail network allows people to exchange e-mail messages very quickly. E-mail is the electronic equivalent of a letter, but with advantages in timeliness and flexibility. While a letter will take from one day to a couple of weeks to be delivered, an e-mail is delivered to the intended recipient’s mailbox almost instantaneously, usually in the multiple-second to sub minute range. This is the case whether the e-mail is exchanged between people on the same floor of a business, or between friends at opposite points on the globe. This article provides a comprehensive, intermediate-level overview of e-mail, including its main functions, historical and current architectures, key standards, supporting infrastructure, and contemporary and future issues.
Organizational Contexts
Initially, the sheer efficiency of e-mail in organizations presented a compelling argument for its use. E-mail reduced the amount of time spent in attempts to contact colleagues through the telephone, a vast percentage of which (estimated at up to 70%) are unsuccessful. Furthermore, e-mail provided a systematic, reliable, and relatively inexpensive means for distributing information across numerous and diverse constituencies within organizations. The cost of transmitting information normally distributed in paper to multiple receivers was negligible and the ability to create, maintain, and update e-mail distribution lists was highly flexible.
However, e-mail quickly demonstrated some interesting additional social uses that further enhanced its attractiveness within organizational environments. Chief among these was the ability to find answers to organizational problems by using e-mail lists that made it relatively easy and convenient to transmit questions and consult those with whom one was not necessarily acquainted within the organizational community. Researchers have documented that electronic mail calls into existence and mobilizes a network of weak ties—distant and infrequently contacted others who possess potentially superior knowledge resources and who are frequently willing to provide information or advice as needed. A variety of factors motivate the helpful behavior of weak ties, including the ability to increase one’s self-esteem, personal identification with the organization, and the organization’s ability to foster a sense of employee citizenship and reciprocity.
Further, researchers have argued that the use of e-mail reduces certain costs of decision making incurred whenever organizations bring employees together for face-to-face group communication. Such costs occur due to inherent inefficiencies of group communication. For example, individuals are able to produce more good ideas working alone than they can in brainstorming groups simply due to the amount of time required to take turns and listen to the ideas of others. Individuals brainstorming through electronic mail or chat, on the other hand, may express themselves continuously, taking brief breaks to read the contributions of others.
Online interactions can produce written archives of discussion and their ongoing quality can help to maintain the momentum of the group over time. Online interaction also appears to stimulate a more equal distribution of talk, as group members are less likely to be inhibited by status, gender, and power cues that are prominent in face-to-face communication. Designers of software and hardware systems called group decision support systems have sought to capitalize on these advantages through the development of technologies that provide guided sequences of interaction aimed at producing high quality organizational decisions.
One of the first theories generated to account for how managers in organizations use electronic mail in organizations was the media richness theory. Developed as a more general theory of media use in organizations, media richness theory was adapted in the early 1980s to advance some claims about the potential role of electronic mail in organizational task accomplishment when compared to that of other organizational media choices. Essentially, the theory suggests that organizational tasks require different types of information, and organizational media are differentially useful in helping individuals to process these types of information. The theory makes some descriptive claims about how savvy managers actually select communication media for task accomplishment, which become the basis for normative claims about how managers should select communication media for task accomplishment.
More specifically, the theory posits that some organizational decisions can be made on the basis of lean information, or information that is relatively unambiguous and not subject to multiple interpretation; such information can be communicated through a small number of channels. However, other organizational decisions require information that is rich; that is, information that carries with it greater degrees of uncertainty, that is potentially equivocal or capable of being interpreted in potentially conflicting ways, and that requires substantial interpretation and feedback in order to be used wisely. Rich information requires interpretation at a number of levels and, beyond language, must be communicated through a number of channels.
According to the theory, organizational media are differentially suited to cope with the requirements of information categorized on a continuum from rich to lean. Four factors determine the richness or leanness of a medium. The first factor is the feedback capability of the medium, or the extent to which the medium makes it possible to ask questions or to make corrections as interpretations of information are advanced. A second factor is the availability of multiple cues, or the extent to which verbal information is supplemented by additional cues such as facial expressions, vocal inflection, gestures, graphics, physical presence, or even numbers. The third factor is the variety of the language that is being used. Information expressed in the form of numbers can be more precise; however, natural language enables users to communicate a far greater number of meanings and interpretive nuances. The final factor is the extent to which a medium makes it possible to include the personal focus of communicators, particularly the feelings and emotions of senders and receivers, as further cues about how to make sense out of equivocal or ambiguous information.
Although all media restrict the social presence of senders and receivers in particular ways, using these factors theorists have constructed a graded hierarchy describing the richness of particular media forms in organizations. Face-to-face communication, such as group or dyadic meetings, is seen as the richest medium because it allows for the greatest amount of feedback, the greatest diversity in nonverbal cues, the most language flexibility and variety, and the greatest possibilities for incorporating the personal focus of both senders and receivers. Face-to-face communication is followed by the telephone as the next richest medium, which is followed by electronic mail. Following e-mail in descending order of richness are personal written communication, such as letters and notes; formal written communication, such as memos, reports, and bulletins; and formal numeric communication, such as data in tables and management information systems.
In addition to claims about the level of information richness each medium is theoretically capable of conveying, media richness theory argues that managers need to assess the task at hand and make conscious and strategic decisions about their choice of medium, given the information required for the task. Using a medium that is capable of handling information richer than that required for the task is simply a waste of capacity and potentially a waste of resources. This is especially the case if meetings are involved since this is the most costly medium in terms of time and organizational resources. On the other hand, using a lean medium when rich information is required is a potentially dangerous failure to bring sufficient organizational resources to bear for successful decision making. The optimum outcome occurs when managers are able to accurately gauge the demands of the situation and mobilize organizational media resources accordingly.
The placement of e-mail on the media richness hierarchy suggested that, initially at least, researchers believed that the medium was useful only for routine information exchange, routine decision making, and personal idea generation. Although a limited amount of empirical support for the theory has accumulated, researchers have learned more about the nature of the medium of electronic mail since this theory was advanced and research begun. Critical to the placement of e-mail in the midpoint of the media richness hierarchy are a host of assumptions about the medium that have undergone significant scrutiny and revision over time.
As indicated by the second factor above, researchers believed that e-mail was a relatively cue less medium in that nonverbal behaviours typically used to supplement and clarify meanings as well as to evaluate communicators are absent. The cue less quality of e-mail meant that traditional indicators of an individual’s social status such as gender, ethnicity, class, and age were generally unavailable or lacking prominence within the context of interaction. Although this characteristic has been seen as a problem with the medium, it has also been associated with certain positive outcomes for interaction. Principal among them has been a seemingly more egalitarian context for interaction, mentioned earlier, in which those who might have been more reticent contribute more or those whose contributions might have been discounted due to social status or power considerations are taken more seriously in group discussion.
However, the quality of cluelessness has been additionally associated with the observation that e-mail comprises an interactional context in which individuals become DE individuated, in much the same way that individuals acting anonymously in a crowd or mob lose sight of social convention and appropriateness, and acquire implicit license to commit acts for which they will not be accountable as individuals in the future. This particular quality has been implicated in explanations of episodes of relatively disinhibited or idiosyncratic, aberrant, or bizarre behaviour in online social contexts, and, ultimately, flaming. The phenomenon of flaming is the most extreme outcome of DE individuated and disinhibited behaviour. Although researchers dispute its precise definition, most agree that flaming is an e-mail phenomenon (although it can take place also in synchronous chat) and consists of insulting, aggressive, argumentative, and antagonistic messages sent to particular others or an entire interactional group. Flaming is unquestionably an expression of hostility and aggression, but flames can also possess an artful or creative dimension depending upon the interactant’s ability and desire to write well.
Group Communication
Electronic mail (e-mail), a system that allows users to send and receive messages through a computer network, is the most common groupware application and a central component of several other groupware tools based on a messaging system. Most e-mail systems include features for forwarding and attaching files to messages, providing delivery receipts, and creating mailing groups. Advanced e-mail systems include “rule” processors capable of automatically sorting and processing messages.
Mailing lists and newsgroups are similar to e-mail systems but are intended for the distribution of messages among large groups of users. While mailing lists deliver messages as they become available, newsgroups only deliver messages after receiving an explicit user request. Computer conferencing and electronic discussions are also similar to (and in most cases based on) e-mail, but messages are posted to a conference or discussion group, rather than to individual addressees.
Discussion Lists
Electronic mail was one of the first services to emerge when developers began to assemble networks of computers. Since nearly every computer user learns to use e-mail, it became one of the first vehicles for group communication. On a discussion list, messages arrive in one’s electronic mailbox, either individually or in a periodic digest. A user subscribes to a discussion list by sending a request to join the list. In the early days, a human kept track of the membership and maintained the list. Today there are robot list managers that automate subscription requests. Some discussion lists are moderated, meaning that a human screens all traffic and exercises editorial control over which messages are passed along.
There is increasing overlap between e-mail discussion lists and bulletin board forums. Some systems allow users to participate in the same discussion by either means. Many e-mail discussion lists maintain archives which can be accessed via the Web.
Using E-mail, Listservs and Newsgroups
E-mail is an efficient communication tool and eliminates many of the difficulties associated with trying to reach people by telephone. E-mail can also be used to send the same message to a group of people on a list. A listserv is a server with a mailing list whose members are interested in the same topics. Professional, service, and educational organizations have listservs. The listserv is subject-interest or group-interest oriented. The University of Toronto’s Assistive Technology Resource Centre’s website has an excellent list of listservs related to assistive technology and rehabilitation. Newsgroups are bulletin boards to which e-mail can be sent and posted. Other Internet users can then go to the bulletin board to read the posted messages. These are being incorporated into many websites. People ask questions and then anyone visiting the website can make a comment or suggestion.
E-mail and Usenet
Electronic mail (e-mail) is and probably always will be the most common use of the Internet. It allows Internet users to send and receive messages from around the world. Requests for database searches and the result posted to an account can also be done by e-mail. E-mail is also used to join electronic mailing lists (called list servers) on specific topics of interest. E-mail is used to transfer text, program files, spreadsheets, and even photographic images. Messages can be sent and received in hours and often within minutes; it is no wonder that most e-mail users refer to the regular postal service as “snail mail.”
E-mail is based on the fundamental concept of store-and-forward technology. The store part refers to a message being added to a storage system by the message’s originator. When the recipient is ready the message is forwarded for retrieval. The beauty of this technique is that the recipient does not have to be available when the originator sends the message. This enables the e-mail system to select how the message will move from the place where it is first stored to the place where it is retrieved (forwarded to the user).
It is becoming increasingly easy to find anyone on the Internet—even if one does not know his or her e-mail address. Internet addresses are in two parts, a “domain” name and a user name separated by a @ sign. The domain name (more correctly called a hierarchical name) consists of the name of the machine on which the user has an account, along with the network groups and subgroups leading to that computer, thereby giving that machine a unique identification, which enables the Internet software to determine where to deliver the message. Delivering the message to the addressee is then up to the named computer. The computer’s name is chosen locally and is often colourful or thematic. User names can be cryptic. They are often composed of a first initial and last name but can be shortened to a nickname or identifying numbers. All Internet alphanumeric addresses are actually aliases for numeric addresses, such as 134.6.4.187. The alphanumeric addresses are used because, even though they can be hard to interpret, they are easier than the numeric names. Machines on the Internet called name servers handle the translation of alphanumeric names into numeric addresses. To get around the cumbersome Internet address of a person or persons, many mail programs enable users to create aliases. Aliases are particularly helpful when e-mail is sent to a group of people.
Because electronic mail is such an inexpensive form of communication and it is so easy to send copies of messages to long distribution lists, recipients may get much mail, which is of little or no value to them. As a result, new filtering software is being developed to help sort the wanted from the unwanted mail. Users can develop their own filtering rules (such as “if from boss, display immediately”) and can modify them at any time. Techniques such as assigning points to messages to indicate their importance is another variation of the same theme to make e-mail communications among groups more effective—to get relevant information to the recipients with less waste of time on the part of both senders and recipients.
E-mail, Internet Relay Chat and Instant Messaging
E-mail is asynchronous person-to-person computer-mediated communication; a sender transmits a message at one point in time to one or more receivers and the receiver downloads and reads the message at a later time when it is convenient. E-mail is the most popular Internet application because it is an inexpensive and efficient means for people to keep in touch with those whom they know and for contacting those whom they do not know. Individuals worldwide are increasingly using e-mail to supplement communication in other contexts. People who know each other use e-mail to fill gaps between face-to-face meetings, arrange for future meetings, and continue conversations started in other contexts, such as face-to-face or on the telephone. E-mail messages are text messages that can also contain attachments, which are attached files of graphics, spreadsheets, music, or text documents. Approximately 500 million e-mail messages are transmitted over the Internet daily. In contrast to e-mail, Internet relay chat (IRC) and instant messaging (IM) are synchronous person-to-person computer-mediated communication in which two or more people send and receive e-mail messages in real time.
Early Net applications
Studies have shown that the number one use of the Internet is for communication. Until the 1990s, communication as well as other computer network applications were text-based.
Electronic mail (e-mail) based on the protocol ‘user log-in name @ host computer name’ was first developed in 1971 by Ray Tomlinson of ARPAnet.
Two other early network applications, Telnet and FTP, allowed more efficient communication and file-sharing. Telnet allows a strong, direct connection from a computer to a distant server. FTP (file transfer protocol) is a means to transfer files, particularly large files, in an efficient manner.
Item A
E-mail message. At your request, an insurance company representative replies that she can meet with you at your convenience to explain why the corporate liability insurance premium will rise by 10% next year.
Item B
Telephone voice message. An accident on the premises between a truck and a forklift has resulted in two injured employees. The director of human resources wants to meet with you immediately.
Item C
E-mail message. As treasurer of a regional risk management association, you are assigned to arrange the next meeting, including location, meal, and speaker.
Item D
Your “to do list” states that you need to re-evaluate the risks facing the corporation and implement an improved risk management plan that maximizes risk management tools and is more financially sound.
Item E
Telephone call. A security officer on the premises calls and states: he cannot locate a security supervisor; there is a fire in the warehouse; he can extinguish it; and you do not have to call the fire department.
Item F
Telephone voice message. Your boss wants to meet with you immediately because insurance covered only 50% of losses from an accident at another corporate plant.
Item G
Telephone voice message. An attorney representing a plaintiff/employee in a sexual harassment suit against the corporation wants to speak with you.
Item H
Telephone voice message. The emergency management director for the local county wants to meet with you about cooperation on joint planning and training.
Item I
E-mail message. The information technology (IT) director needs to meet with you as soon as possible. The corporate IT business continuity plan was rejected by one of the insurers of the corporation.
Confidentiality
E-mails leave copies of themselves in almost all servers through which they pass. In this respect e-mail is less of a sealed letter than a postcard copied at each post office through which it passes. Although the regulations and guidelines included above require attention to confidentiality, they should be understood as raising the bar of difficulty of access to content. It is reasonable to assume that a highly motivated, intelligent person with enough time and other resources can eventually access all files. Thus confidentiality is likely to be sacrificed to the determined hacker.
Network
Network
A network is a collection of computers, servers, mainframes, network devices, peripherals, or other devices connected to allow data sharing. An example of a network is the Internet, which connects millions of people all over the world. To the right is an example image of a home network with multiple computers and other network devices all connected.
Examples of network devices
- Desktop computers, laptops, mainframes, and servers.
- Consoles and thin clients.
- Firewalls
- Bridges
- Repeaters
- Network Interface cards
- Switches, hubs, modems, and routers.
- Smartphones and tablets.
- Webcams
Network topologies and types of networks
The term network topology describes the relationship of connected devices in terms of a geometric graph. Devices are represented as vertices, and their connections are represented as edges on the graph. It describes how many connections each device has, in what order, and what sort of hierarchy.
Typical network configurations include bus topology, mesh topology, ring topology, star topology, tree topology, and hybrid topology.
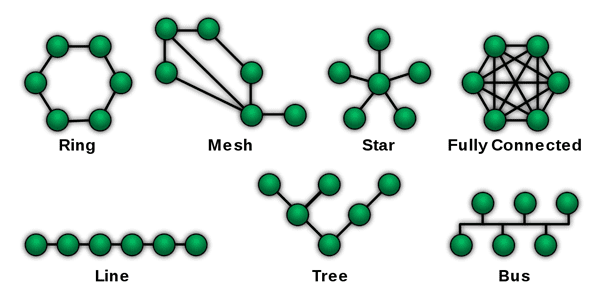
Most home networks are configured in a tree topology that connects to the Internet. Corporate networks often use tree topologies, but they also often incorporate star topologies and an Intranet.
What is the difference between public and private networks?
Often offered by nearby businesses and other publicly accessible areas, public networks are a convenient way to connect to the Internet.
- Some public Wi-Fi networks require a password before a connection is made. If the network displays a lock icon in your list of available Wi-Fi networks, it requires a password.
- Some networks do not require a password to connect, but require you to log in using your web browser before accessing the Internet.
- Other public networks do not require a password at all. Any compatible device may connect to these Wi-Fi networks without authentication.
Note: All public networks are less secure than your home network. Even if the websites you visit use encryption, the URLs you visit can be eavesdropped. For this reason, you should not transmit private or sensitive information on a public Wi-Fi network if you can do it elsewhere. If a public network does not require a password, we strongly recommend you do not connect any of your devices to it.
Private networks have security measures in place to prevent unwanted or unauthorized connections. Private networks are often used for home, business, school Wi-Fi networks, or mobile hotspots for security and to preserve bandwidth.
Advantages of a network
There are more advantages to a network than disadvantages. In fact, many companies today wouldn’t exist without accessing some form of network. Below are the advantages of a network.
- Share data and information – One of the biggest advantages of a network is sharing data and information between each of the devices on it. In addition, networks allow access to databases and help with collaboration on more complex work.
- Communication – A network gives all users the ability to quickly communicate with each other using chat, instant messaging, e-mail, and videoconferencing.
- Share hardware – Hardware devices connected to a network can be shared with all users. Below are a few examples of network hardware that can be shared.
- NAS (network-attached storage) can store and access vast amounts of information.
- A network printer allows all network users to print to one printer.
- More powerful computers, supercomputers, and render farms can perform complex tasks that would take a normal, single computer longer to complete.
- Share software – With the proper software license, software can also be shared.
- Transferring money – Being connected to a secure network allows a person or business to digitally transfer money between banks and users. For example, a network could allow a company to not only manage employees’ payroll, but also transfer their pay to the employee’s bank account.
Disadvantages of a network
Although there are many advantages to a network (mentioned above), there are some disadvantages. Below are the disadvantages of a network.
- Virus and malware – Networks make sharing information between network users easy. Unfortunately, this also means that viruses and malware have an easier time spreading between computers on a network.
- Vulnerabilities – When a network is created, it introduces new methods of accessing the computers remotely, especially if they’re connected to the Internet. With these potential new methods of accessing the computer, it can introduce new vulnerabilities to computers, users, and data on a network.
- Complexity – Networks are complex, and setting up and managing a network for a business or corporation requires someone with a lot of experience or certification.
What was the first computer network?
One of the first computer networks to use packet switching, ARPANET, was developed in the mid-1960s and is the direct predecessor of the modern Internet. The first ARPANET message was sent on October 29, 1969.
Operating System
Let’s know about OS
An Operating System (OS) is an interface between a computer user and computer hardware. An operating system is a software which performs all the basic tasks like file management, memory management, process management, handling input and output, and controlling peripheral devices such as disk drives and printers.
Some popular Operating Systems include Linux, Windows, Mac OS, Android, iOS, VMS, OS/400, AIX, z/OS, etc.
Definition
An operating system is a program that acts as an interface between the user and the computer hardware and controls the execution of all kinds of programs.
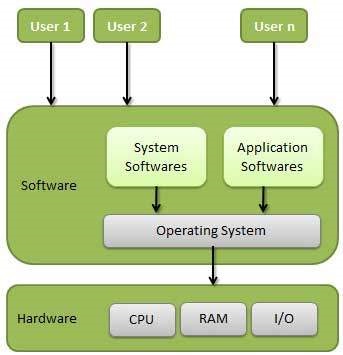
Following are some of important functions of an operating System.
- Memory Management
- Processor Management
- Device Management
- File Management
- Security
- Control over system performance
- Job accounting
- Error detecting aids
- Coordination between other software and users
Memory Management
Memory management refers to management of Primary Memory or Main Memory. Main memory is a large array of words or bytes where each word or byte has its own address.
Main memory provides a fast storage that can be accessed directly by the CPU. For a program to be executed, it must in the main memory. An Operating System does the following activities for memory management −
- Keeps tracks of primary memory, i.e., what part of it are in use by whom, what part are not in use.
- In multiprogramming, the OS decides which process will get memory when and how much.
- Allocates the memory when a process requests it to do so.
- De-allocates the memory when a process no longer needs it or has been terminated.
Processor Management
In multiprogramming environment, the OS decides which process gets the processor when and for how much time. This function is called process scheduling. An Operating System does the following activities for processor management −
- Keeps tracks of processor and status of process. The program responsible for this task is known as traffic controller.
- Allocates the processor (CPU) to a process.
- De-allocates processor when a process is no longer required.
Device Management
An Operating System manages device communication via their respective drivers. It does the following activities for device management −
- Keeps tracks of all devices. Program responsible for this task is known as the I/O controller.
- Decides which process gets the device when and for how much time.
- Allocates the device in the efficient way.
- De-allocates devices.
File Management
A file system is normally organized into directories for easy navigation and usage. These directories may contain files and other directions.
An Operating System does the following activities for file management −
- Keeps track of information, location, uses, status etc. The collective facilities are often known as file system.
- Decides who gets the resources.
- Allocates the resources.
- De-allocates the resources.
Other Important Activities
Following are some of the important activities that an Operating System performs −
- Security − By means of password and similar other techniques, it prevents unauthorized access to programs and data.
- Control over system performance − Recording delays between request for a service and response from the system.
- Job accounting − Keeping track of time and resources used by various jobs and users.
- Error detecting aids − Production of dumps, traces, error messages, and other debugging and error detecting aids.
- Coordination between other software and users − Coordination and assignment of compilers, interpreters, assemblers and other software to the various users of the computer systems.